On this page you will find instruments that I have worked on recently. Included are many photos of their interiors, of their exteriors, and some photos that might only be of interest to technicians.
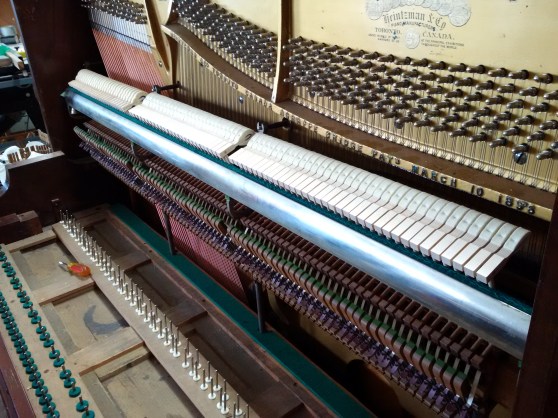
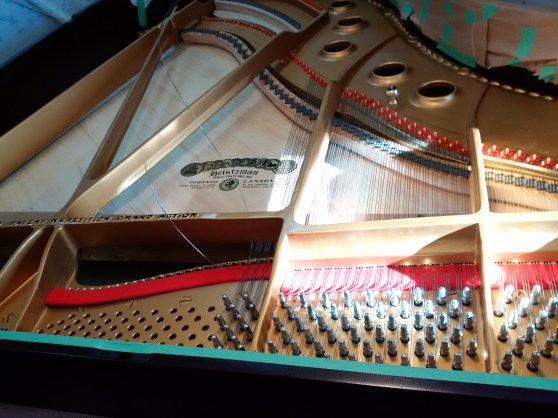
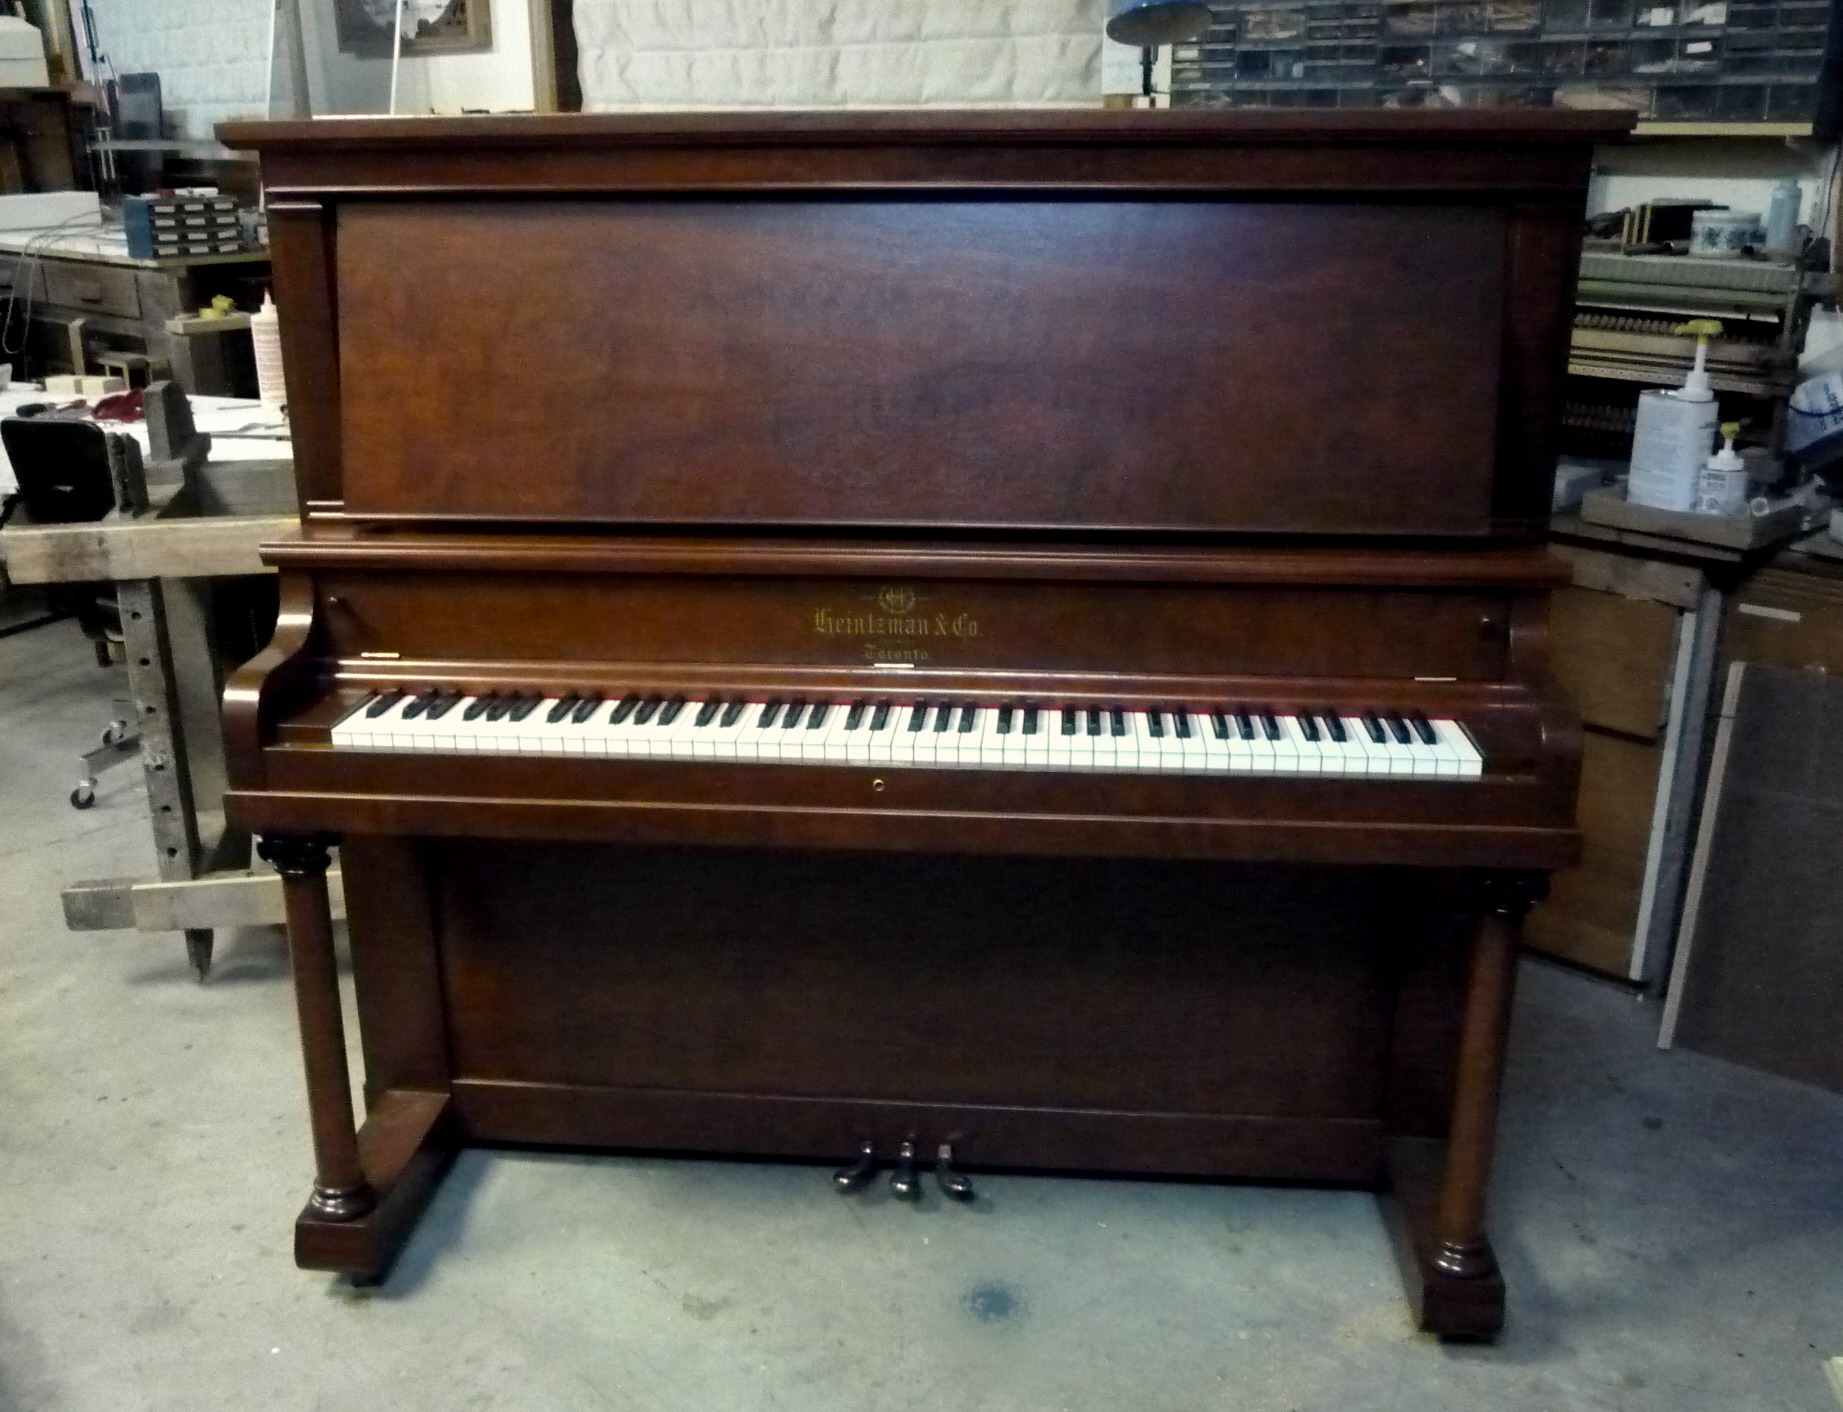
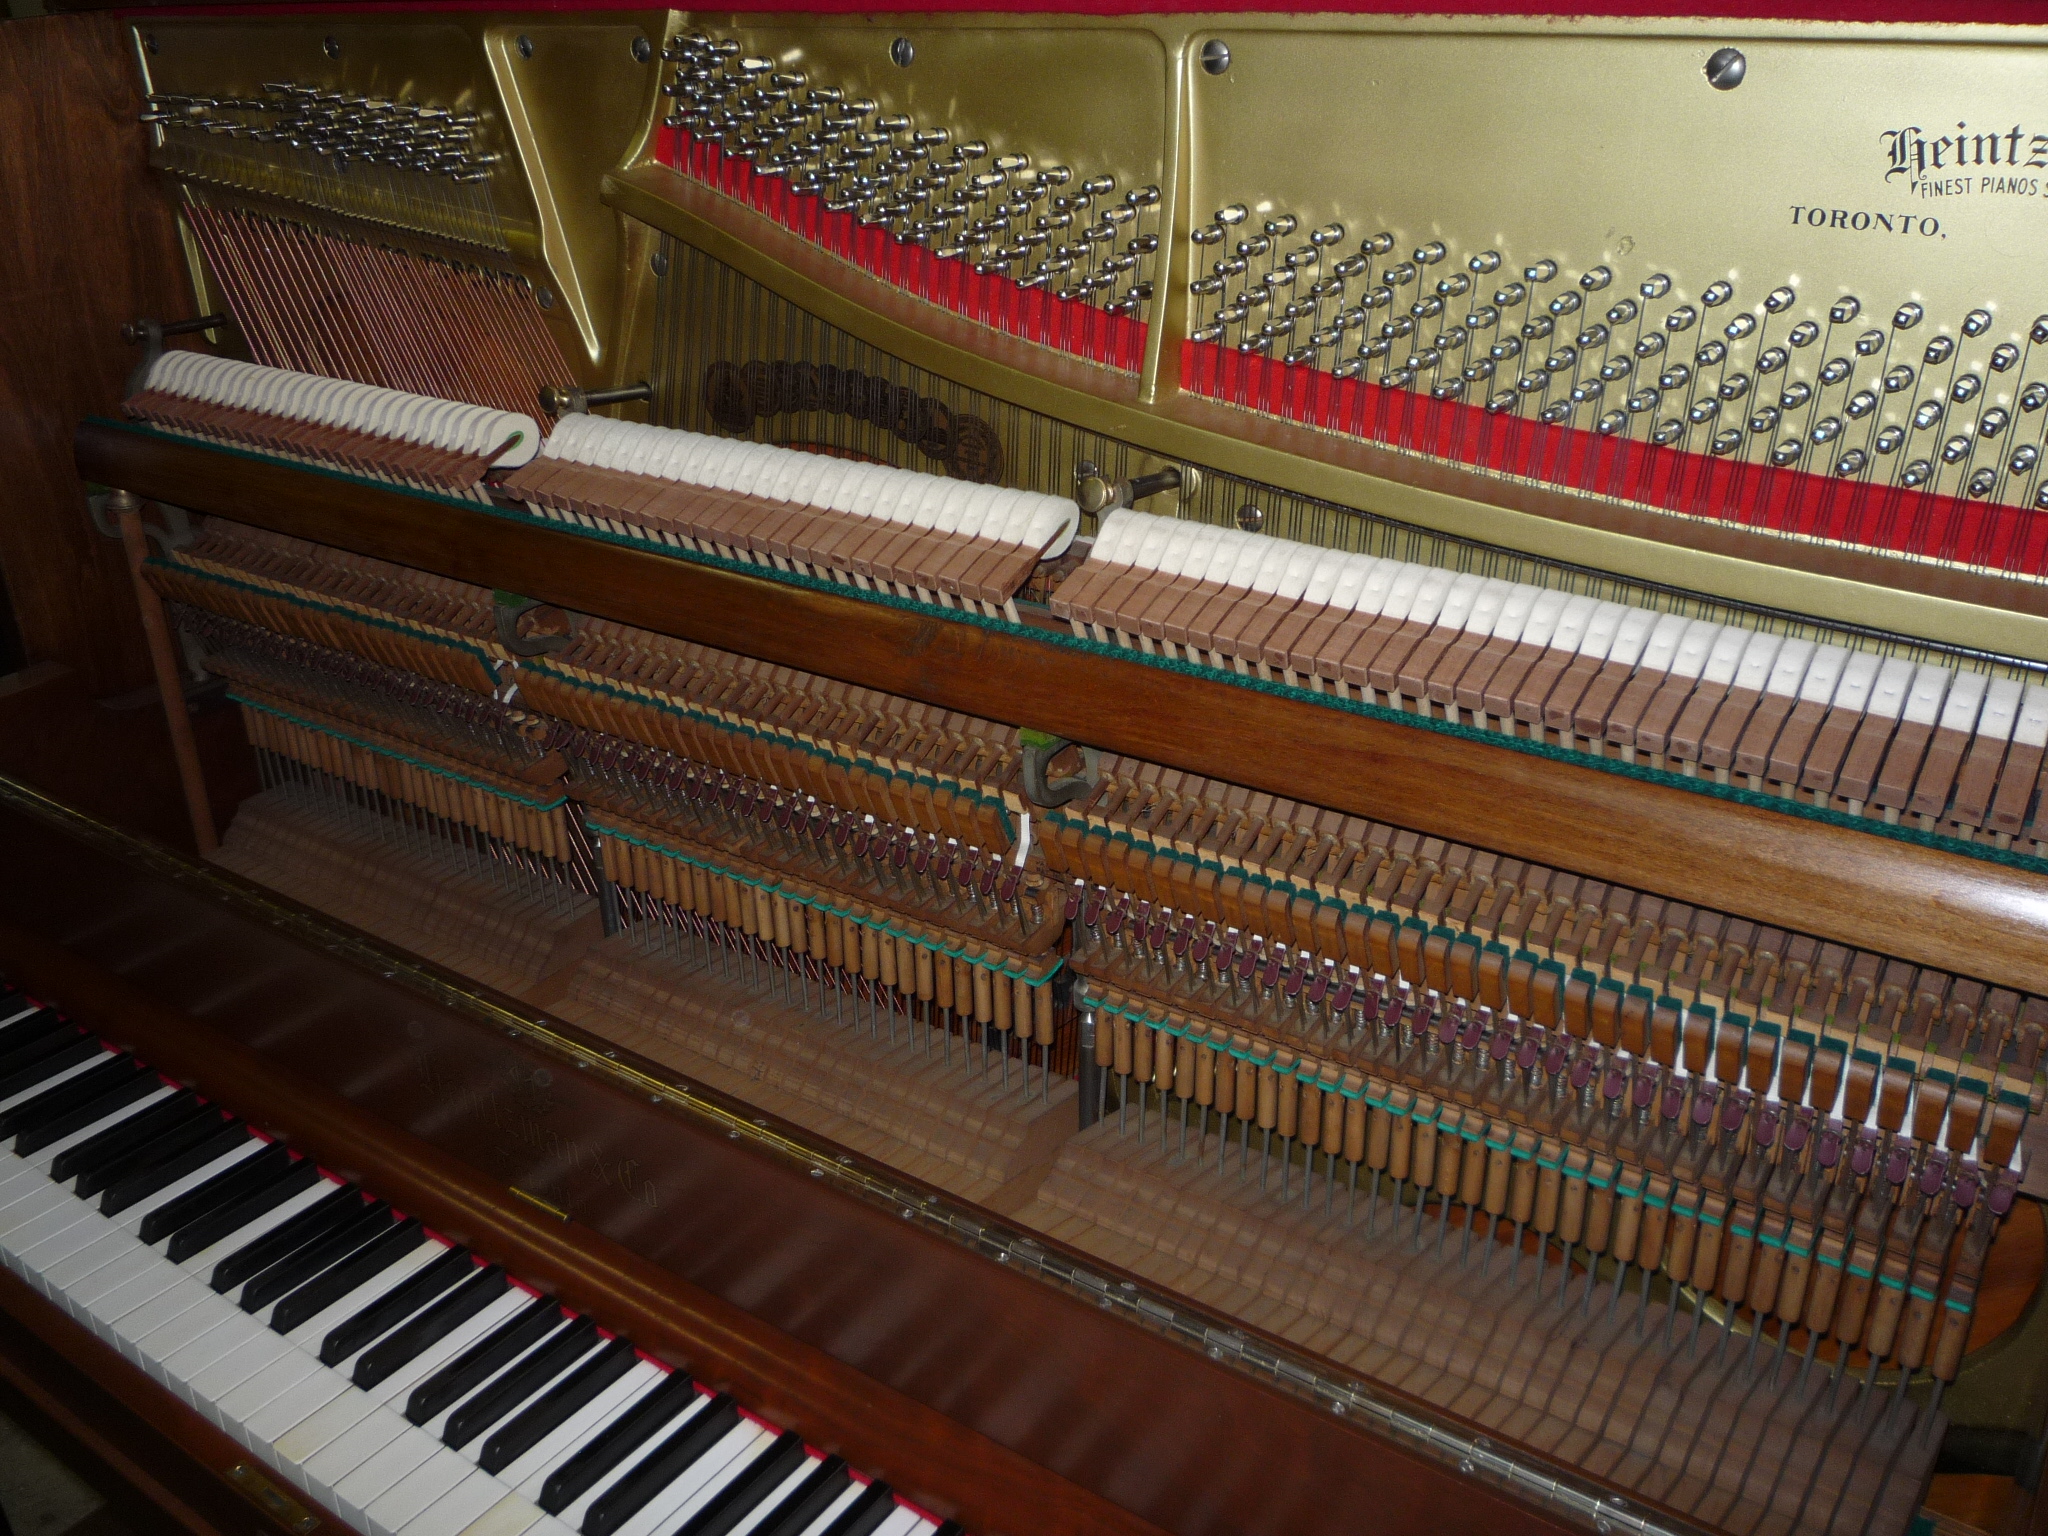
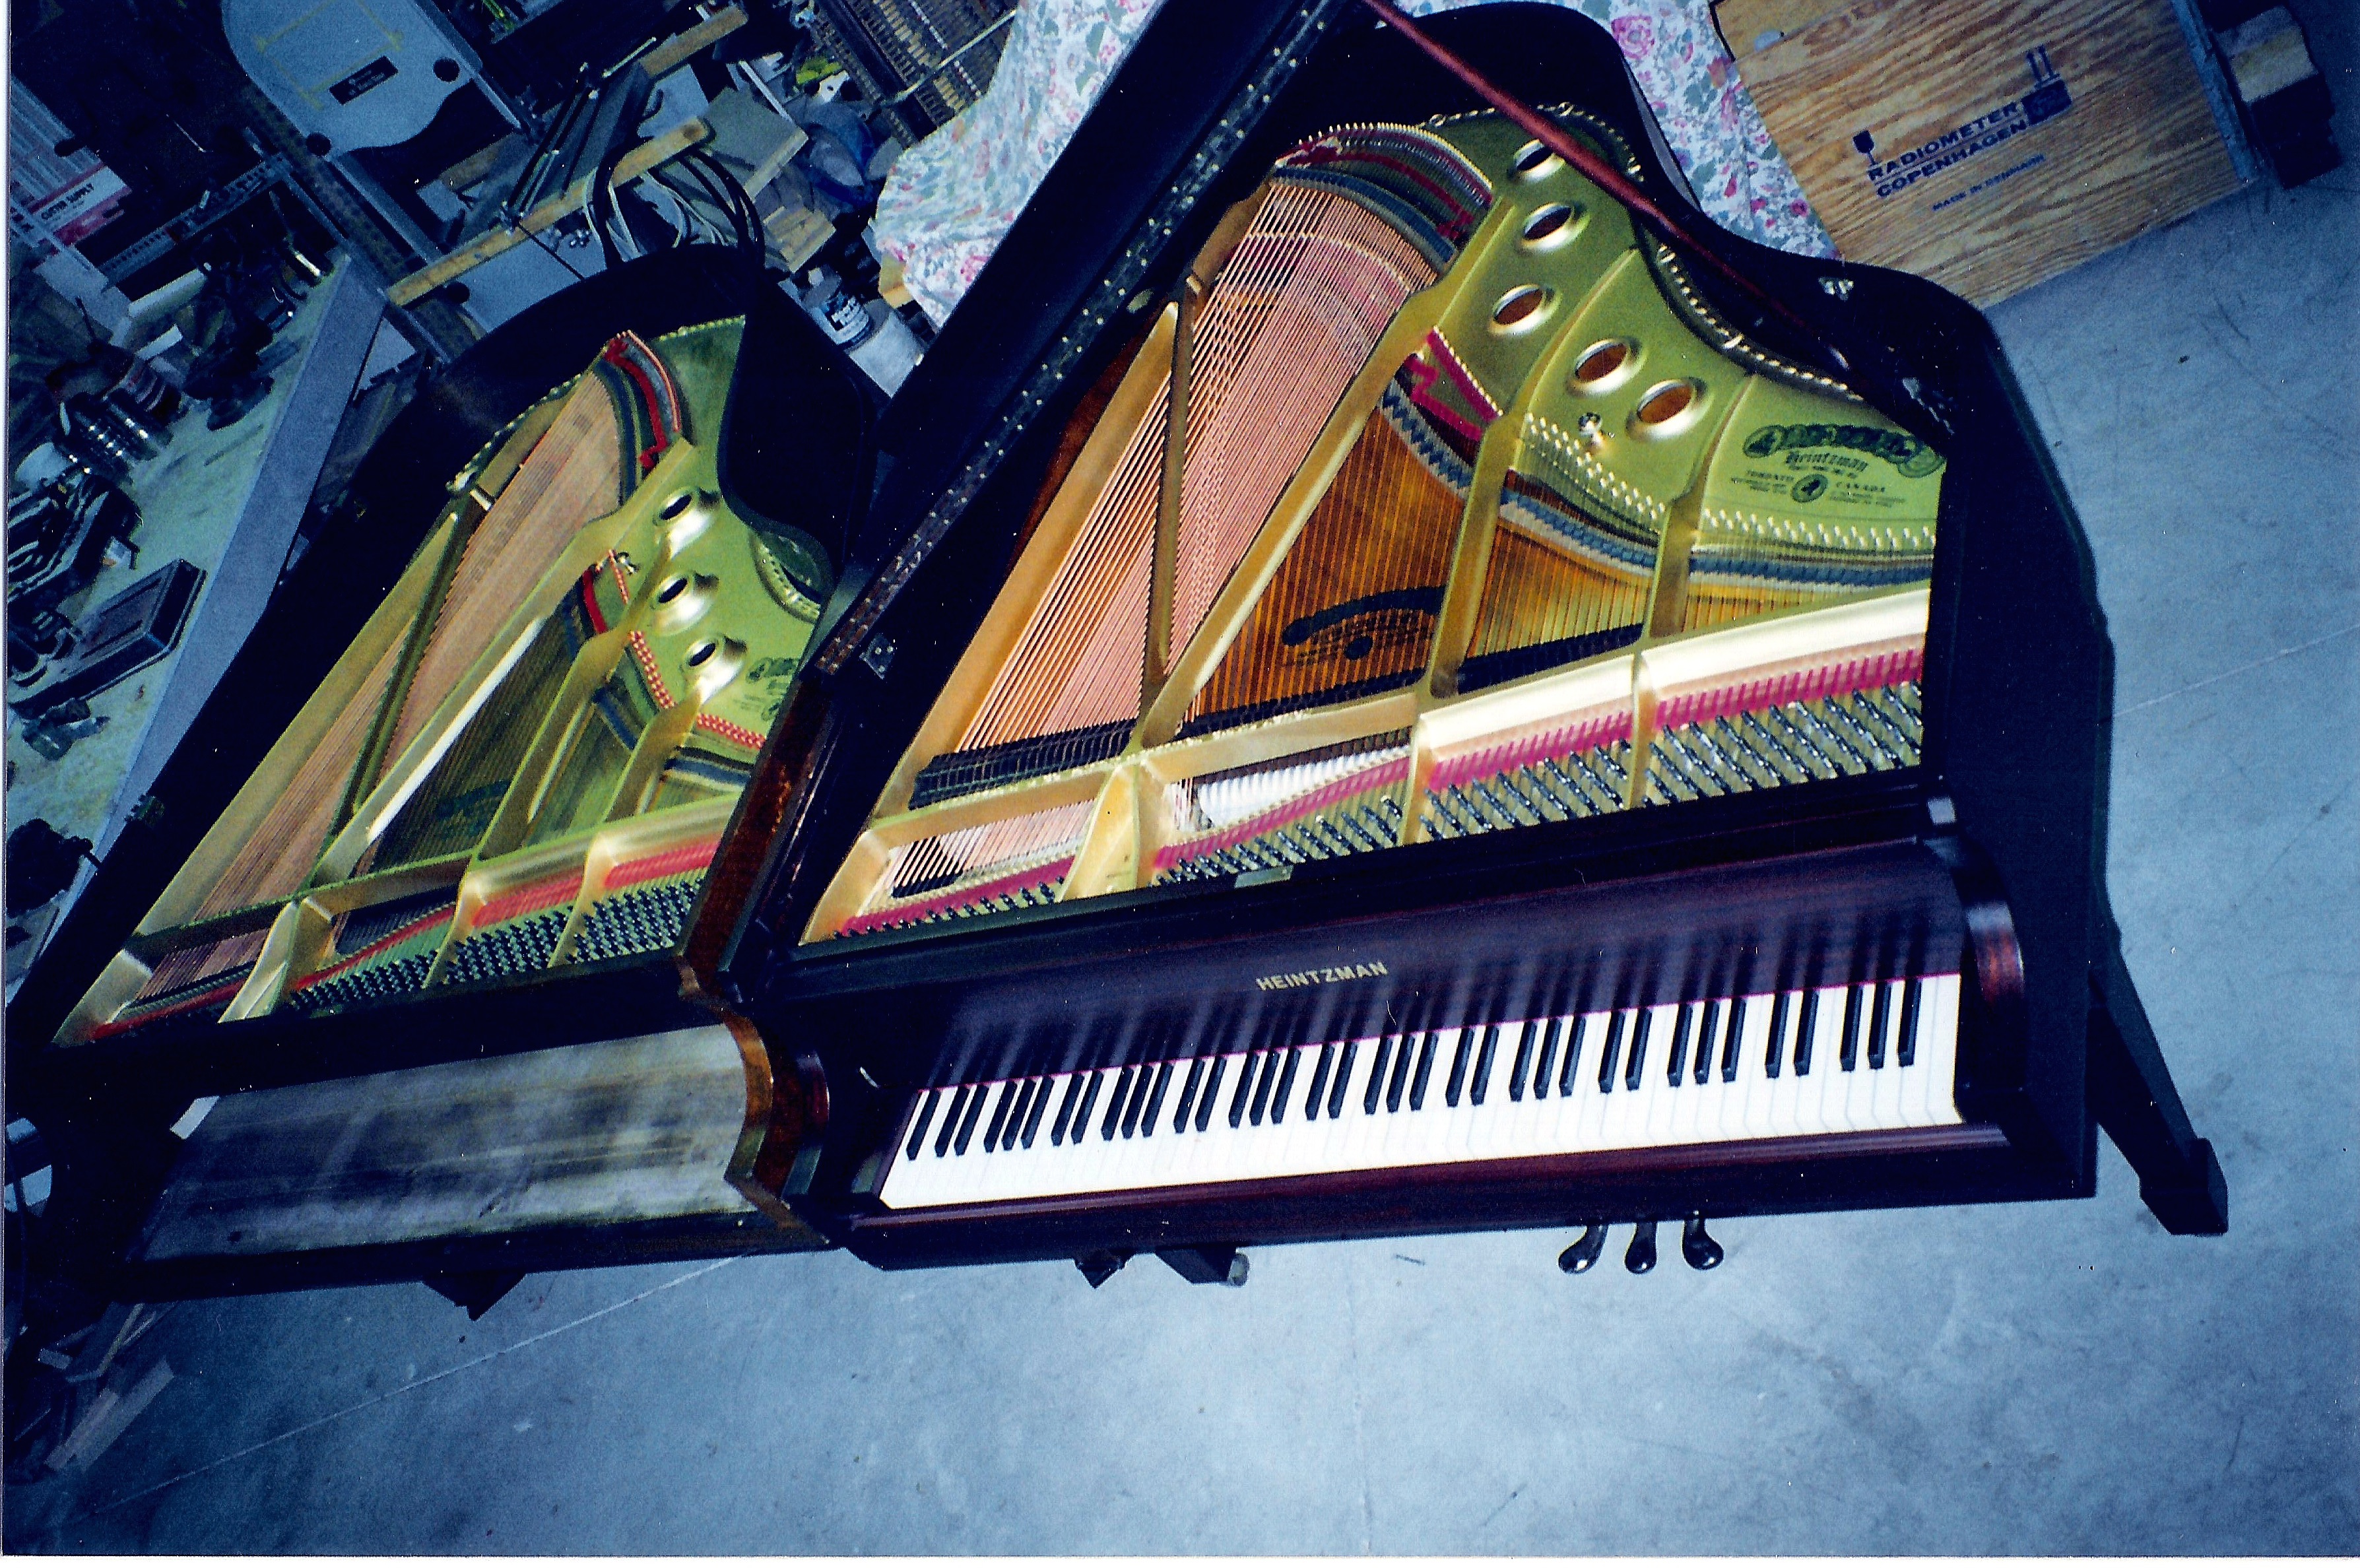
This past year’s work has included two complete action rebuilds for Heintzman uprights. One was worn out due to playing, the other had considerable damage due to insects. Here are some photos of the second project.


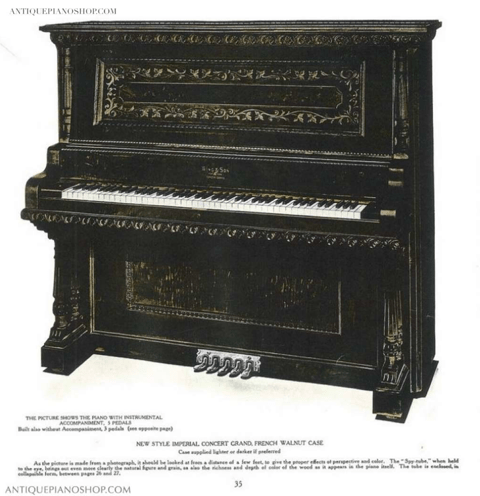
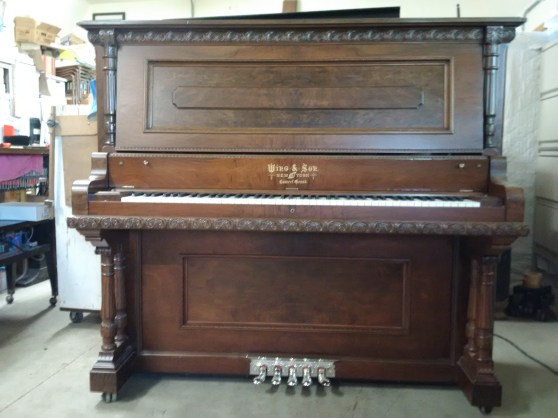
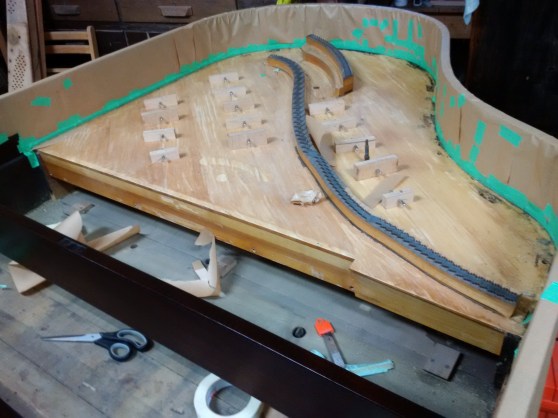
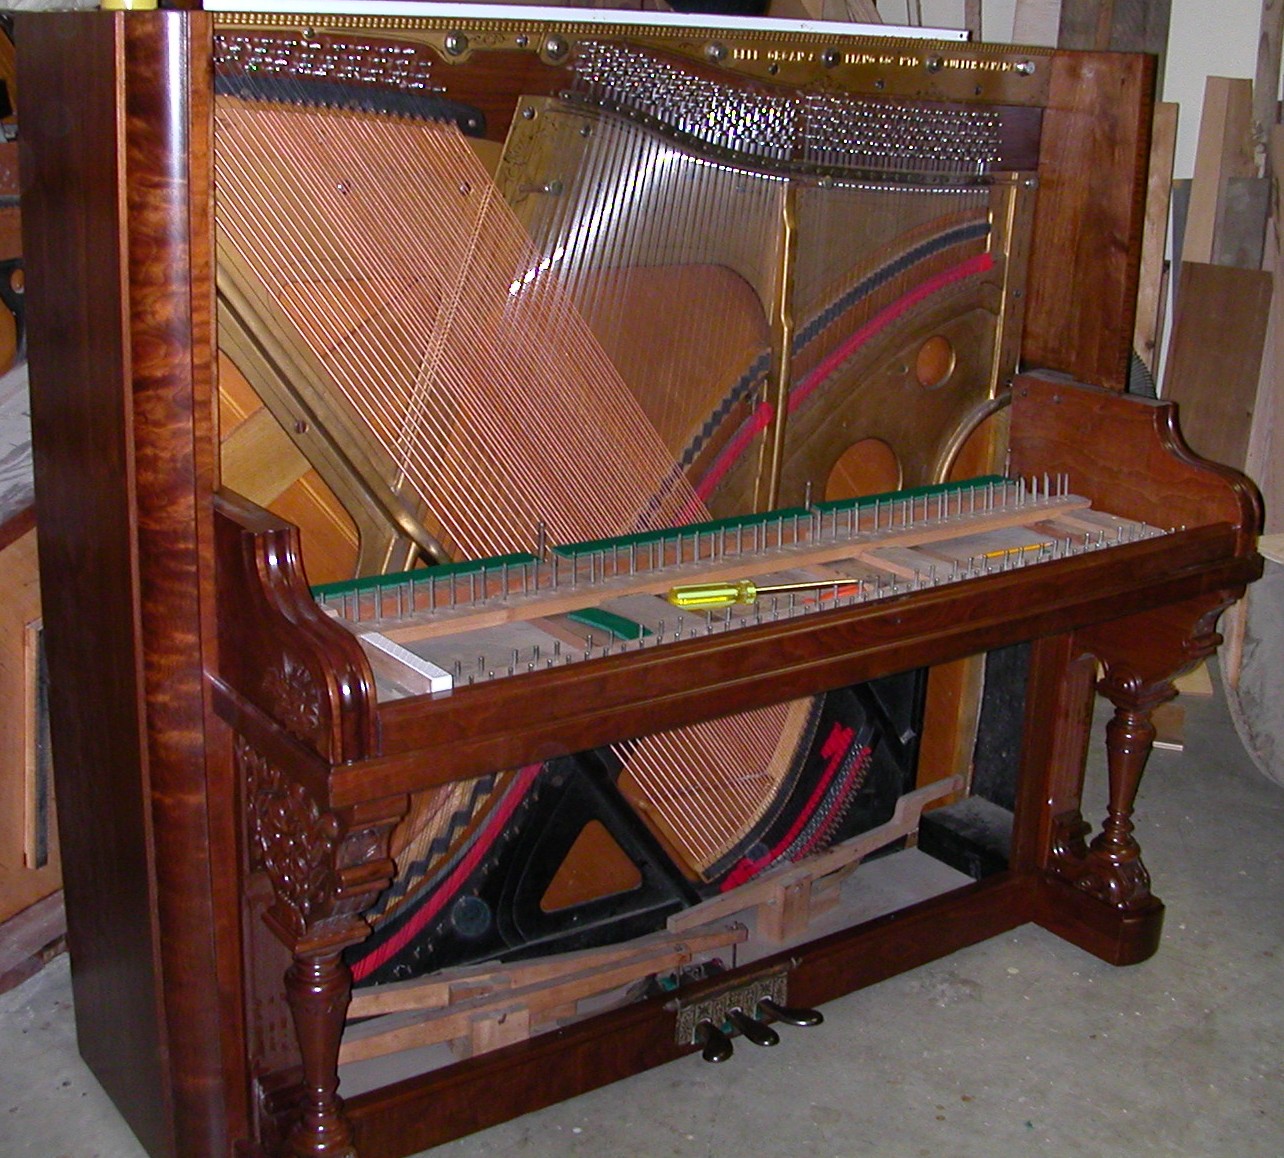
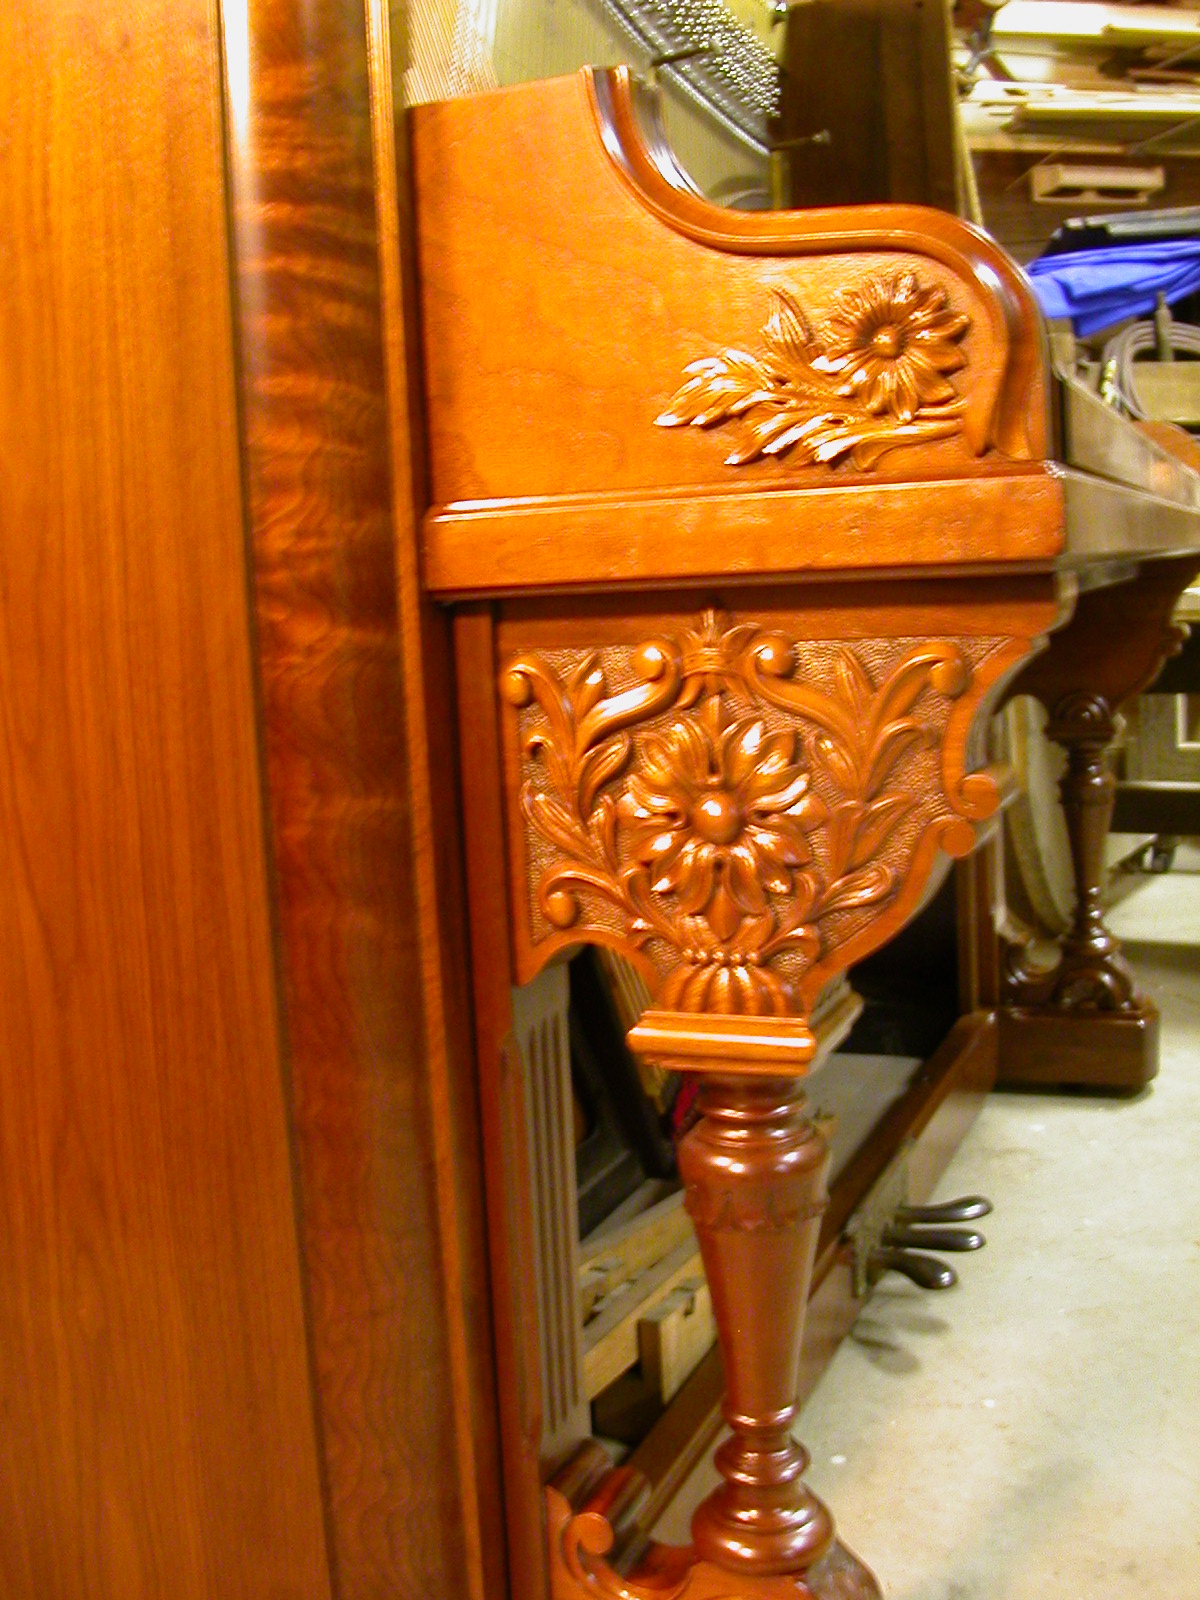
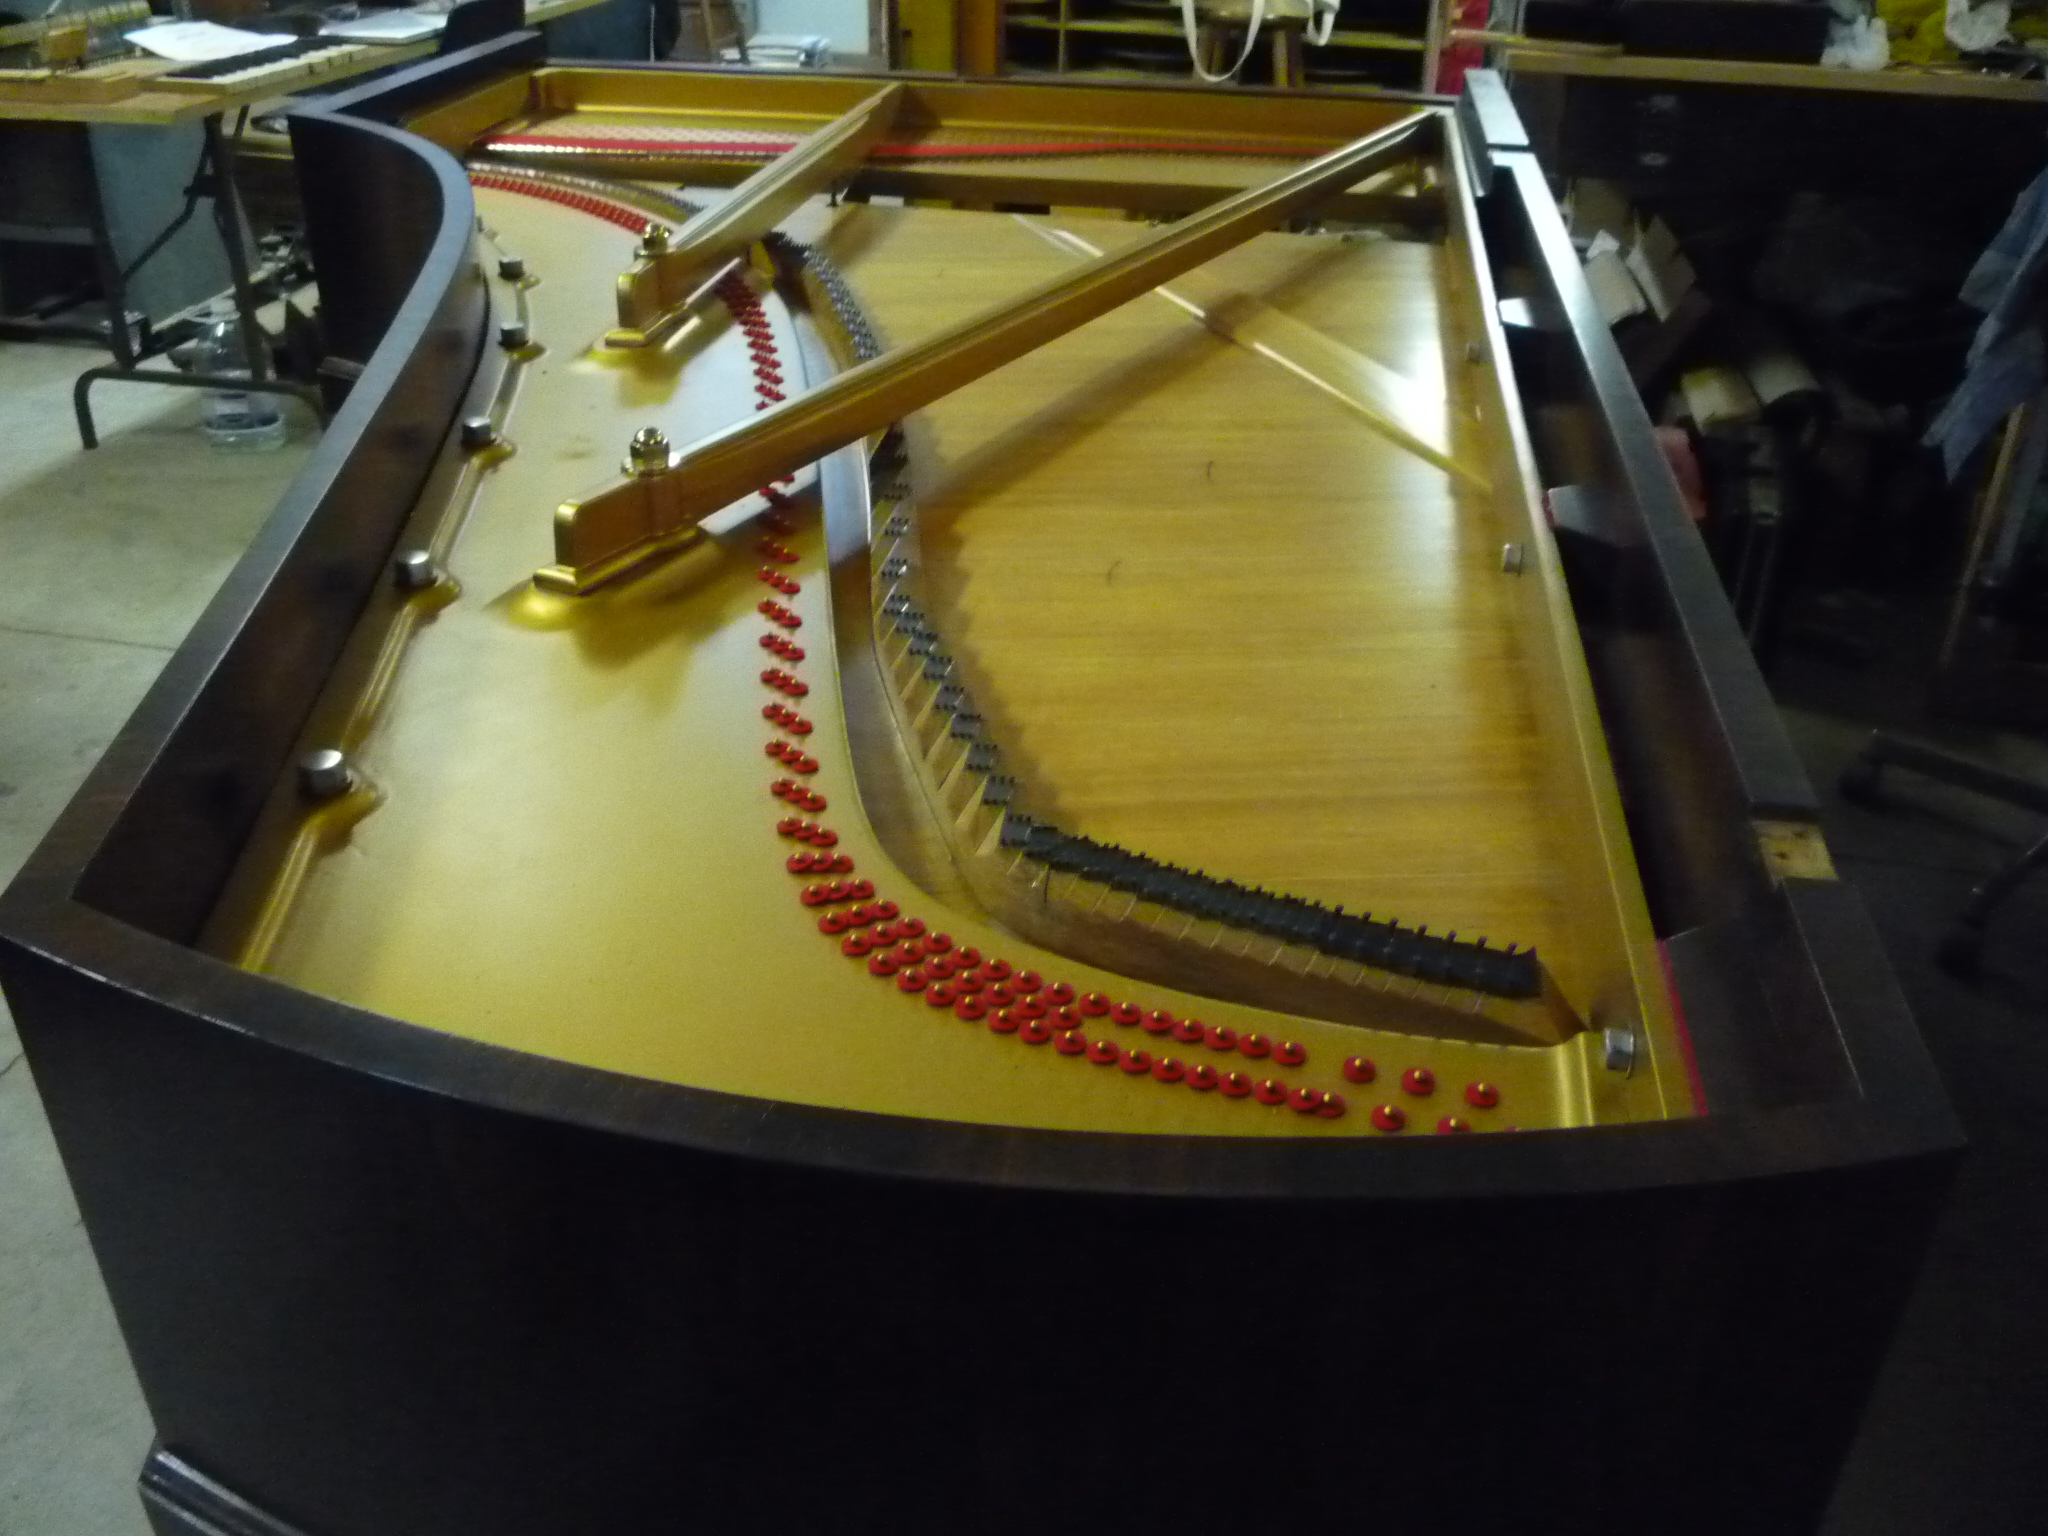
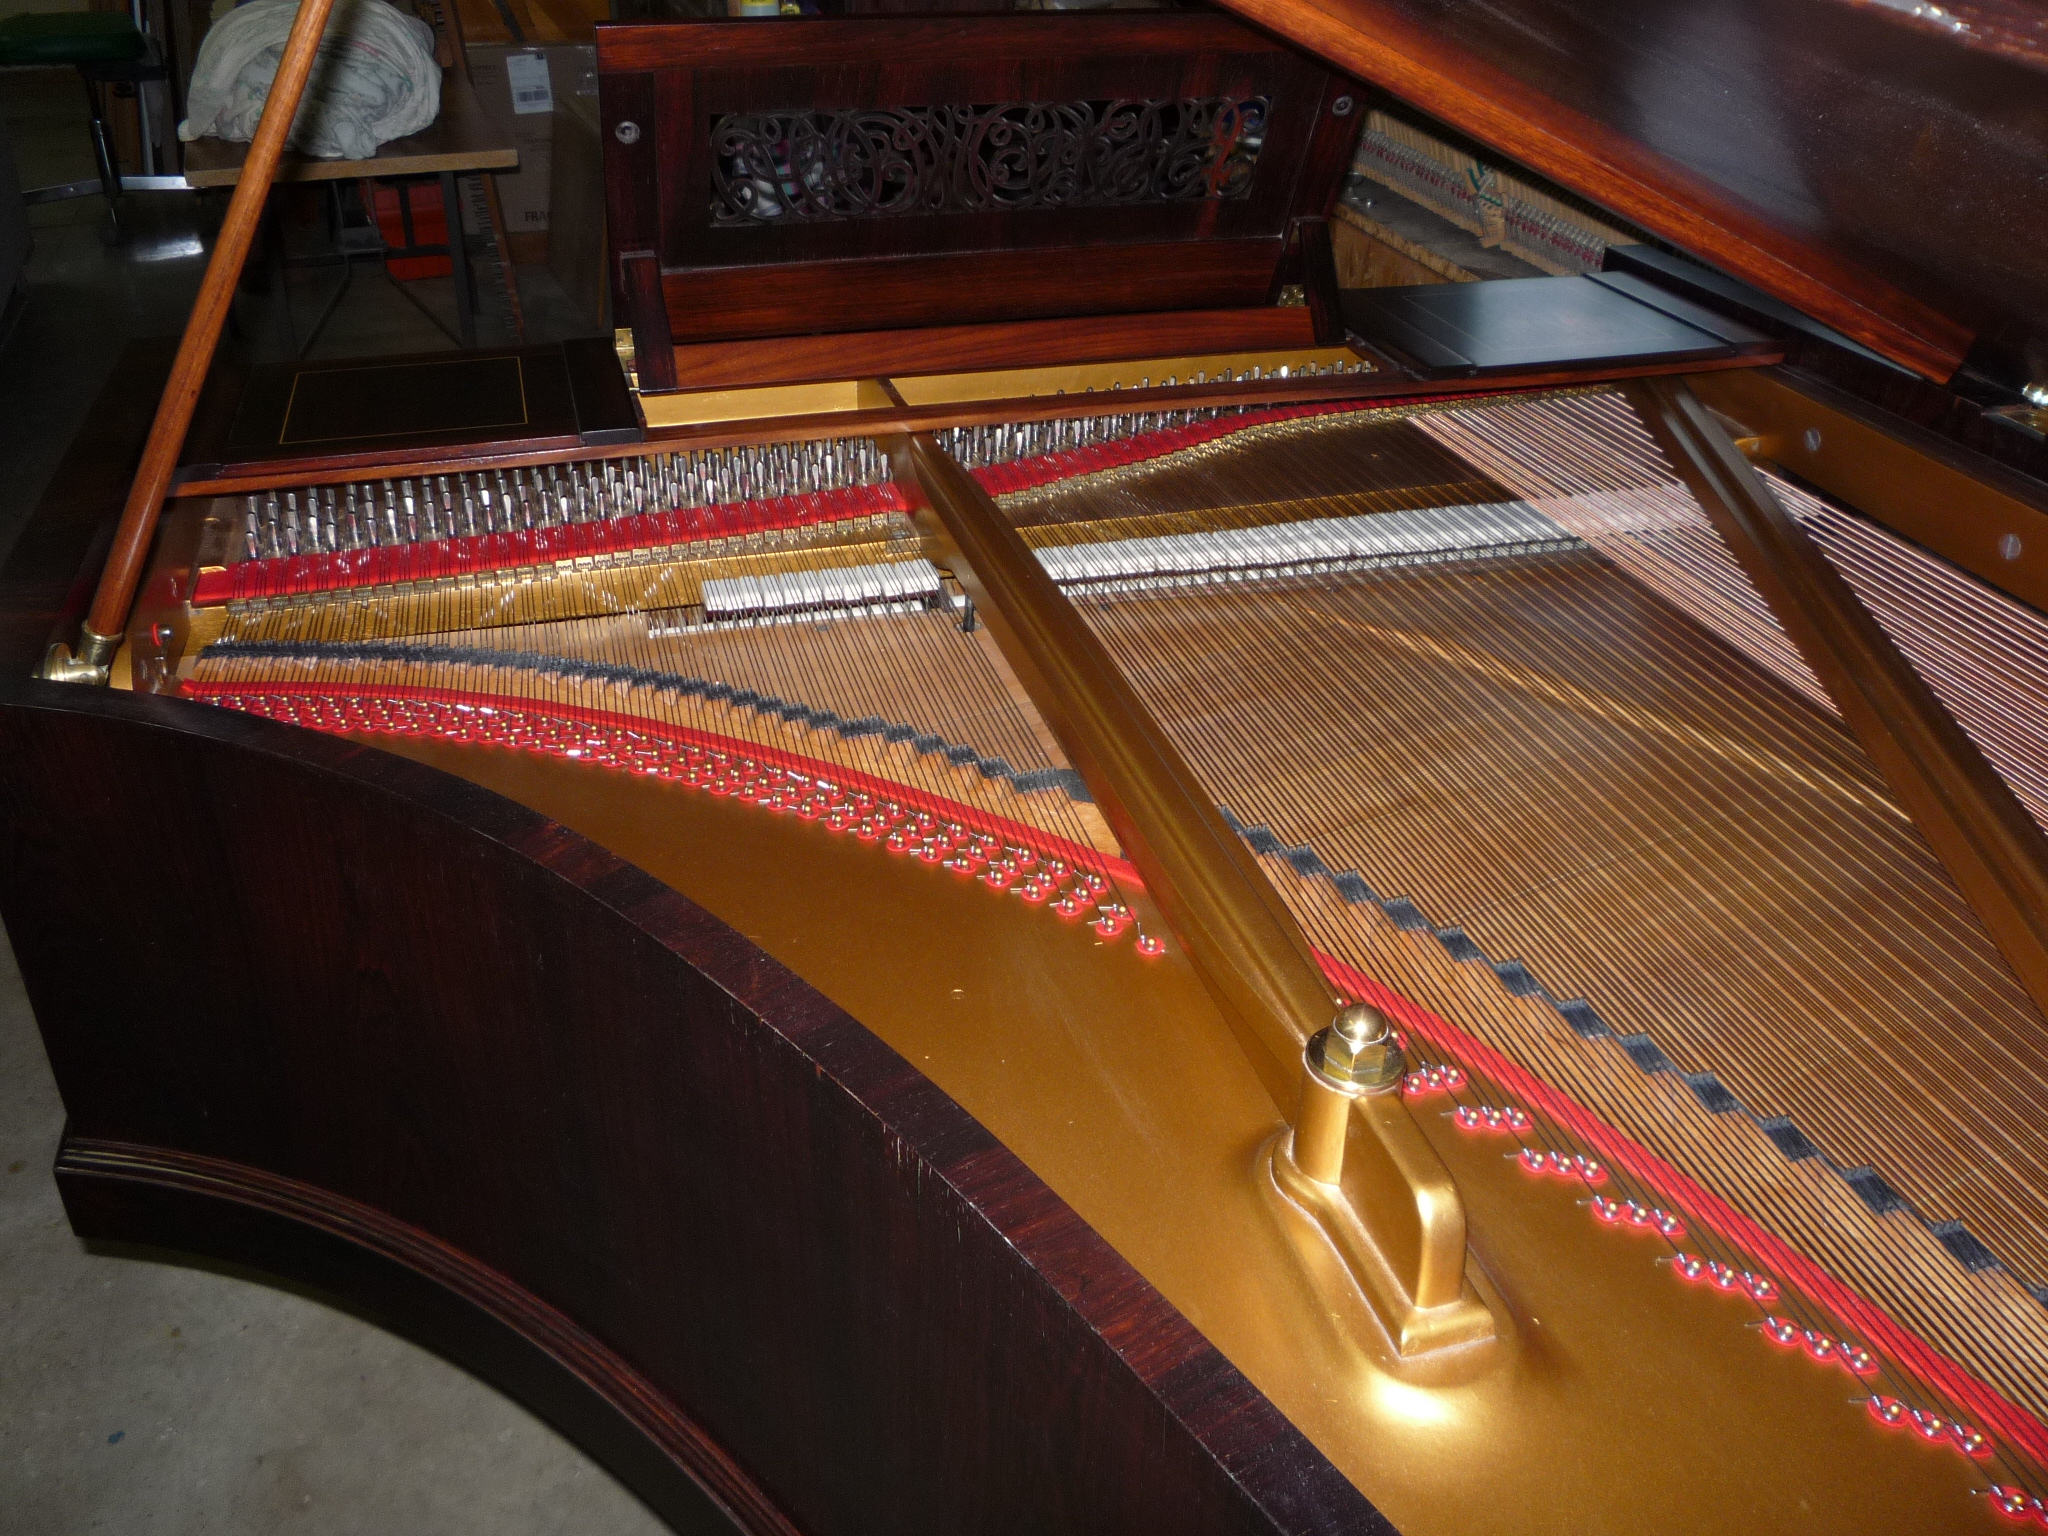
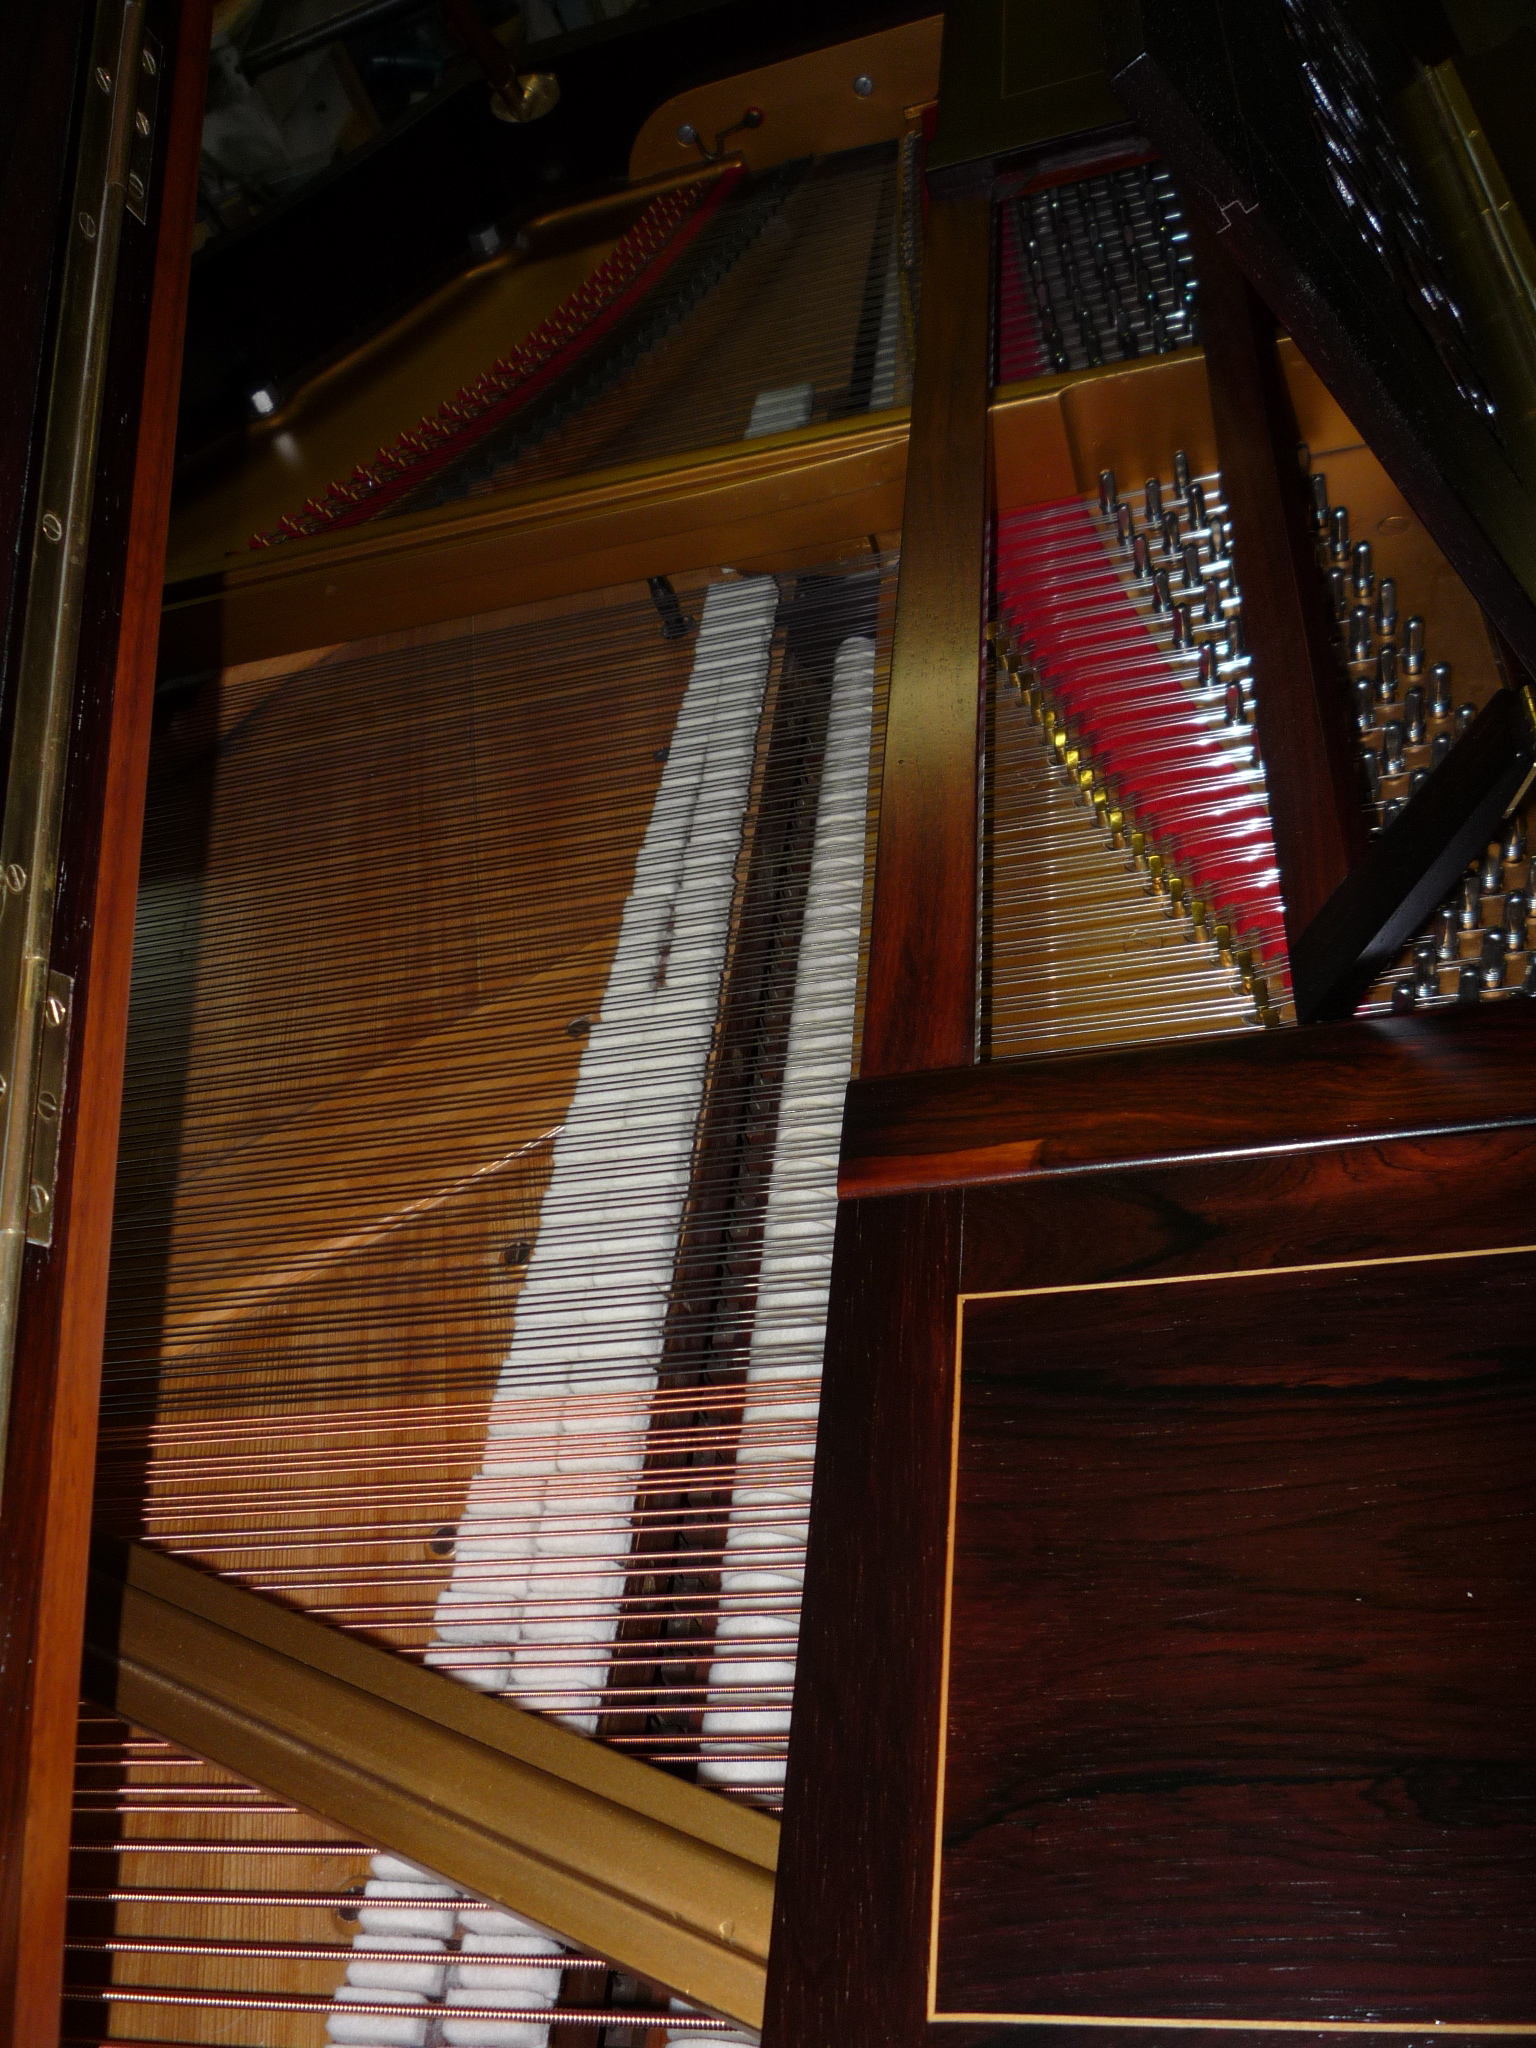
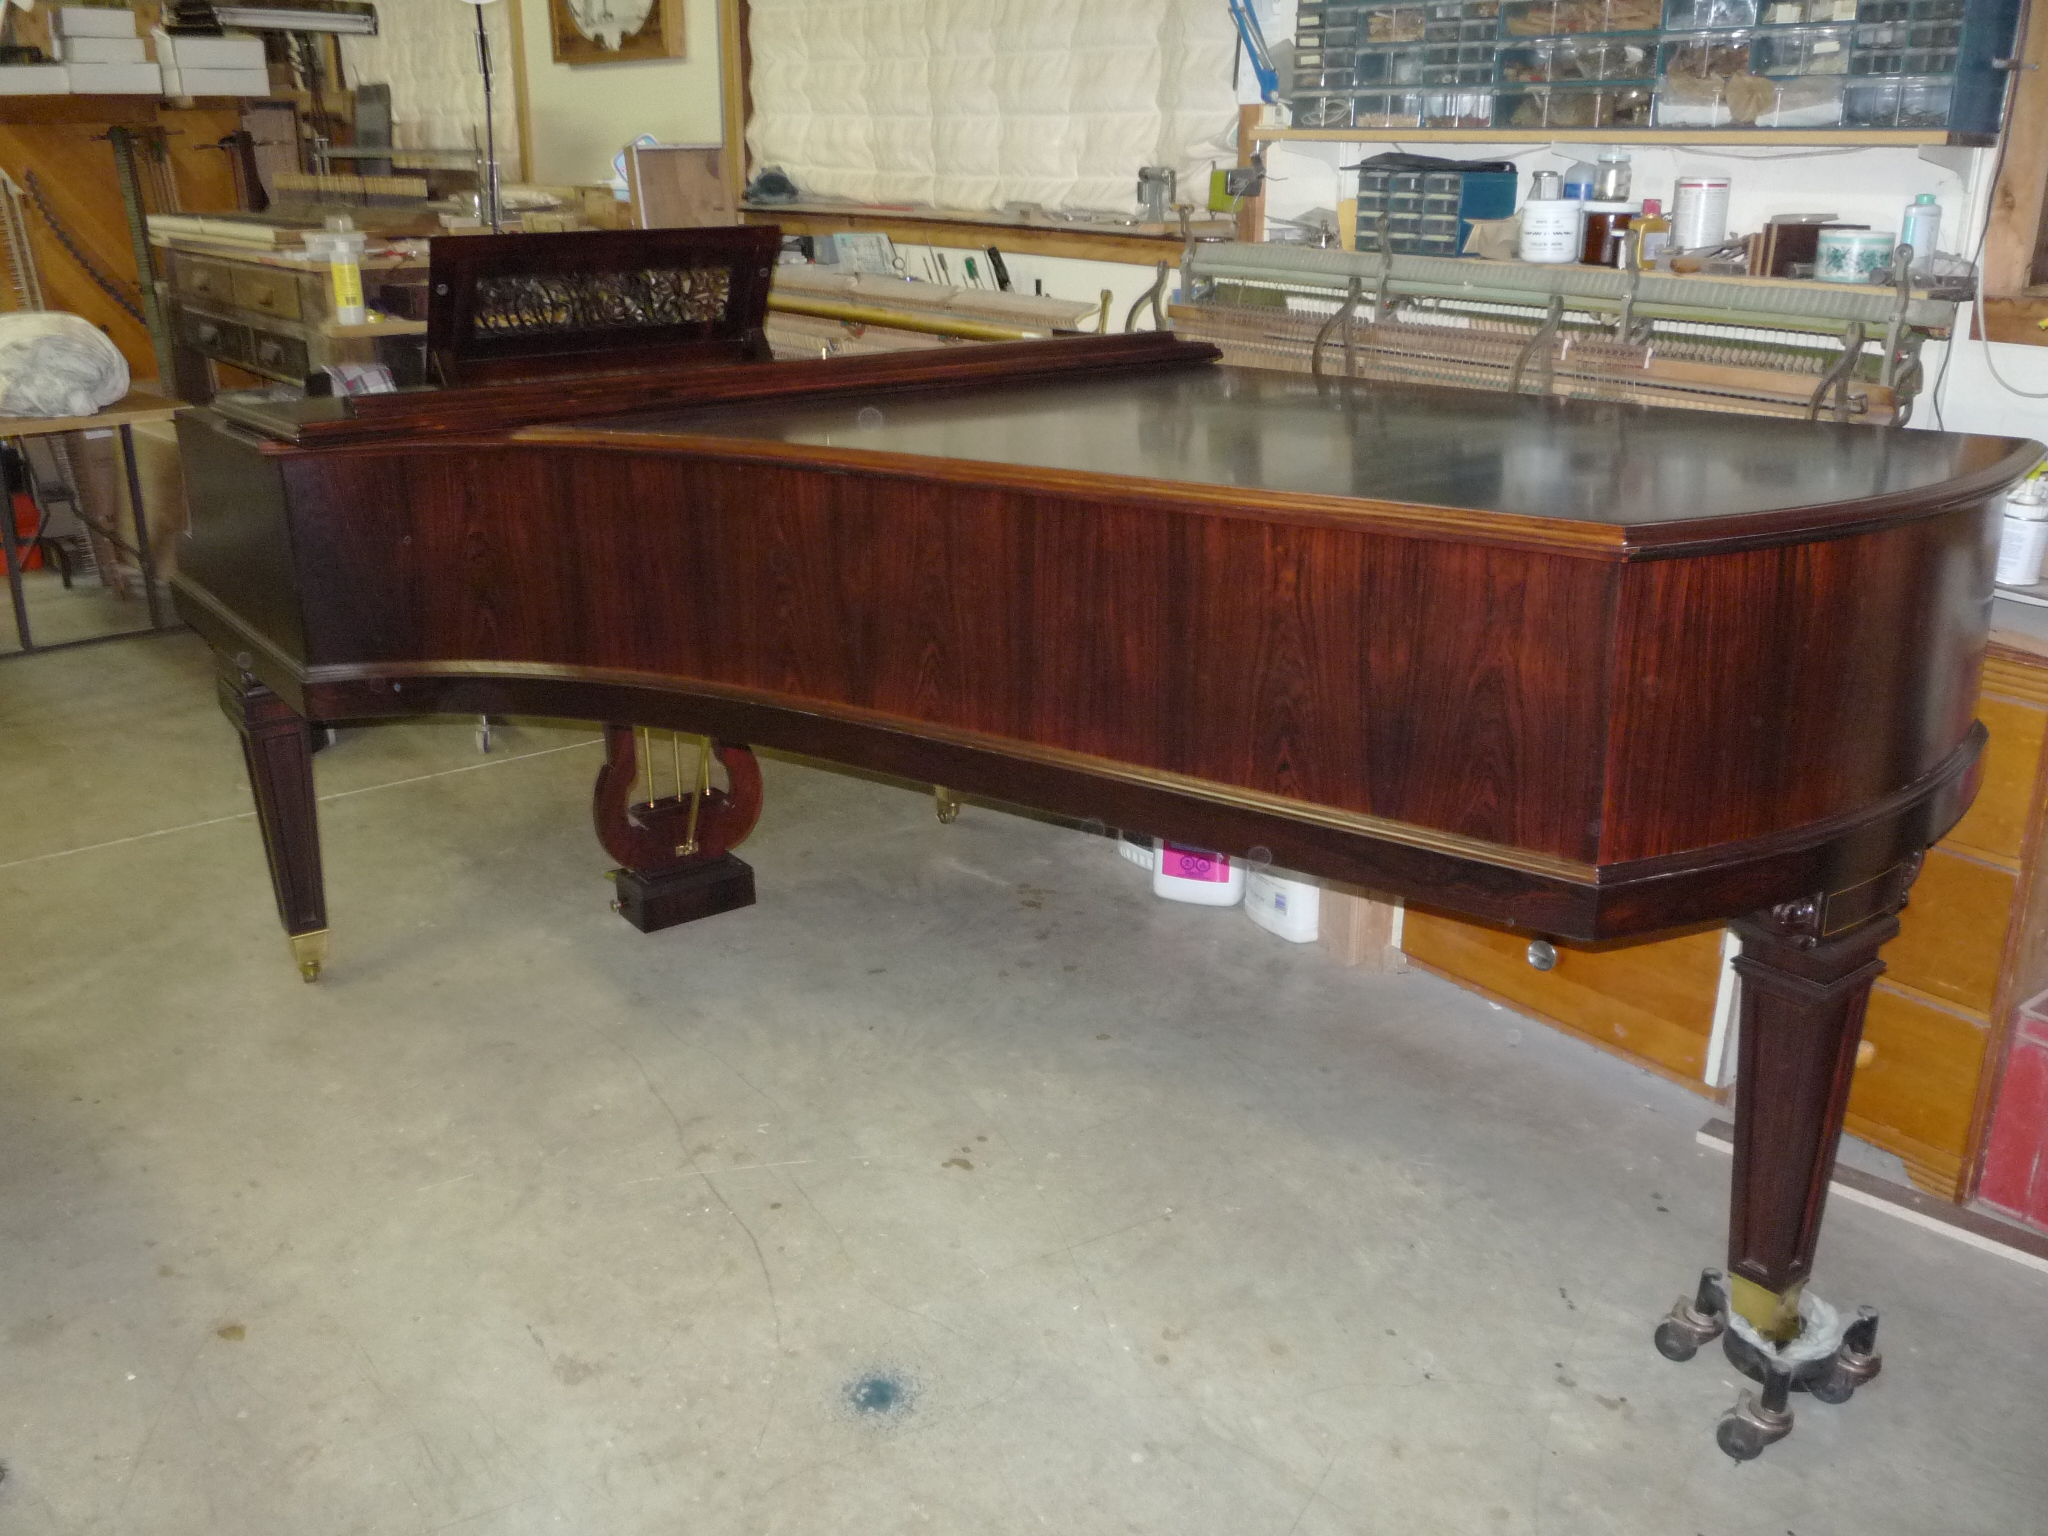
A mammoth project completed in 2018, the Wing and Son “Imperial Concert Grand” upright. A rare instrument in Canada, this was one of my most intricate and extensive rebuilds. I also refinished the cabinet, over thirty individual cabinet pieces to deal with, that’s a lot of workbench space!
Below is a photo from the Wing and Son promotional catalogue.


Above: with the stringing complete, the case is assembled. Fancy woodwork!
To see more of the rebuilding process of this amazing and unusual piano, visit the Wing and Son Piano site that deals solely with that piano. (click on the name)
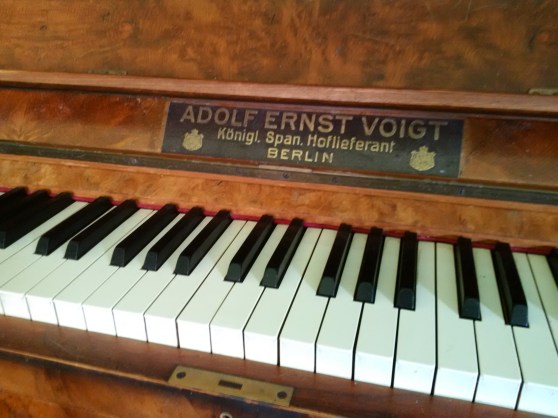
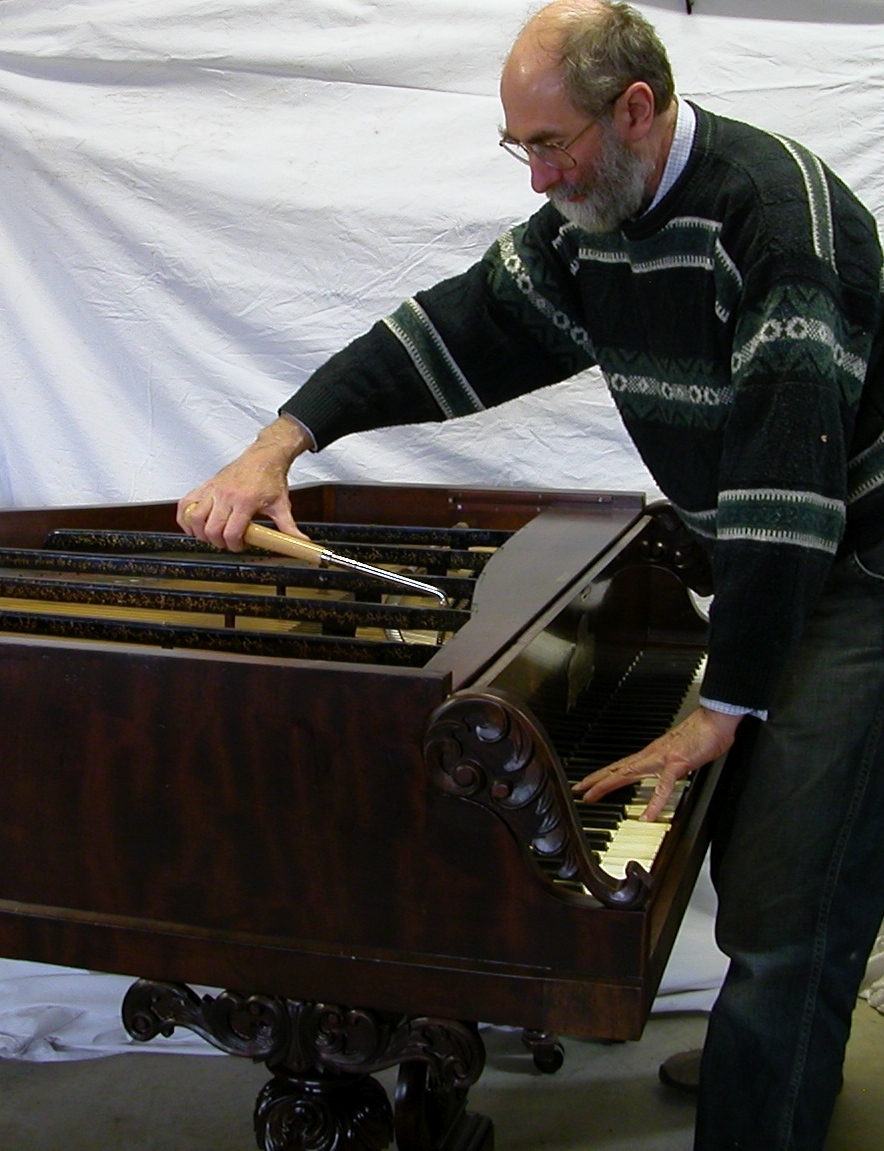
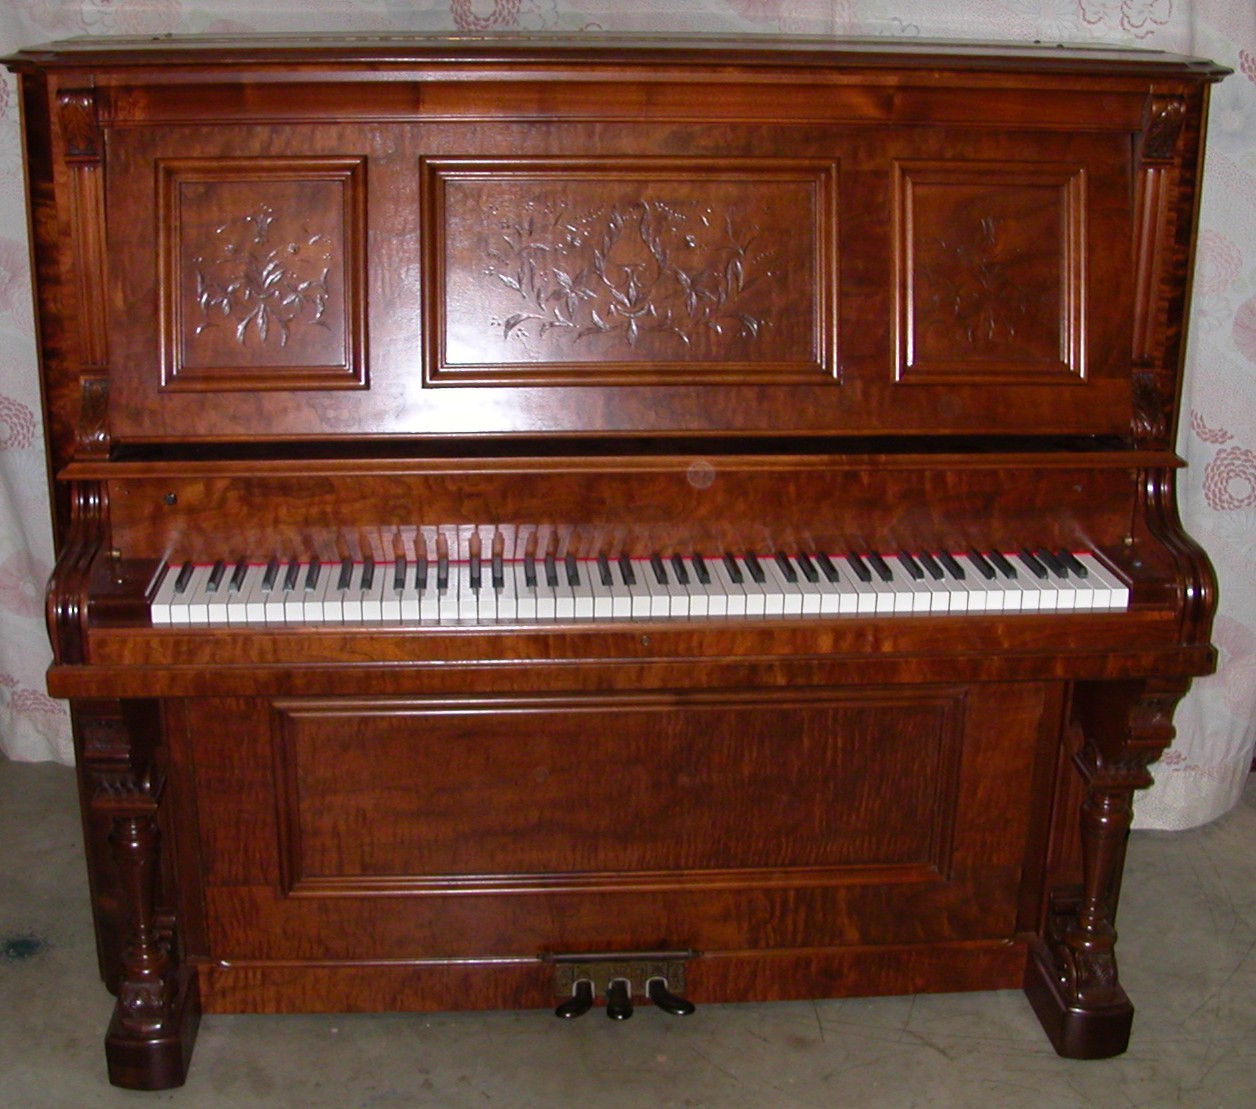
With a career of piano rebuilding spanning forty-two years to date, there’s lots to choose from when posting to this site. Here is one of my favourite projects from some years ago, a beautiful upright built in the early 1900’s in Berlin that I totally rebuilt in 1981 and maintain still for its owner, a piano teacher in London.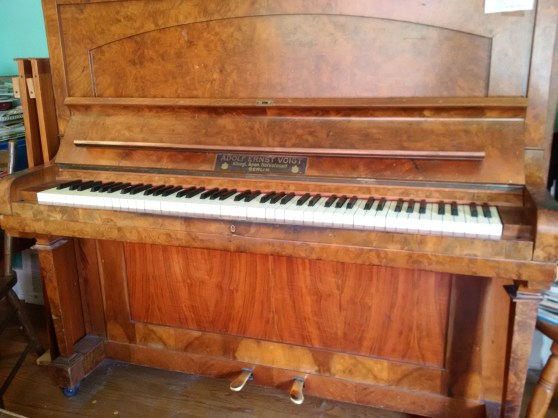
Above: the extended music rest that I added, with a leather surface

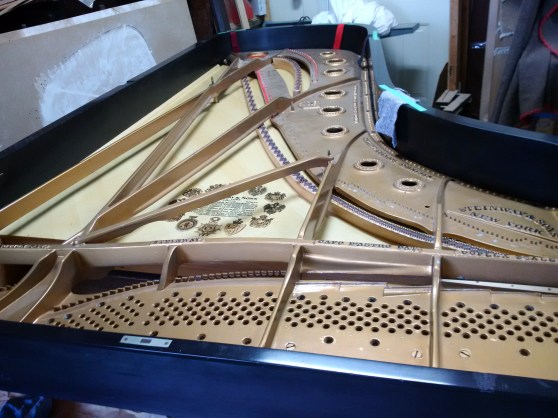
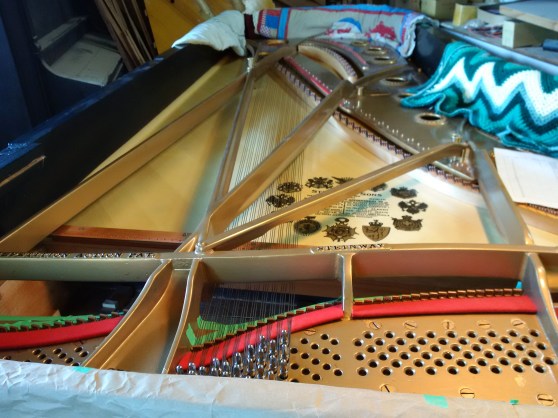
This is another recent large project completed in 2017- a Steinway concert grand, a full rebuilding. Here are a few photos of this project:
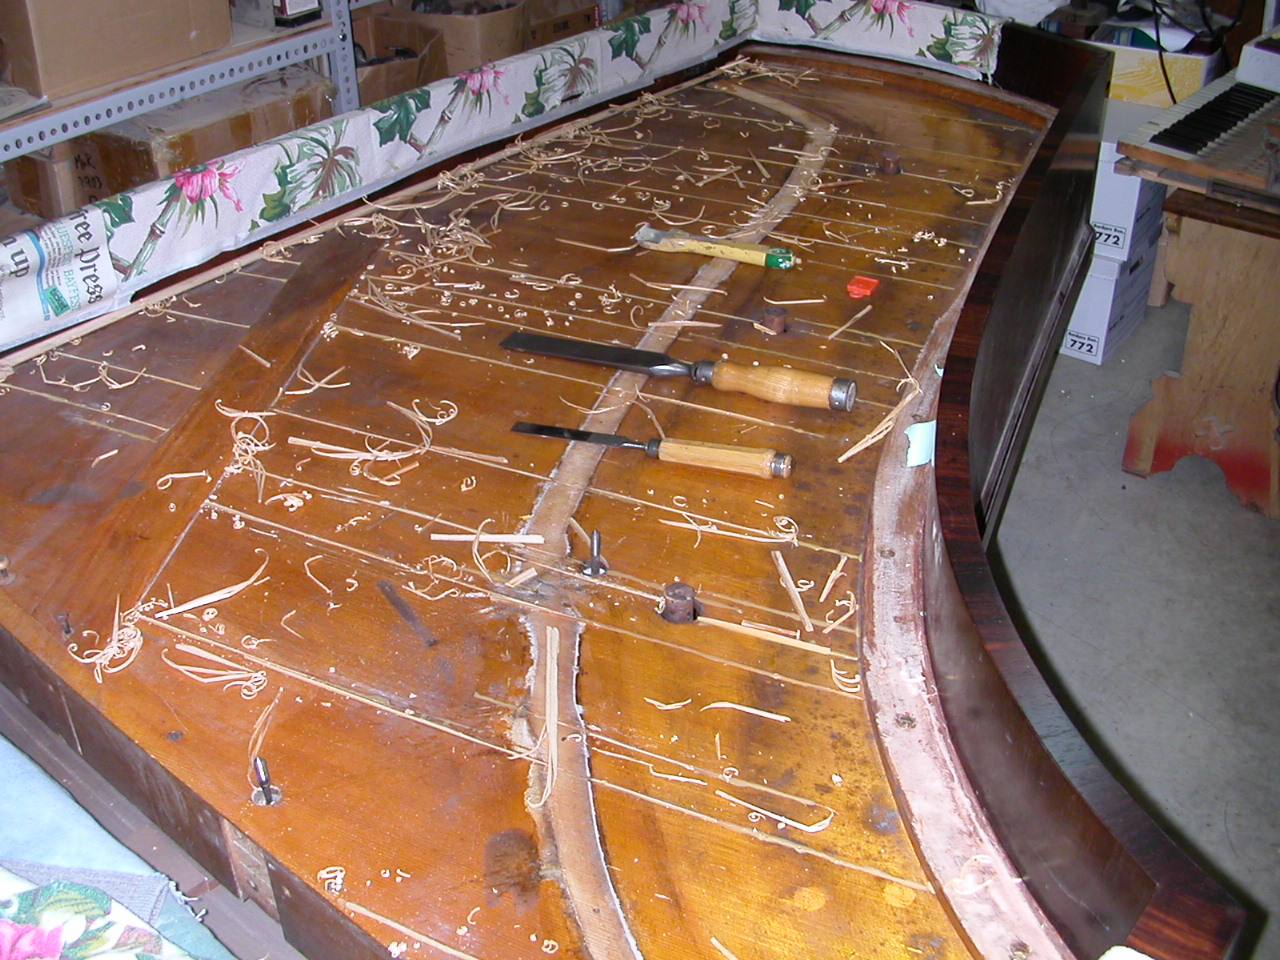
Below: preparing the rim for a new sound board

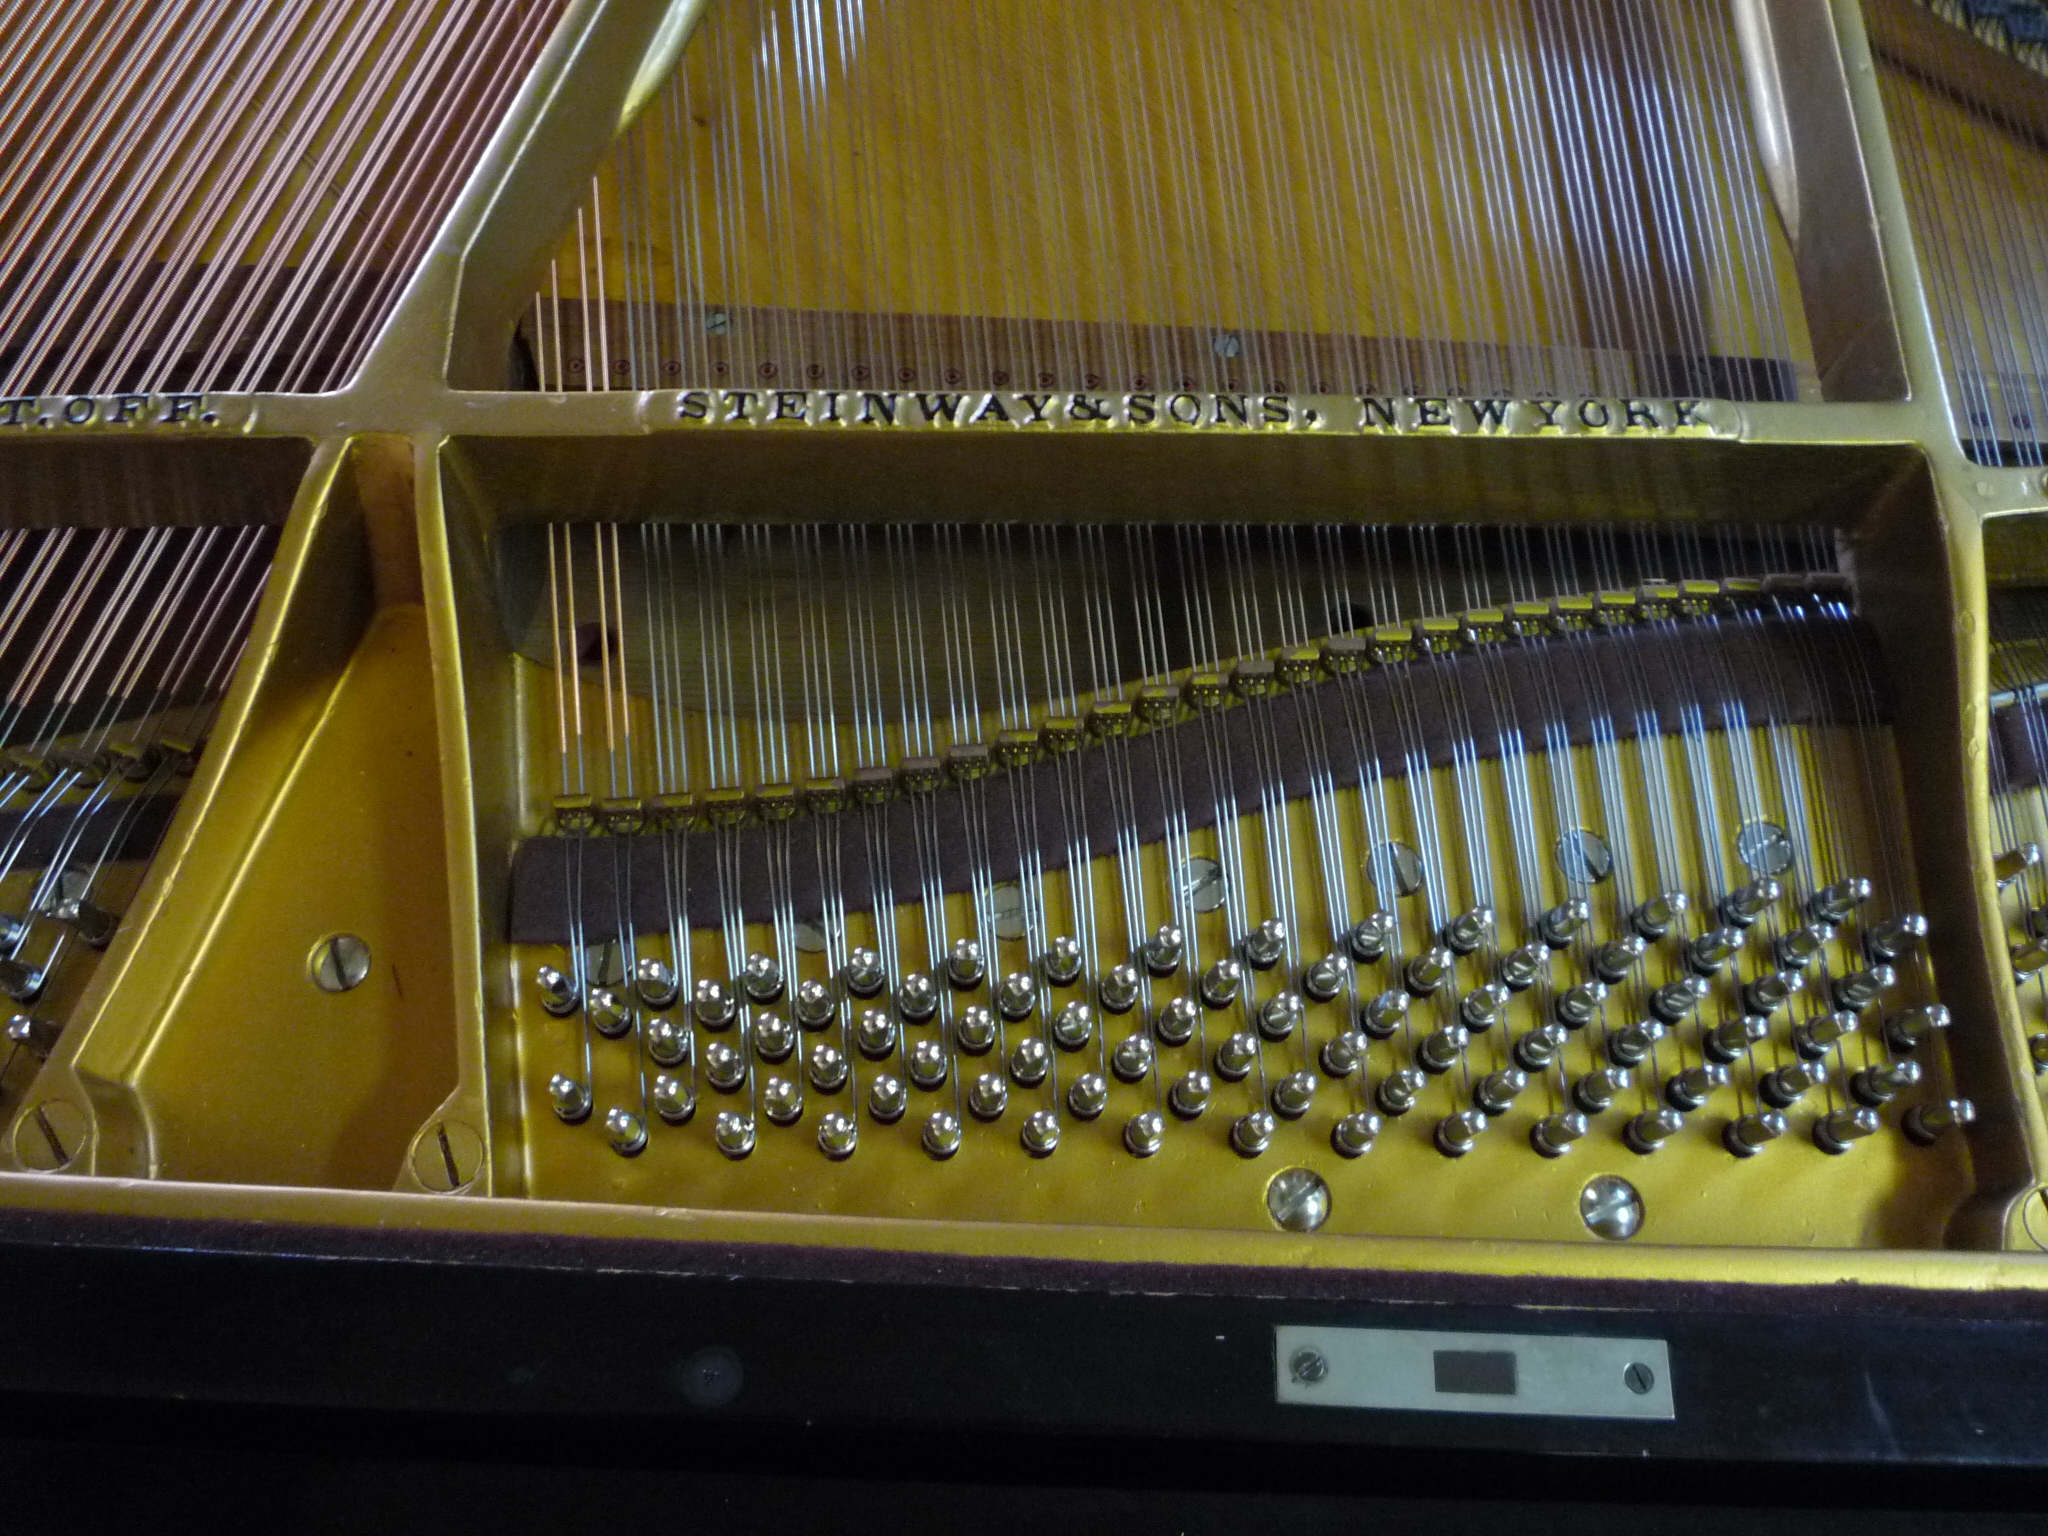
Detail of the lettering on the plate
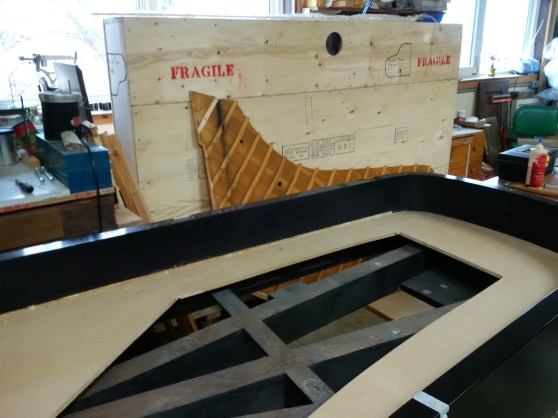
Above: the empty case of the concert grand in the foreground with the old sound board standing in front ot the “hotbox” in which the new sound board is kept dry before installation. The wooden panel sitting in the case is a template for the sound board and its ribs.
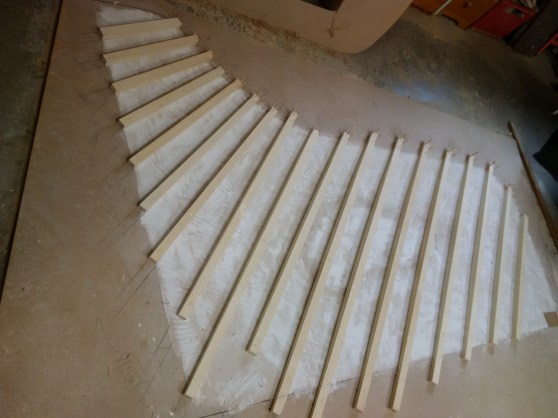
On the sound board press we layout a new radial design for the ribs
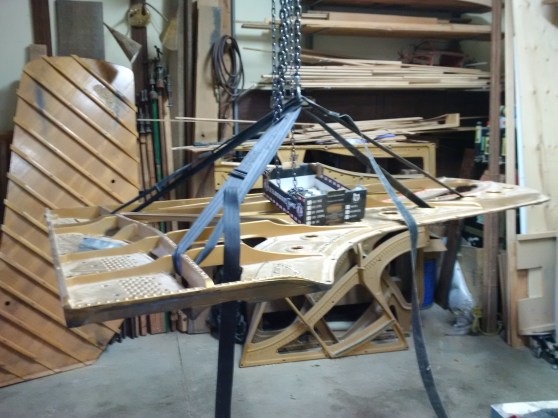
Hanging the very heavy cast plate, ready to lower it into the case for a first fitting
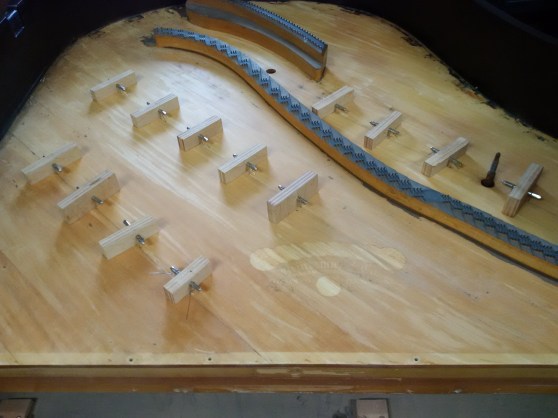
Below: the new Bolduc spruce sound board with bridge sitting in place in the case.
Above and below: gluing on the bridge using 31 screw clamps. The screws will be removed and dowels fitted through ribs into the bridge.
Above: the underside of the sound board, finished with a good sealer, ready for installation. Below, the sound board glued and clamped in place.

Above: gluing the 1/4 round trim along the straight side with an array of clamps
Above: a final coat of finish to protect and seal against changes in humidity. The current thinking is to use as little finish as possible, so the sound board is sanded carefully with fine paper and the sealer coat sanded with even finer paper to yield a very smooth base for the top coat.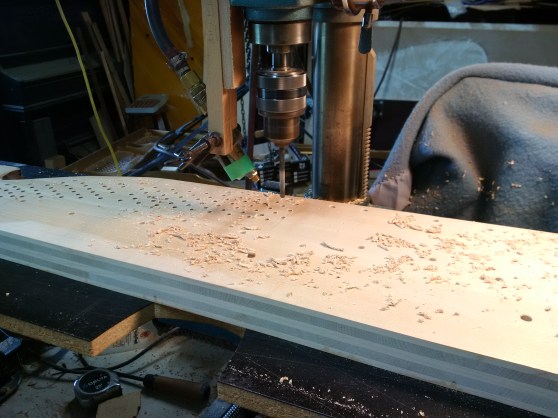
Drilling the Bolduc five-ply concert grand maple pin block
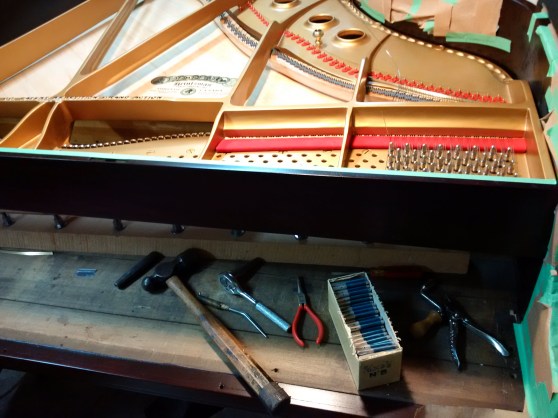
Finally the pin block and plate are installed, ready for the new strings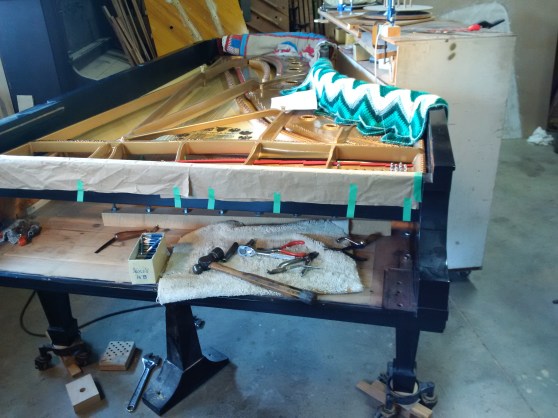
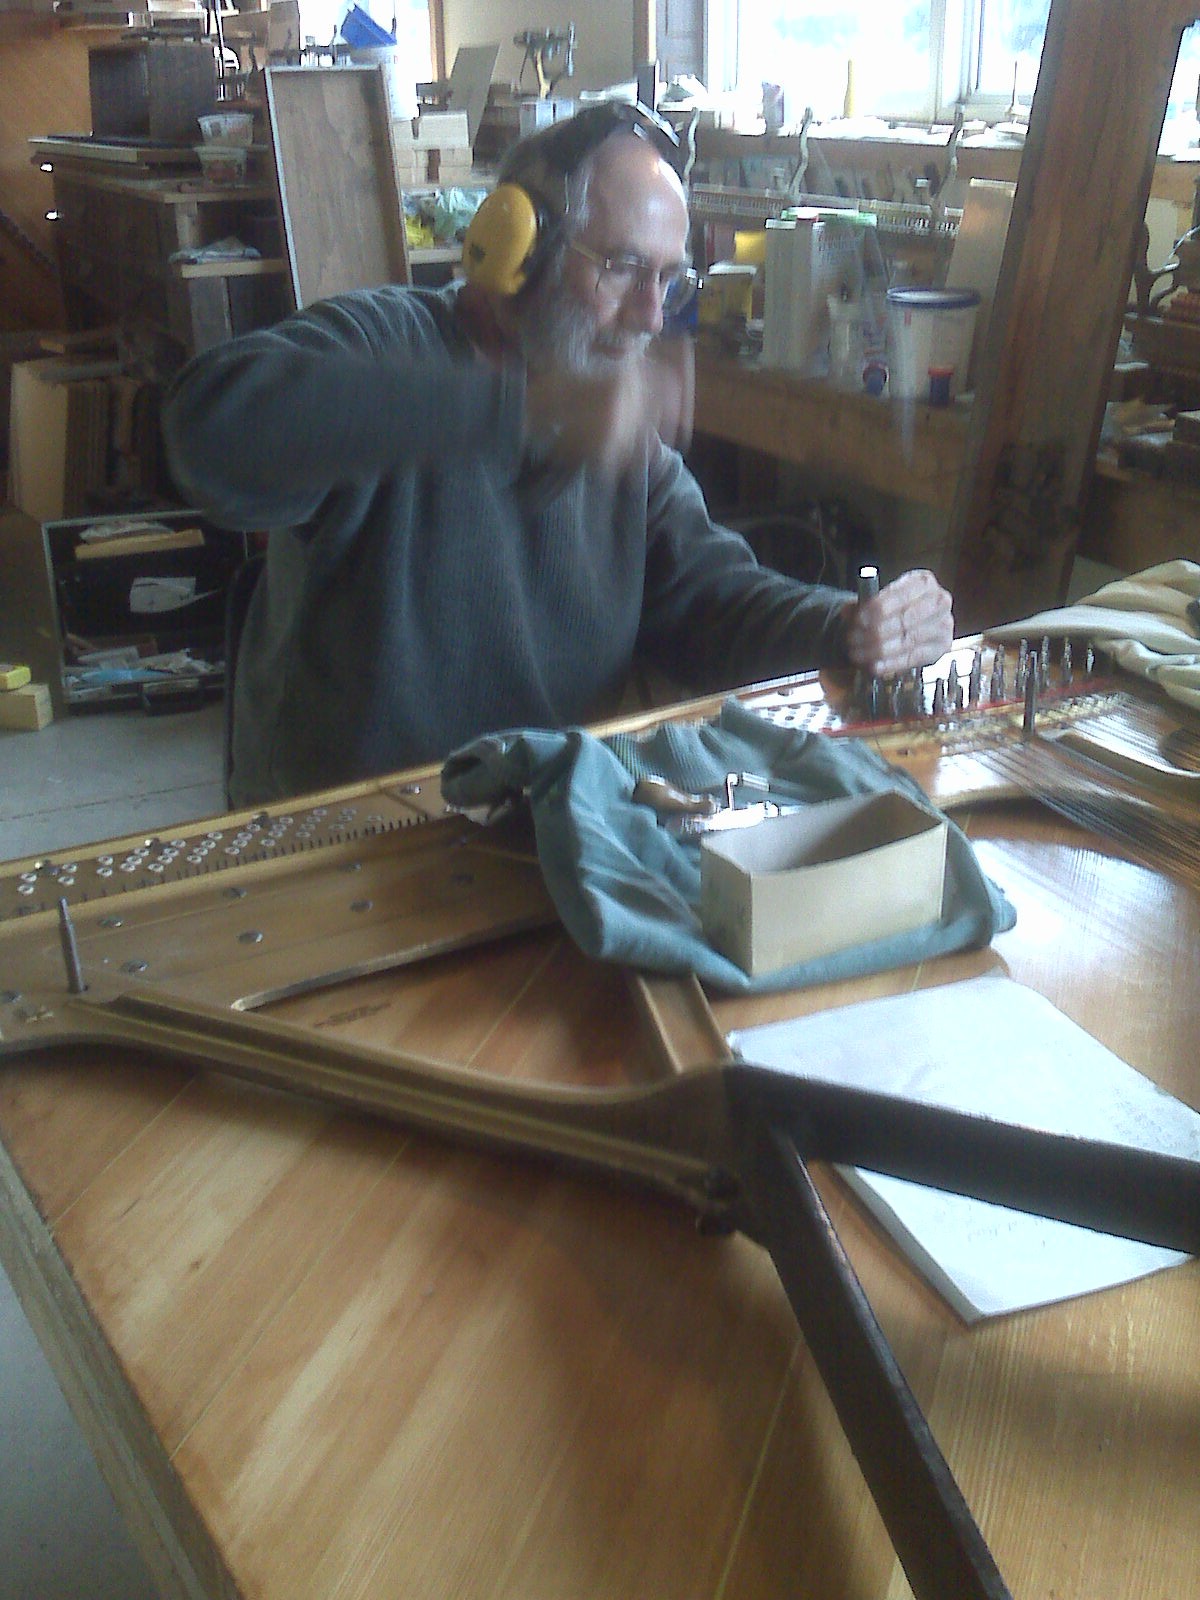
All wrapped up, a big jack supporting the keybed, wheels locked, pin block supported by continuous screw jack from the keybed, tools all in place, and now the strings in the lowest tenor area are installed first.
At the right side of the piano is my stringing bench which houses all the wire guages and serves as the dispensary for installing the strings.
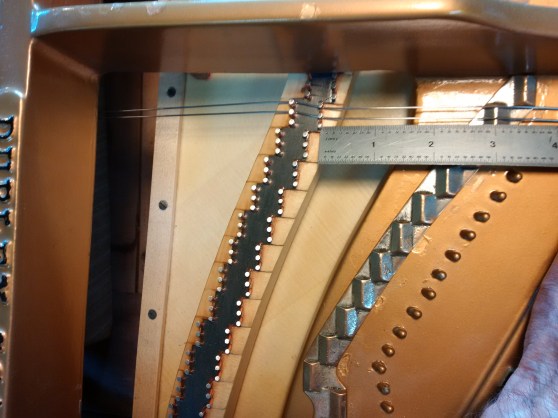
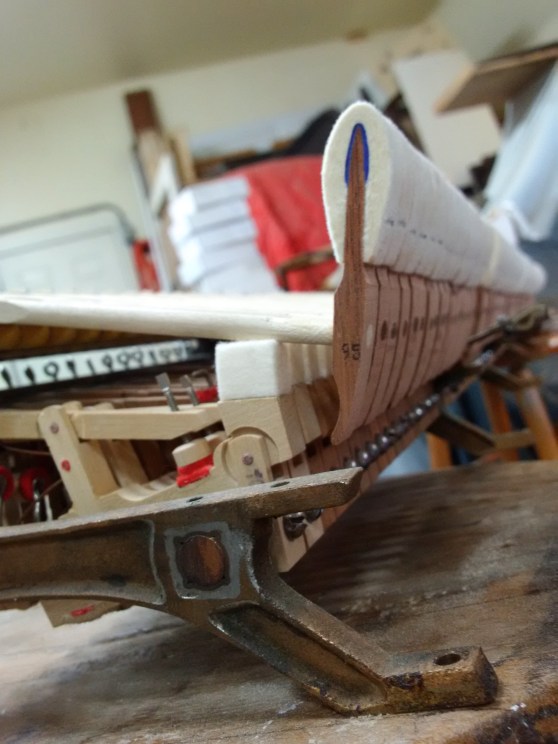
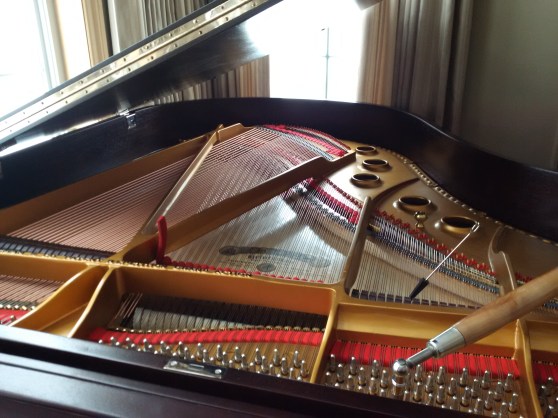
Measuring for correct placement of the duplex bars in the high treble. The back string length is resonant and must be tuned to one of the harmonics. In this specific area the back string length is 2/3 the length of the speaking portion, in other areas it is the same length, half length, a quarter or a fifth, reinforcing specific harmonics of the note. At that point of measurement shown, the speaking length was exactly 4.5″ and thus the duplex was set at 3″. At note 87 the speaking length was 50mm and duplex was set at 50mm.
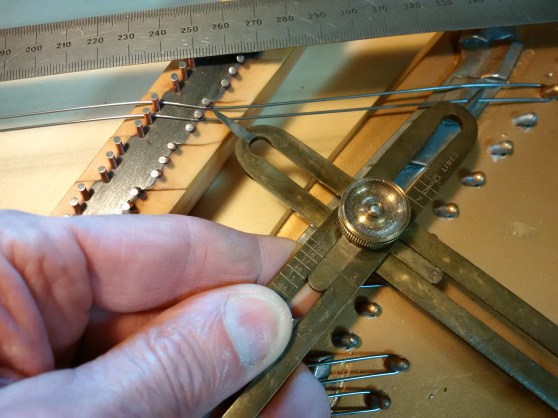
Using a dividing caliper to set the duplex distance, and a closer view of this antique precision instrument below:


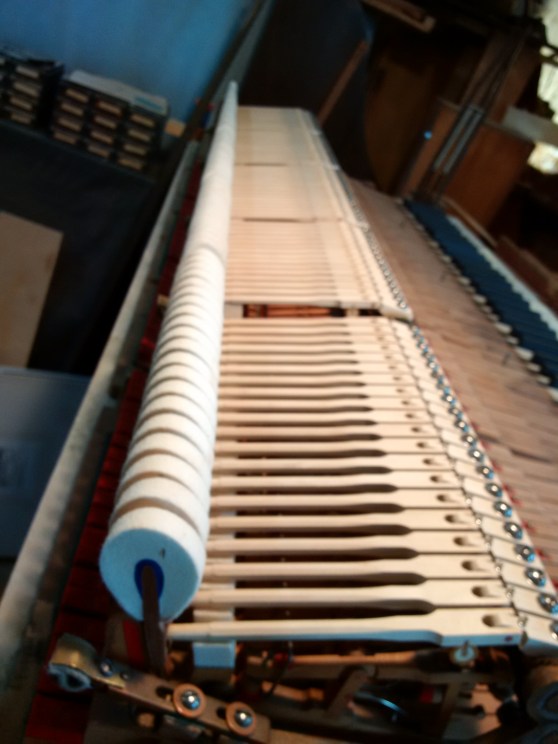
Once all the tenor and treble wtrings are on and at pitch, felt is woven through the back string area to mute off sounds from that area.


Meanwhile the action rebuild is underway: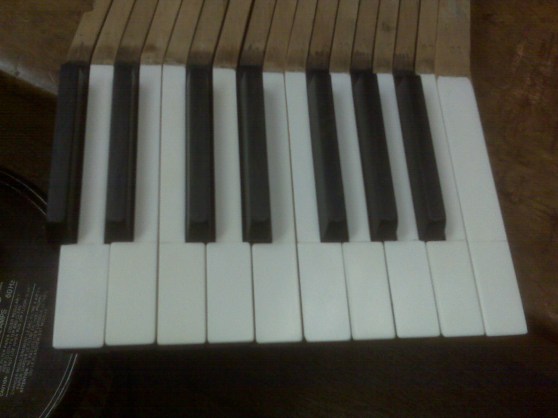
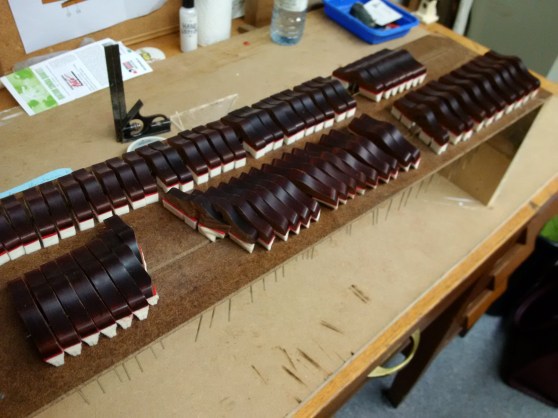
Ivory restored, ebony cleaned and buffed
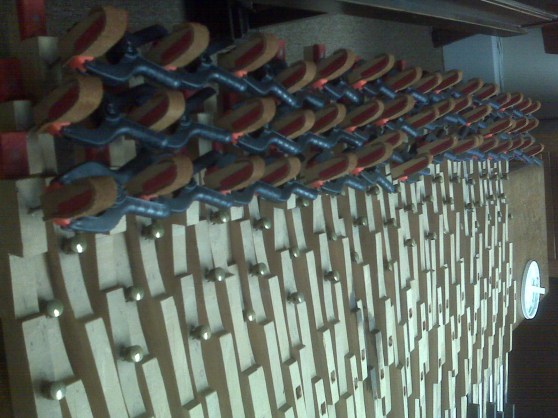
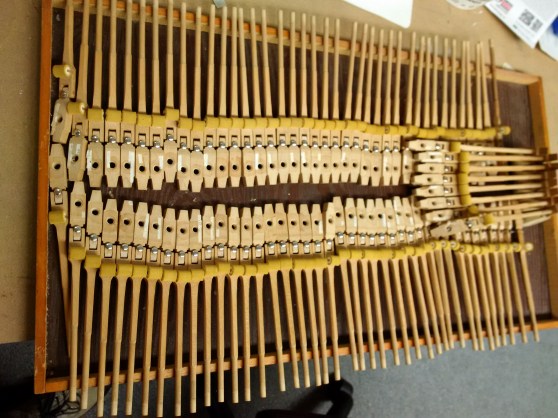
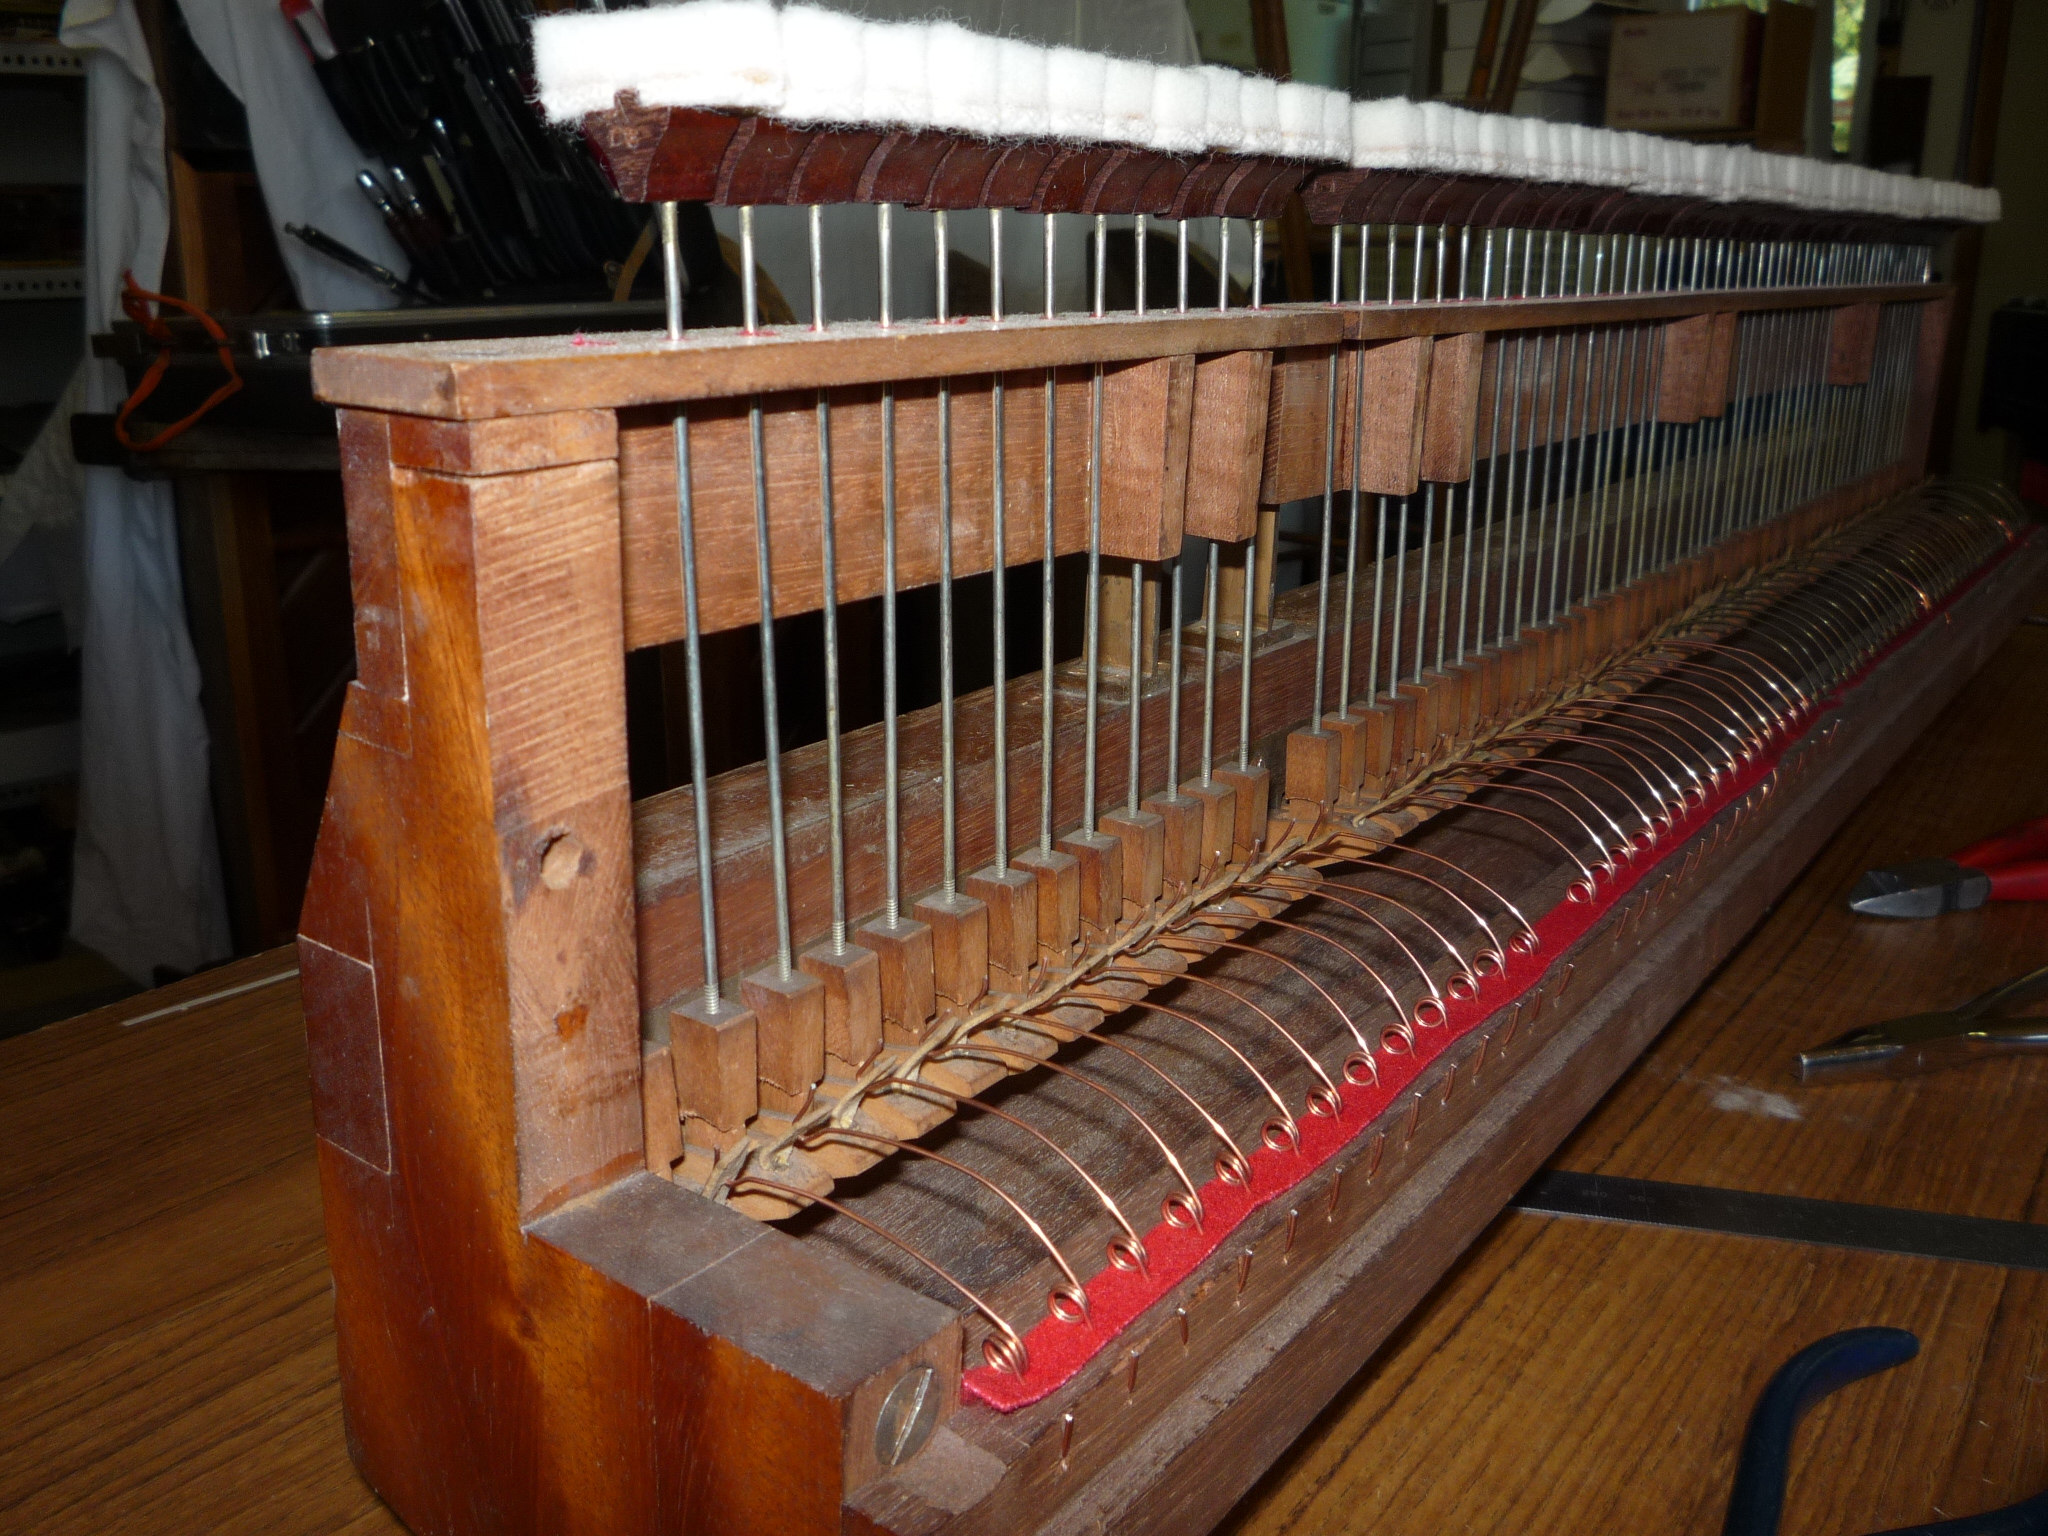
All new leather glued onto the catches with an array of spring clamps
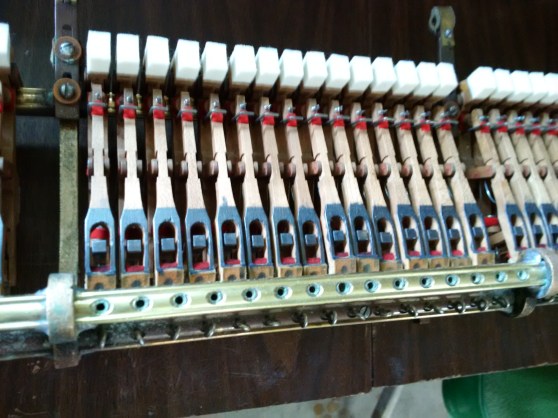
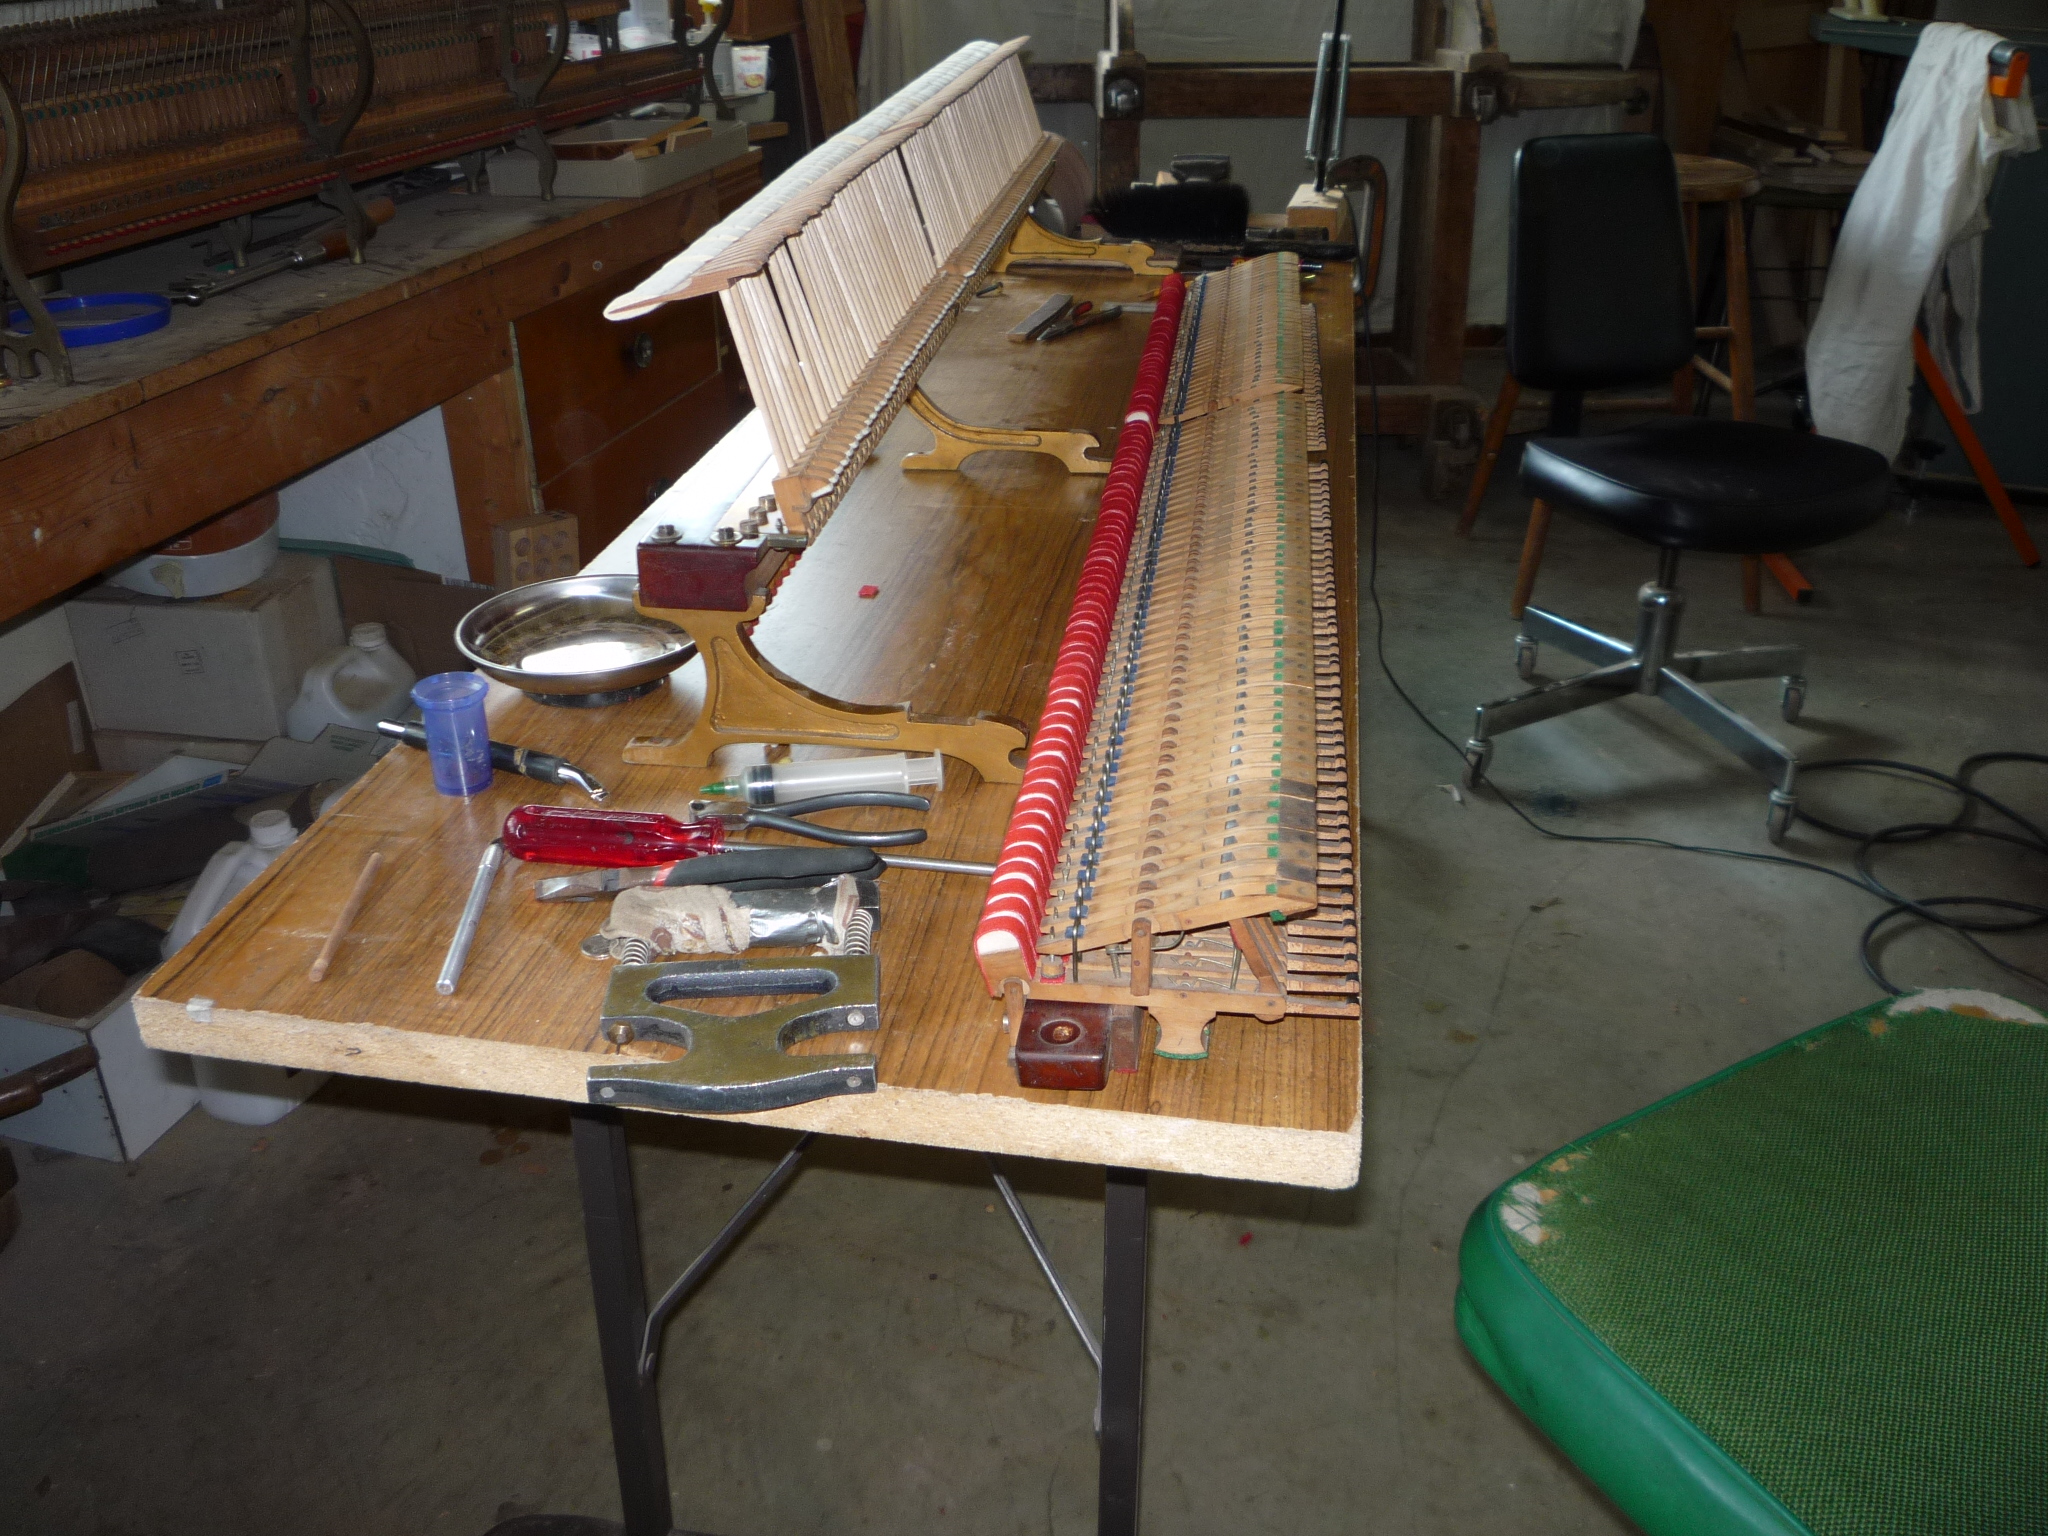
Action frame cleaned, wippens carefully and thoroughly rebuilt
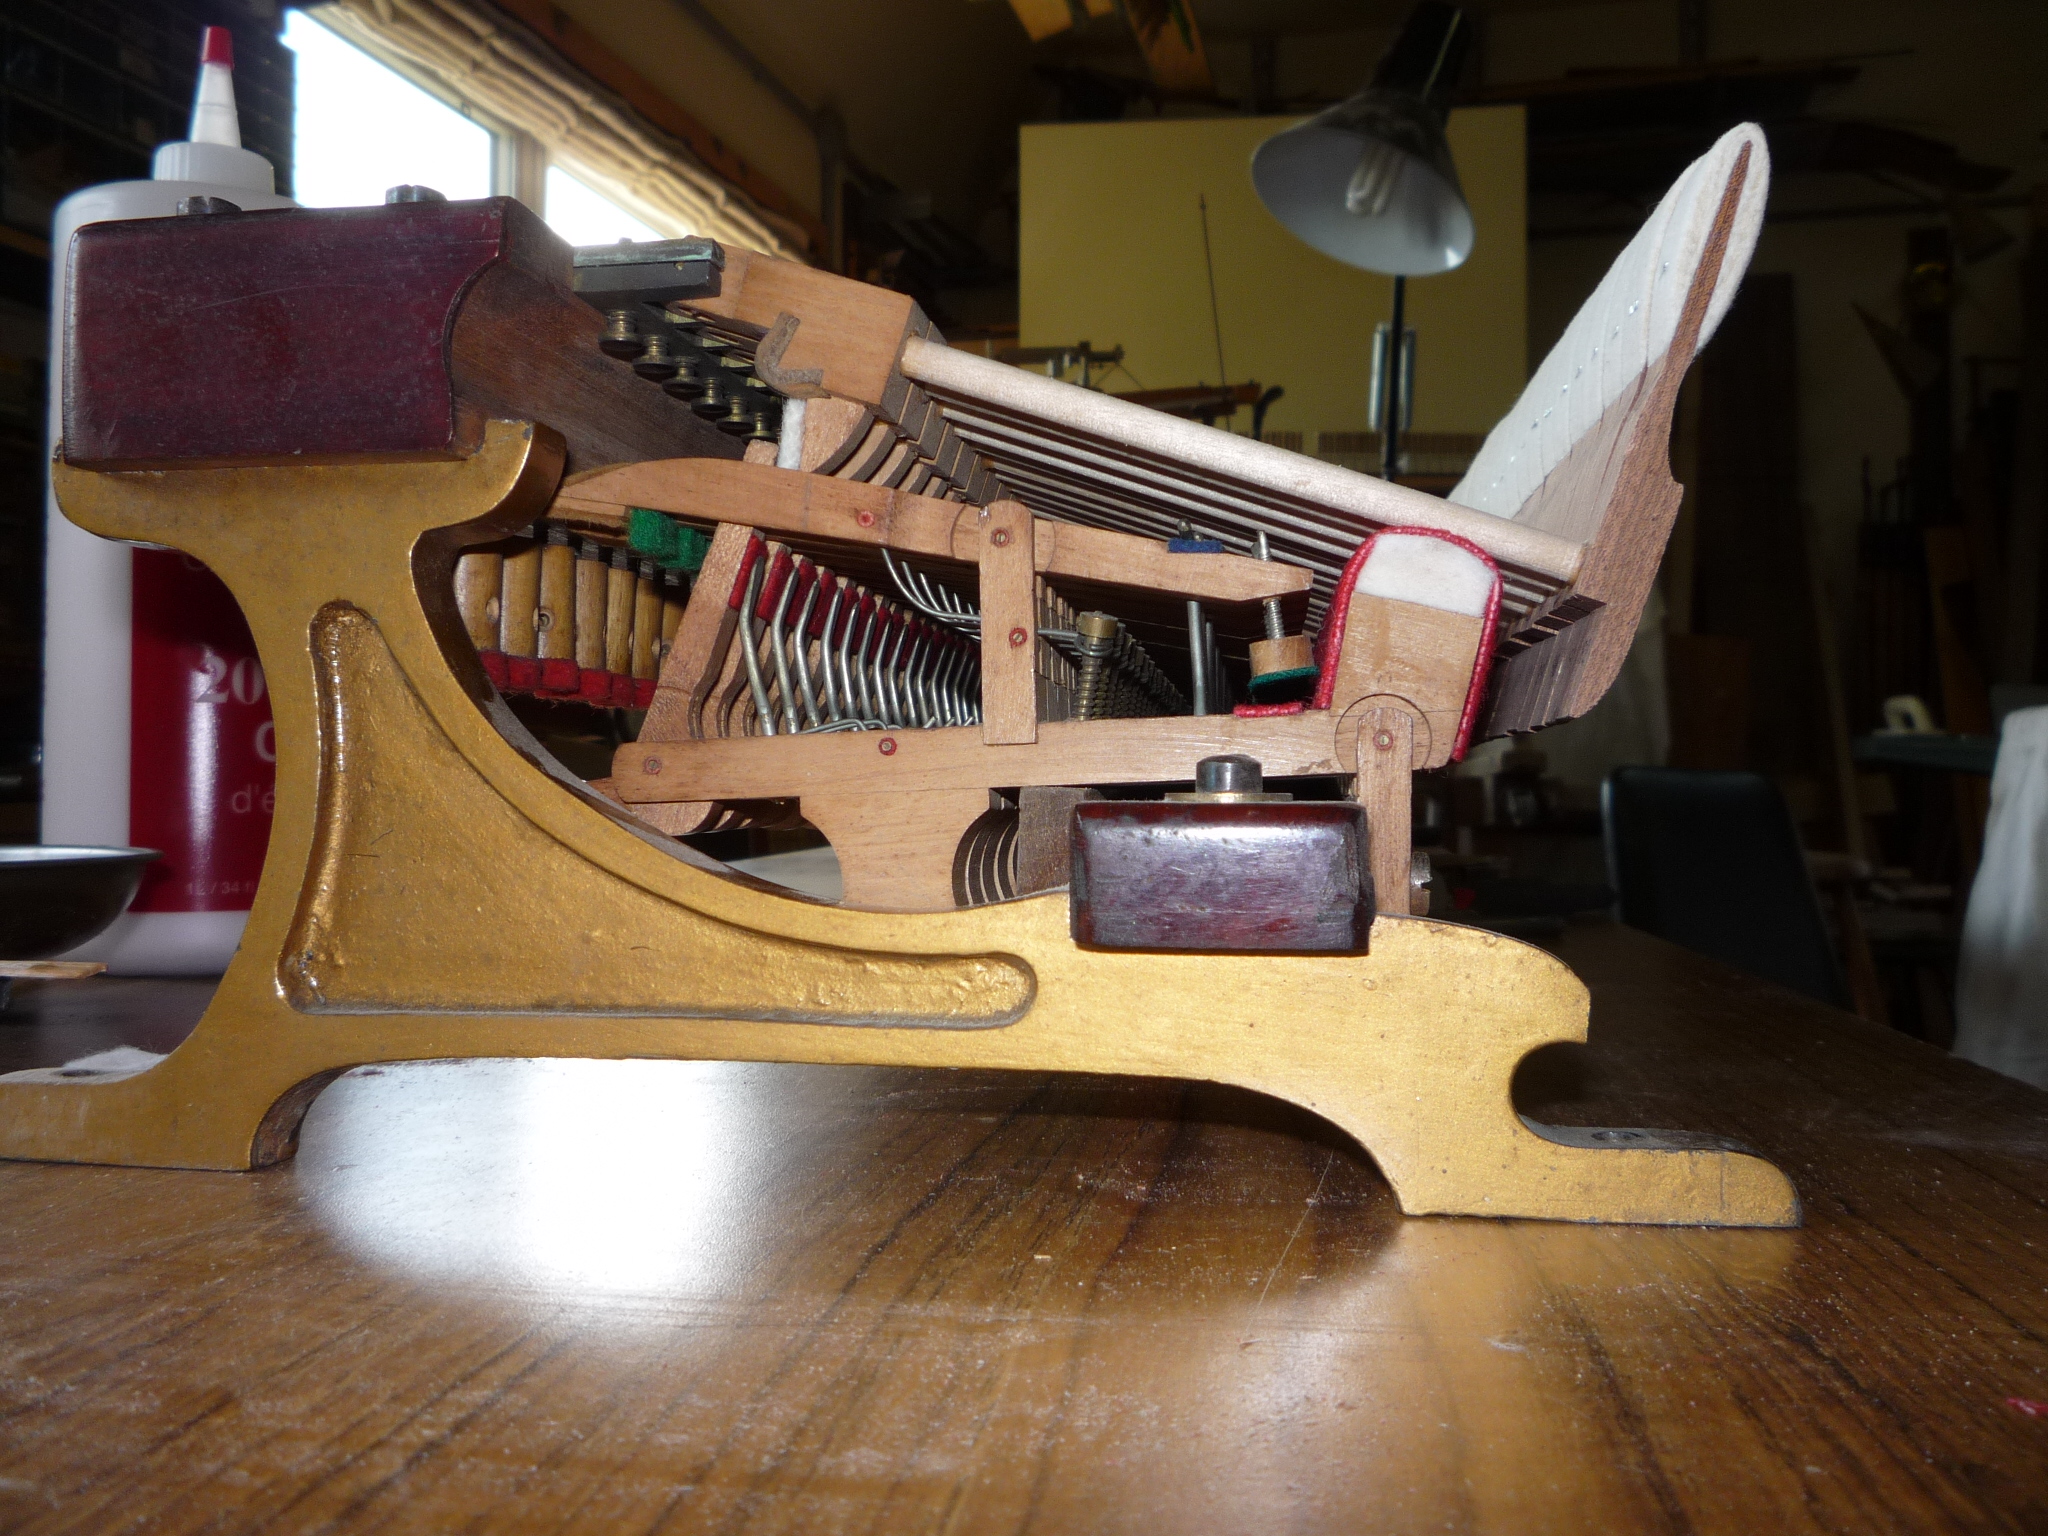
A first fitting of action onto keyboard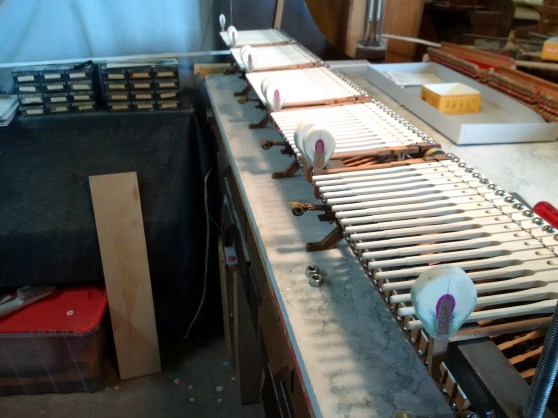
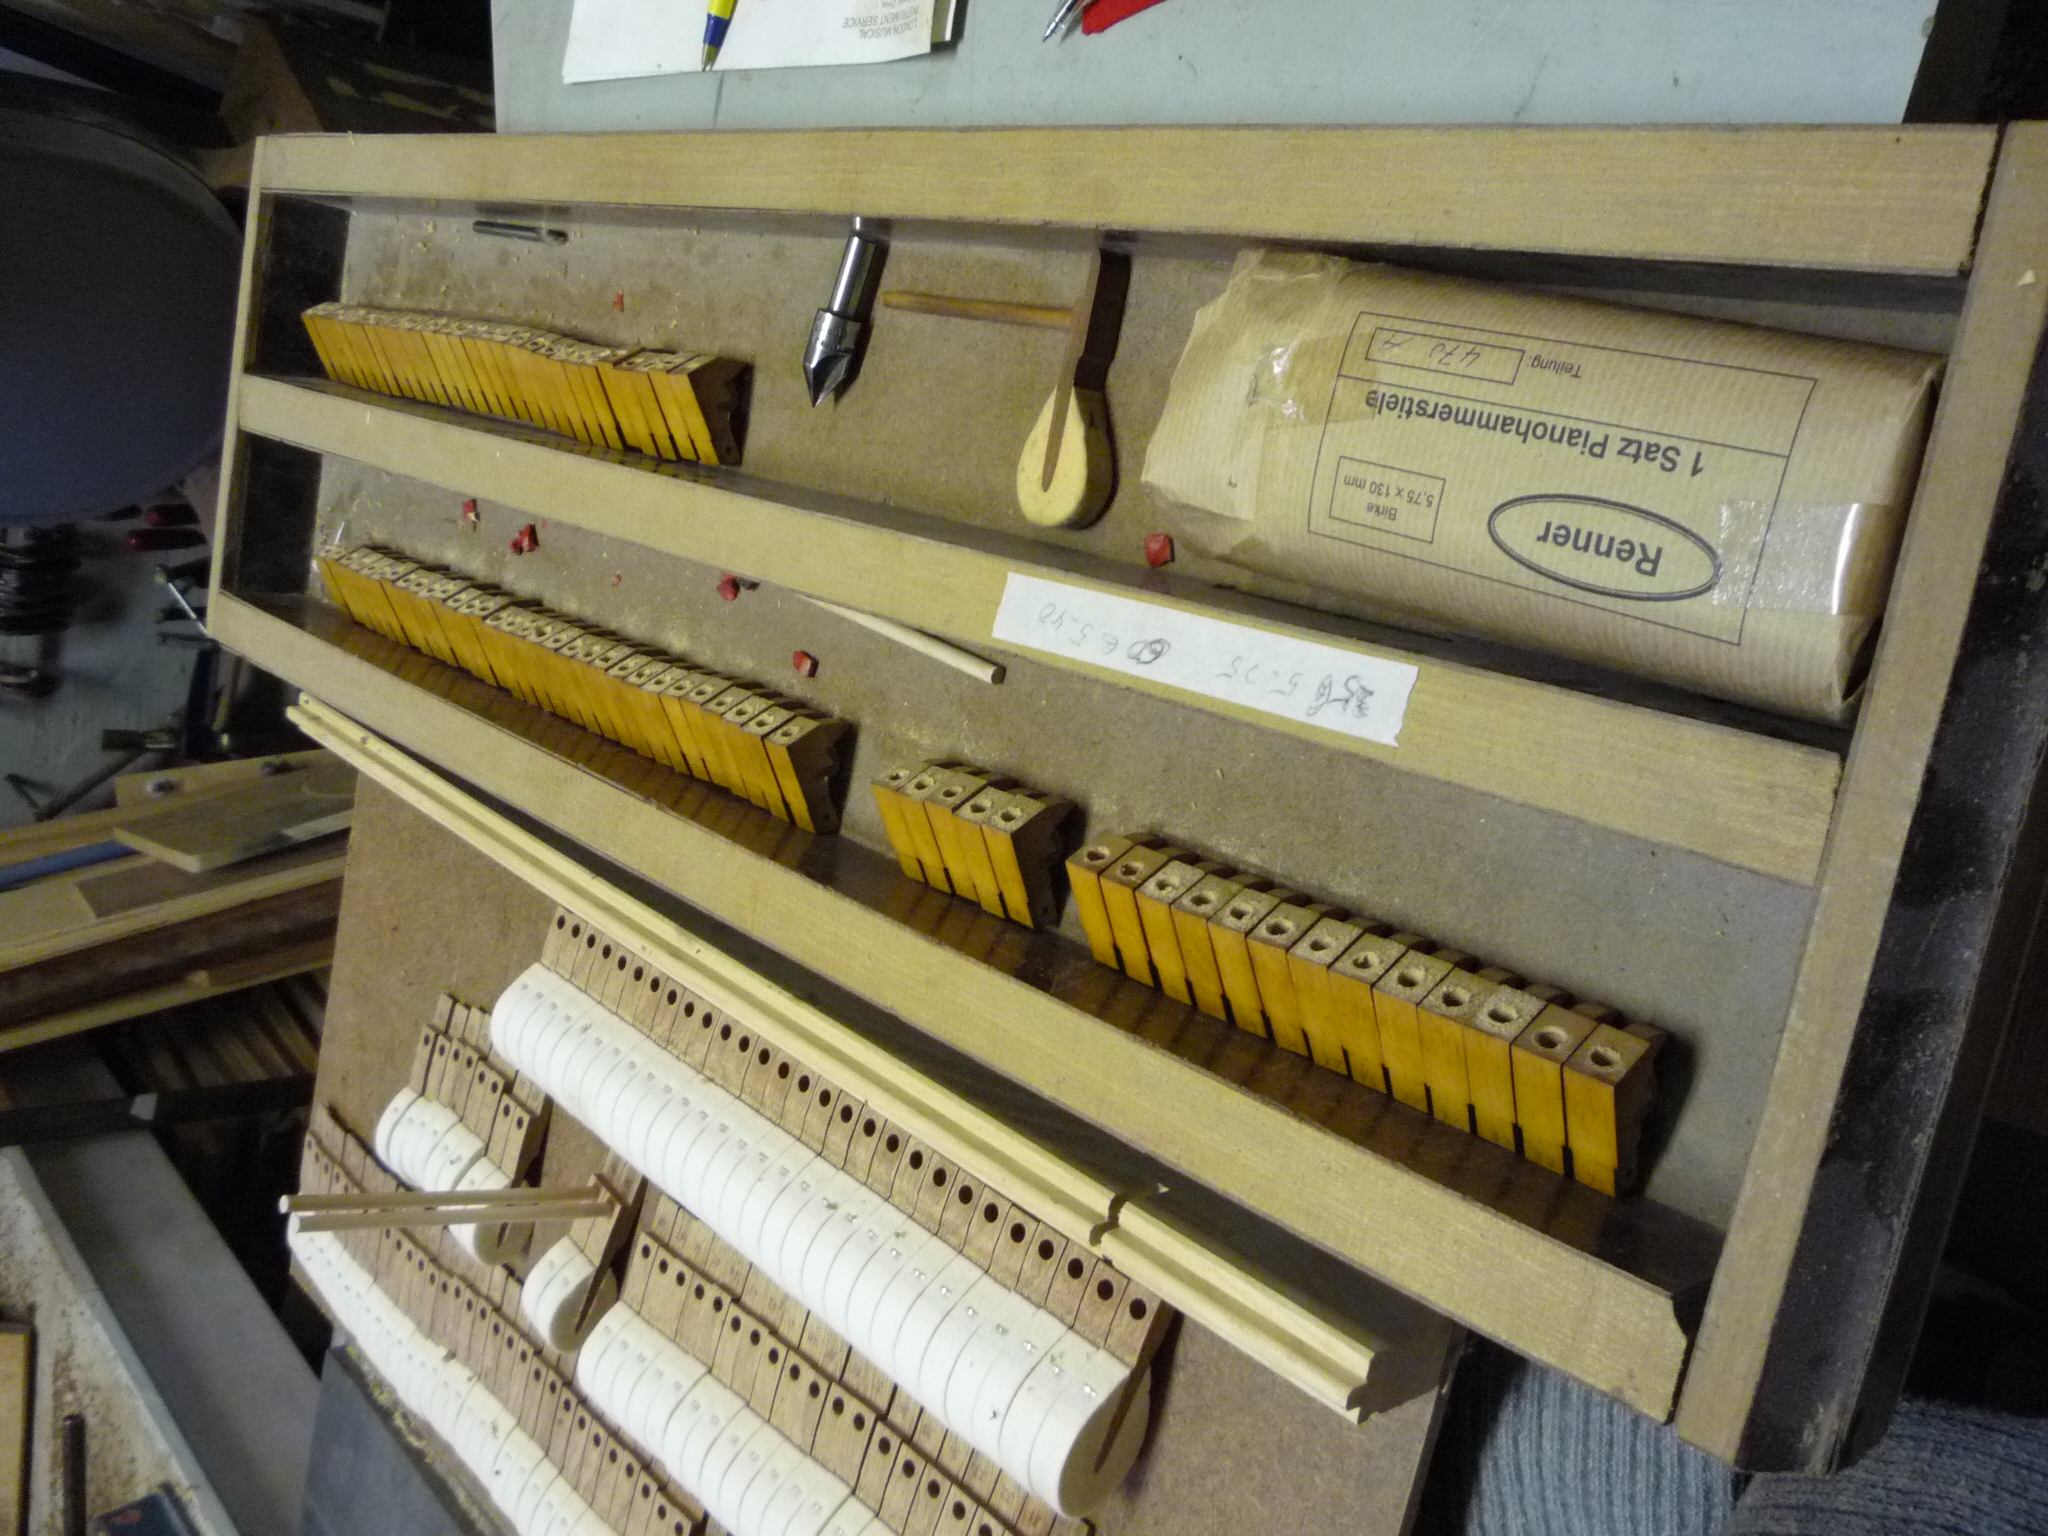
New Tokiwa hammer shanks installed, along with the end-of-section old hammers and shanks
A view down the back edge of the hammers, now all installed and tailed
Action assembled and on keyboard, ready for regulation procedure


After regulation, lots of playing, tuning and a thorough heavy playing by my Marantz PianoCorder pianoplayer, then delivery, this time up a full flight of stairs to its music room destination.
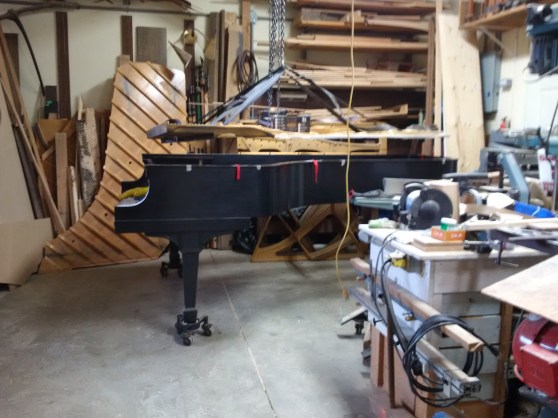
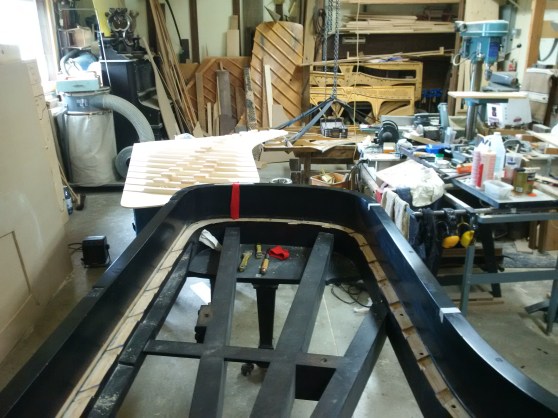
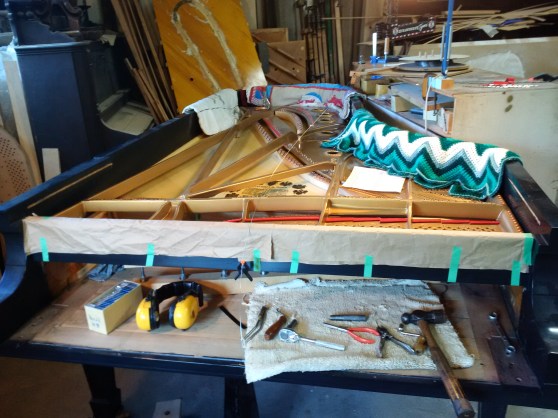
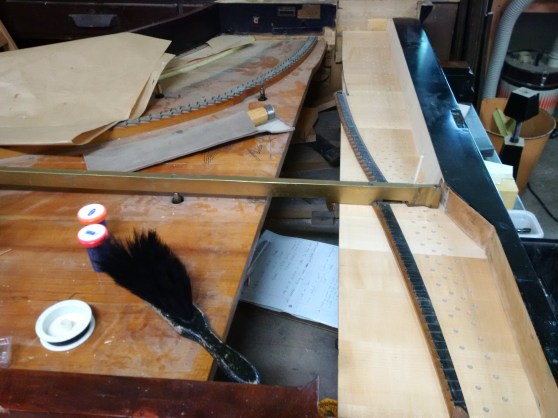
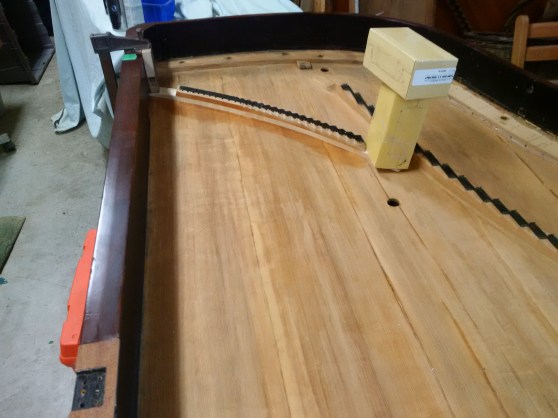
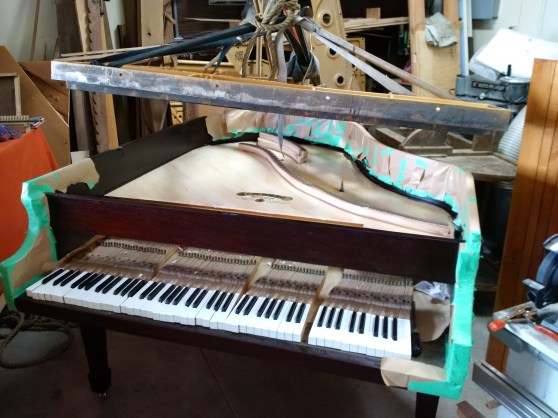
One of our current projects is a Bosendorfer grand from the 1800’s that has had several major “revisions” over time. While I would have loved to fully restore this to its original playing conditions, this is no longer possible due to its previous rebuilding work. The action is entirely the original mechanism, but structurally it has been changed. Now we are “enabling it to function well”, stay in tune and be a representative of the sound and feel of a Bosendorfer of that period. Our assignment is to install a new pinblock of a design strong enough to support stringing, design a suitable stringing scale and install new strings. We are using a Bolduc pin block made in Quebec, seven-plies of cross-banded quarter cut maple. Removing a pin block from an 1800’s piano is a challenging task. The new wire and bass strings will be age-appropriate material.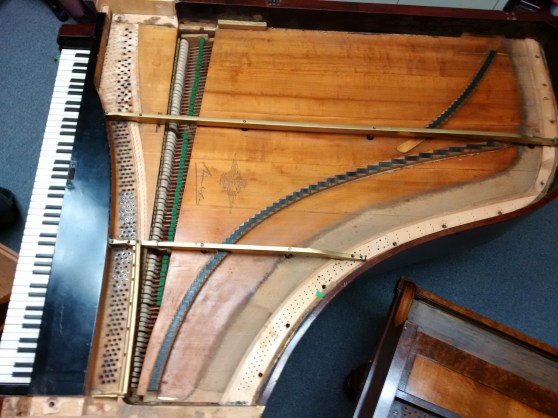
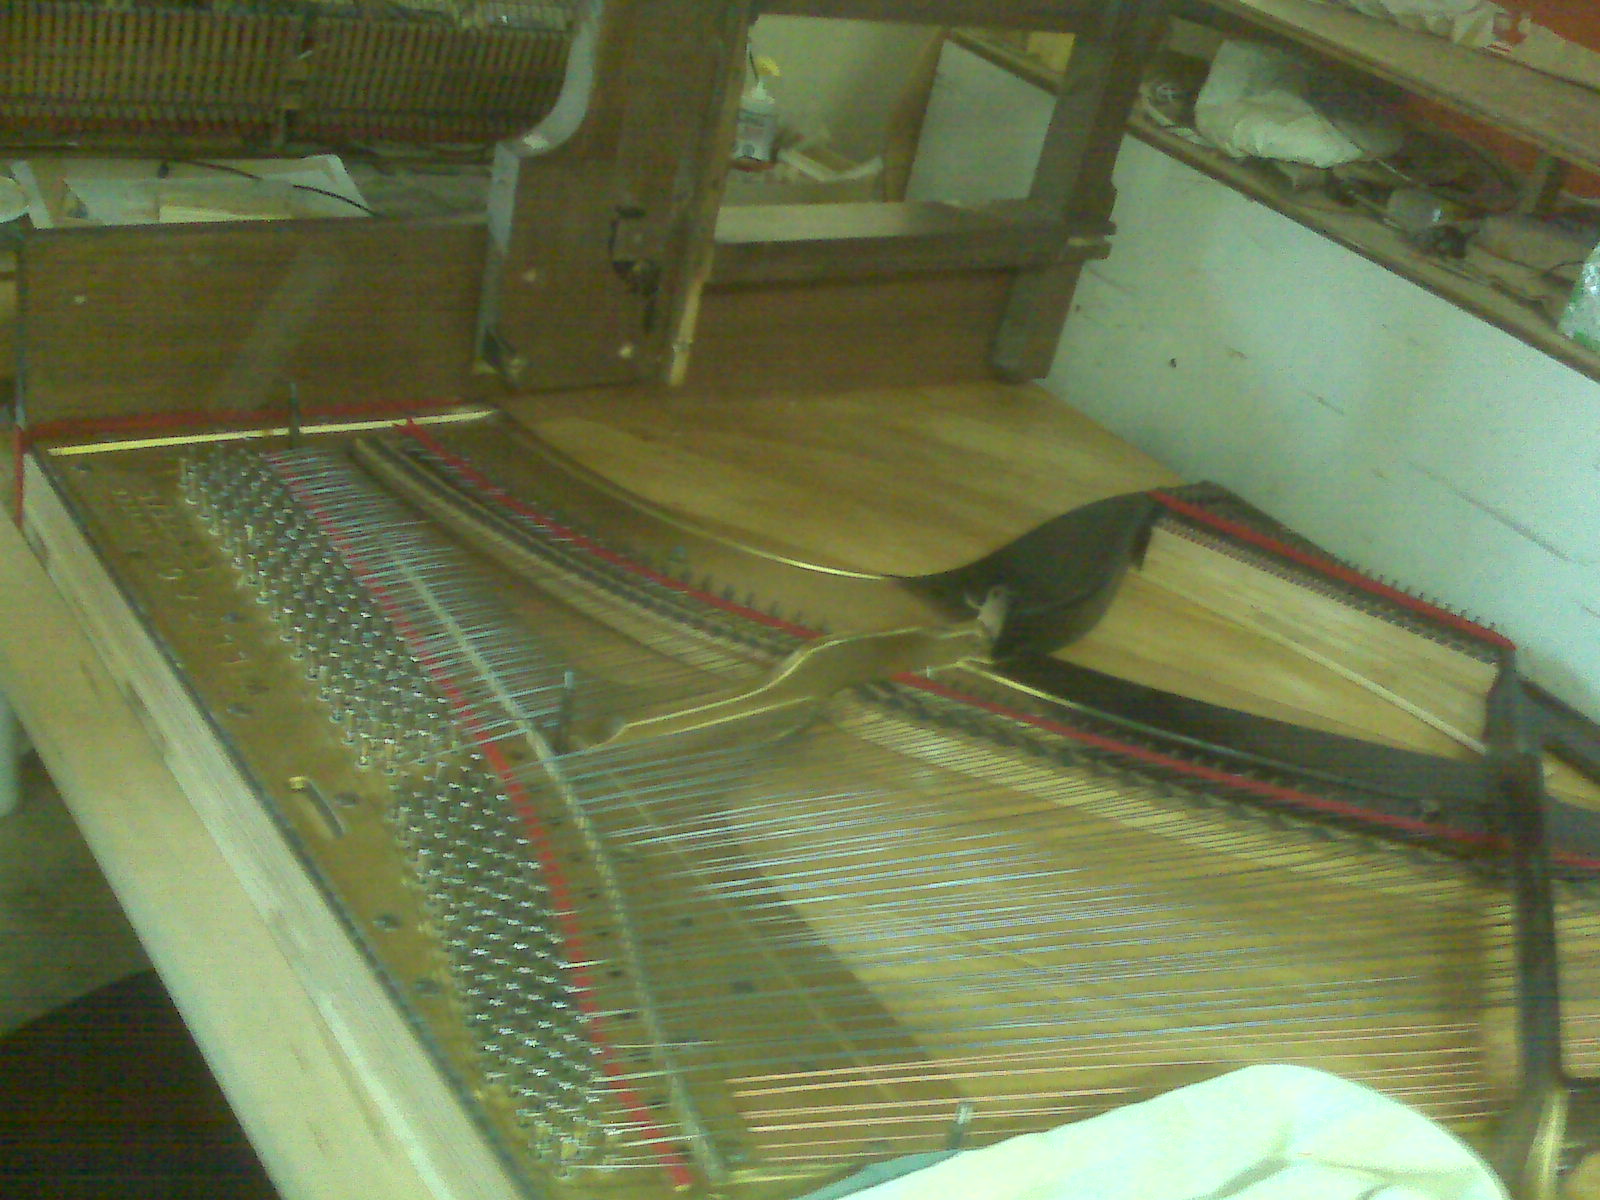
A top view of the patient, with strings, hitch pin rail and inner cheeks removed – methyl hydrate and chisel work.
Above: looking from the front, with the front bridges (or nut) removed.


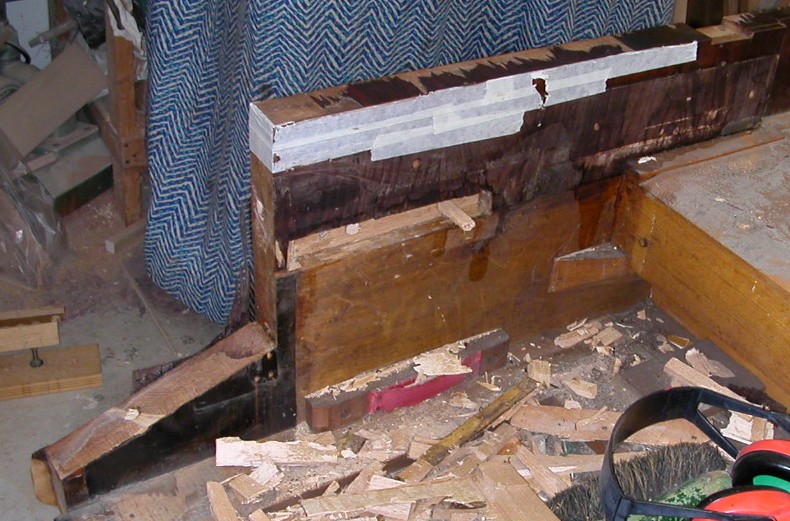
The old pin block removed and ready for examination.
The pin block is now separated from the stretcher.
A radical step: adding a steel support shelf under and ahead of the pin block to hold back the force of the string tension. The metal struts will be bolted through the pin block directly to this shelf.
At the treble end, the Capo will bolt into the leading rim of the steel shelf, which is bent at 60 degrees and has a flat rim at the original height of the pin block.
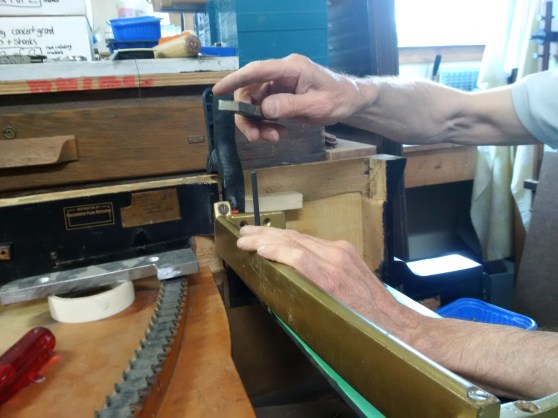
Marking the bolt holes for the Capo.
A new spreader bar to keep the hitch pin rail at the correct distance from the pin block, bearing directly onto the steel shelf assembly.
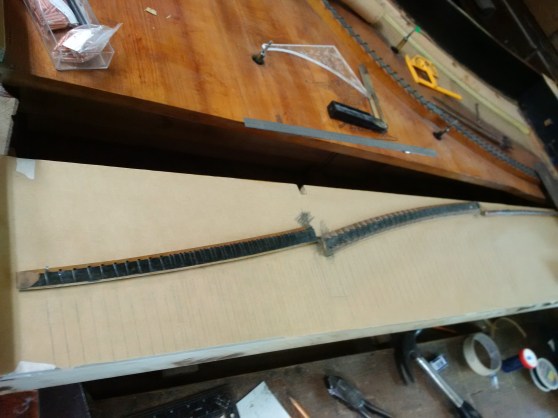
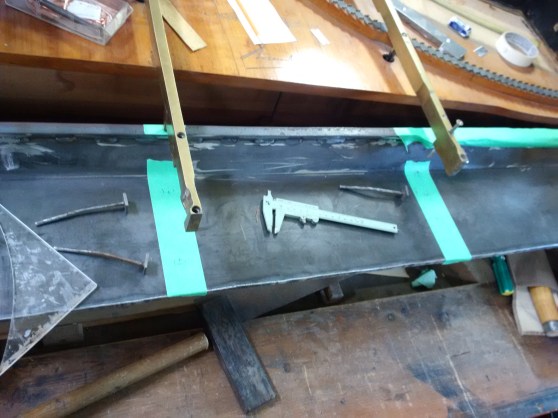
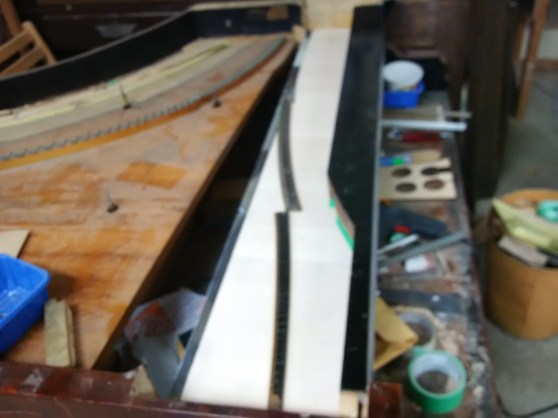
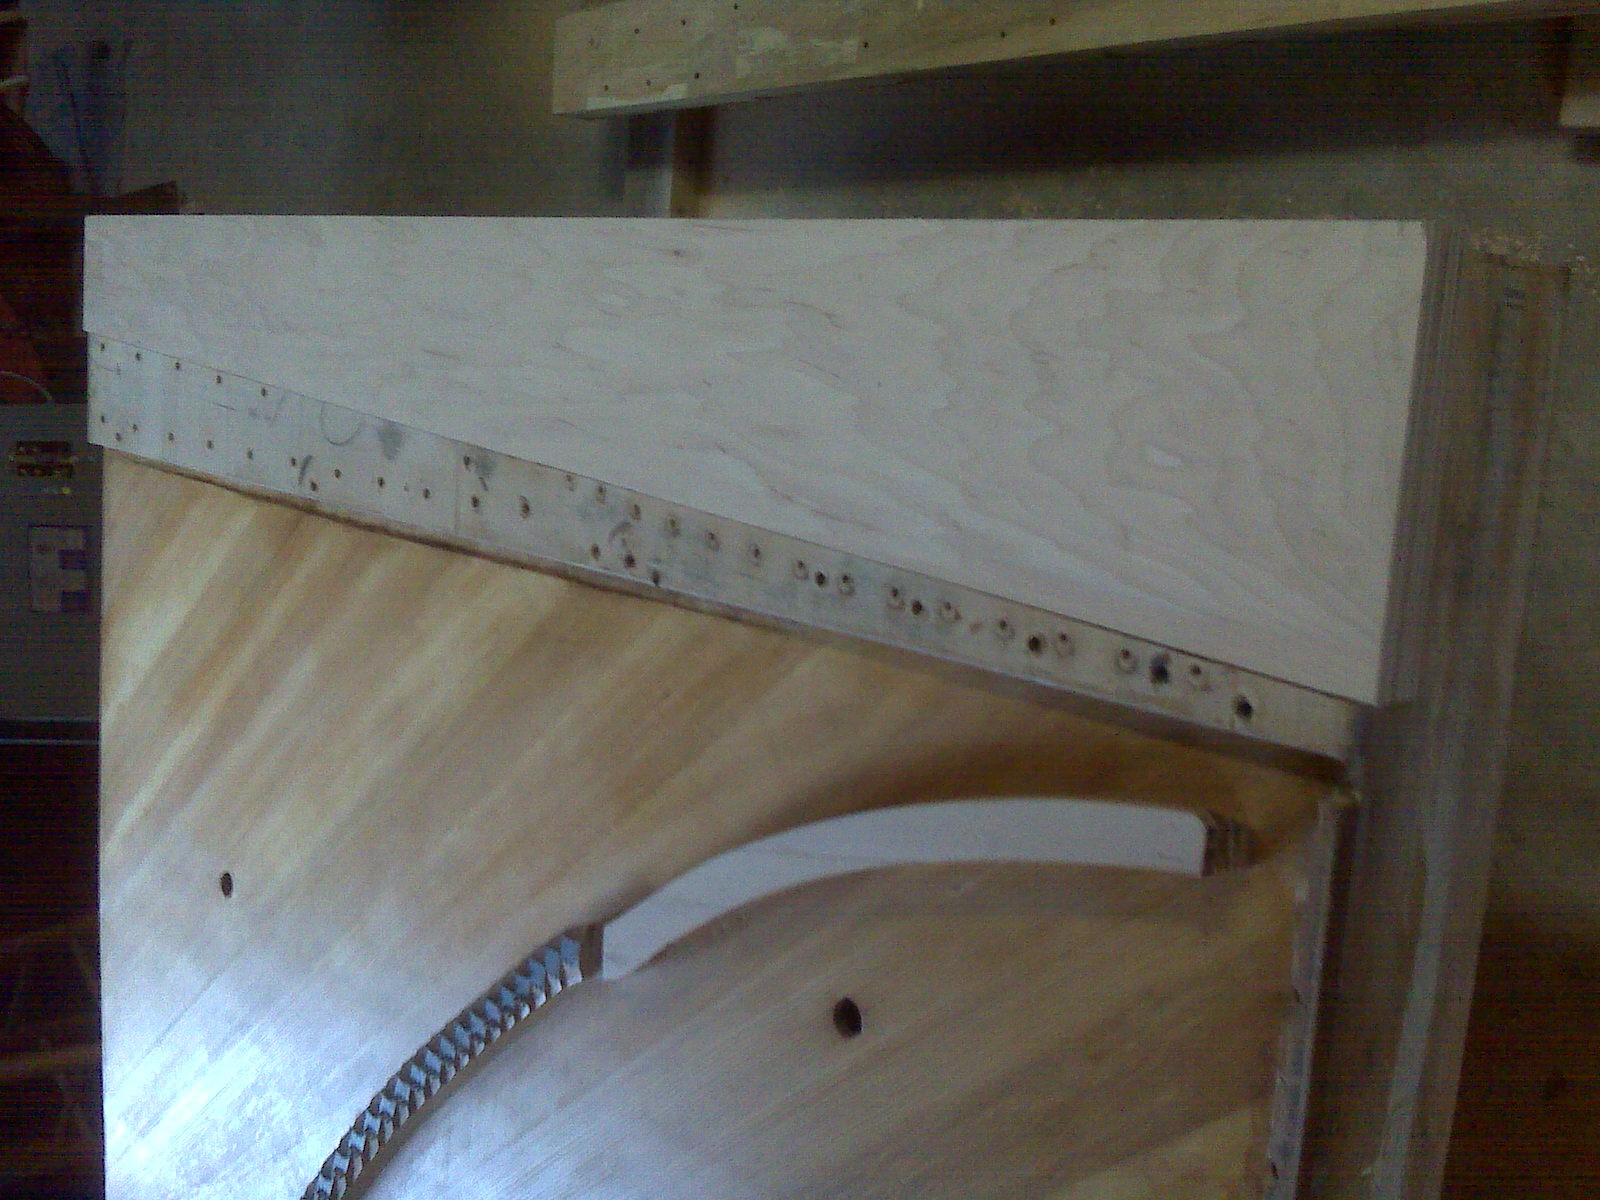
Planning the new layout for the tuning pin holes. This is not a tracing but is a re-calculation of where the strings and therefore the tuning pins should be. At this point we can improve upon the original design and manufacture.
With the action in place, checking for hammer alignment
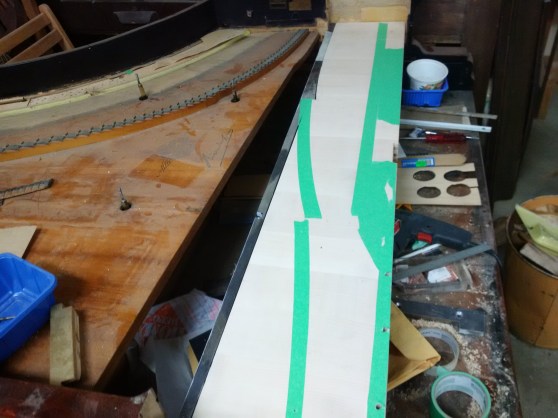
Before applying a finish coat to the open pin block, taping off areas that will be glued, as shown below.
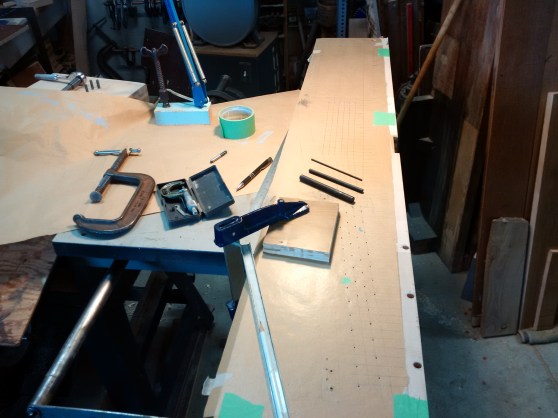
Calculating and marking for tuning pin holes is a delicate procedure! We opt for more space between tuning pins, since the new pins (1/0 size) are a bit larger than the original.
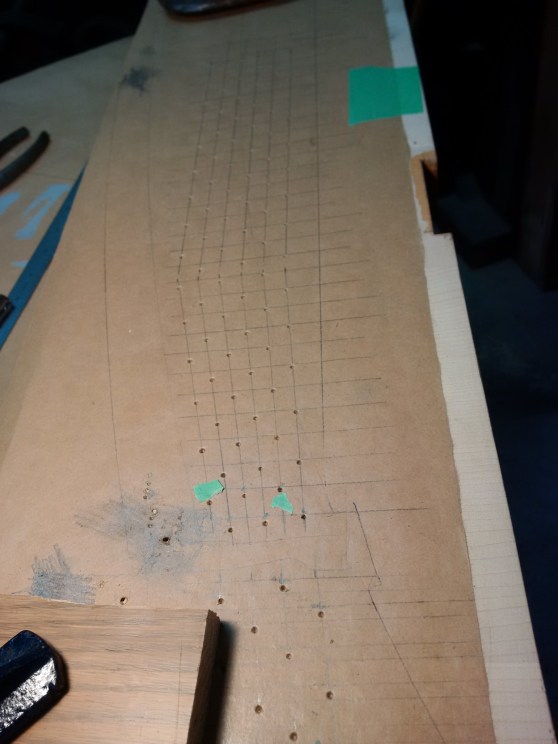
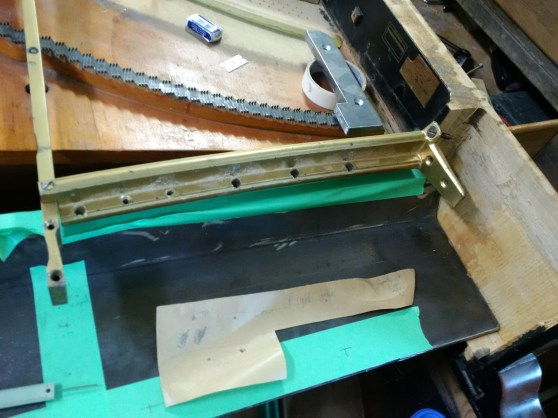
The layout of the tuning pin field takes time. The layout is then transferred to the pin block before drilling.
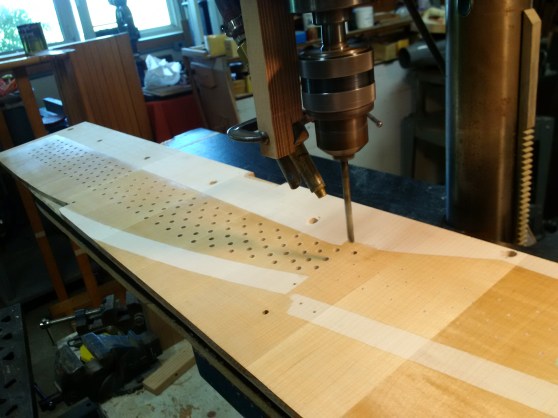
After a third coat of finish, it’s time to drill with a titanium bit, air-cooled to allow for continuous drilling and a consistent hole size.
After drilling, another fit check. Now to glue and screw it into position and finish the sides where material was routed out to allow the pin block to be extracted.
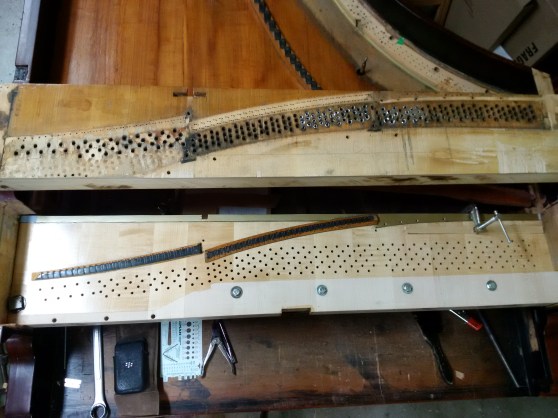
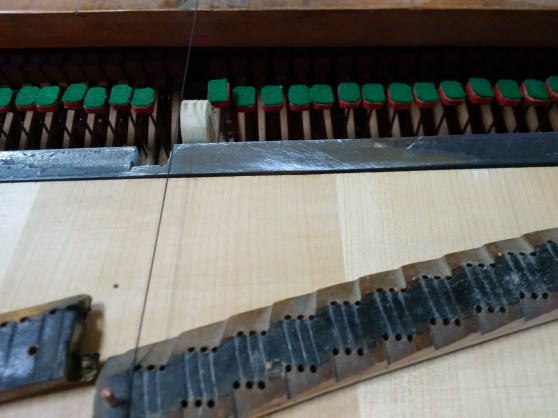
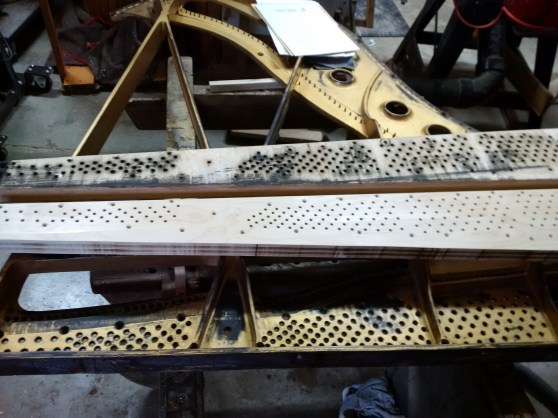
The two pin blocks, old one above, new one below, shows several changes in the layout, including opening up the pin field and re-shaping the stretcher.


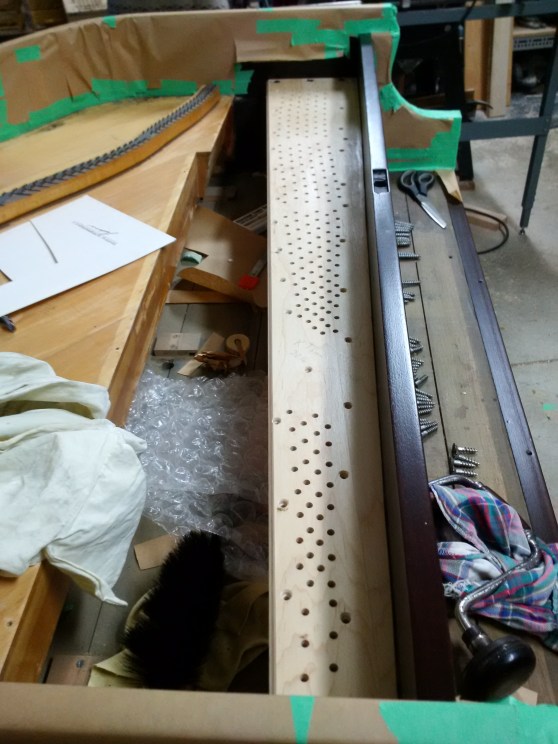
Pin block is fully installed, complete with the stretcher and new rosewood-faced pieces above, and mahogany veneer on the top rim. Tail piece and bars temporarily in place to check on the look and the fit.
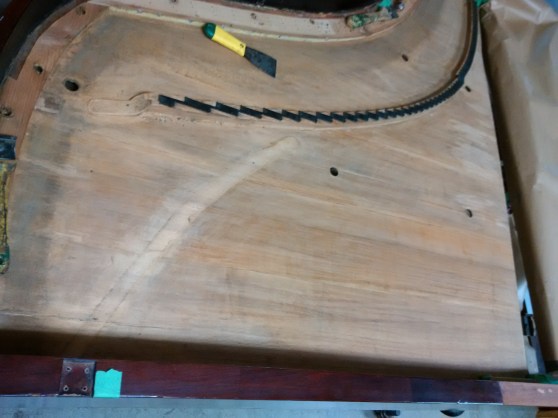
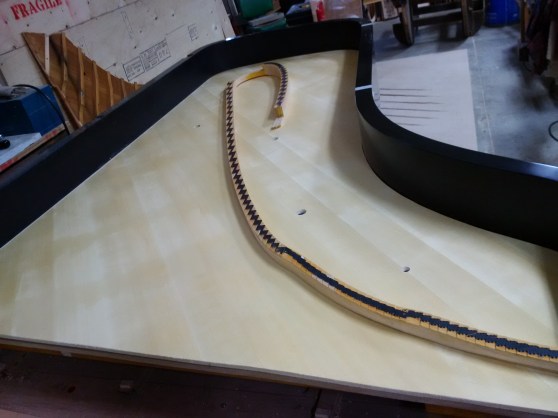
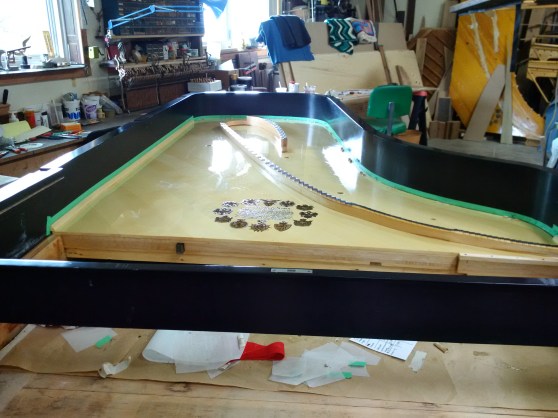
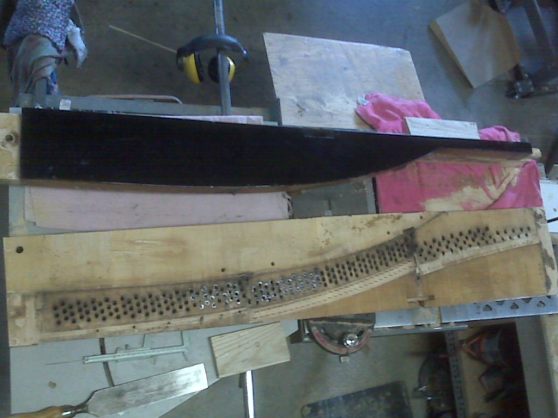
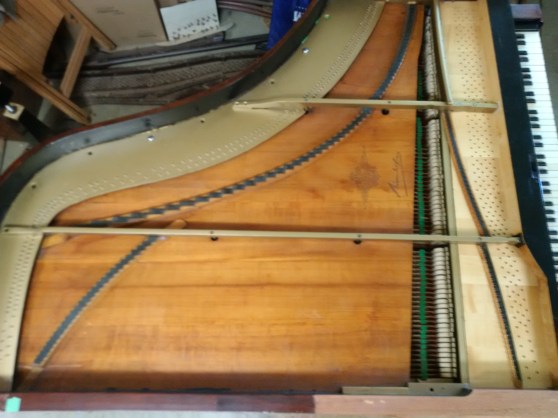
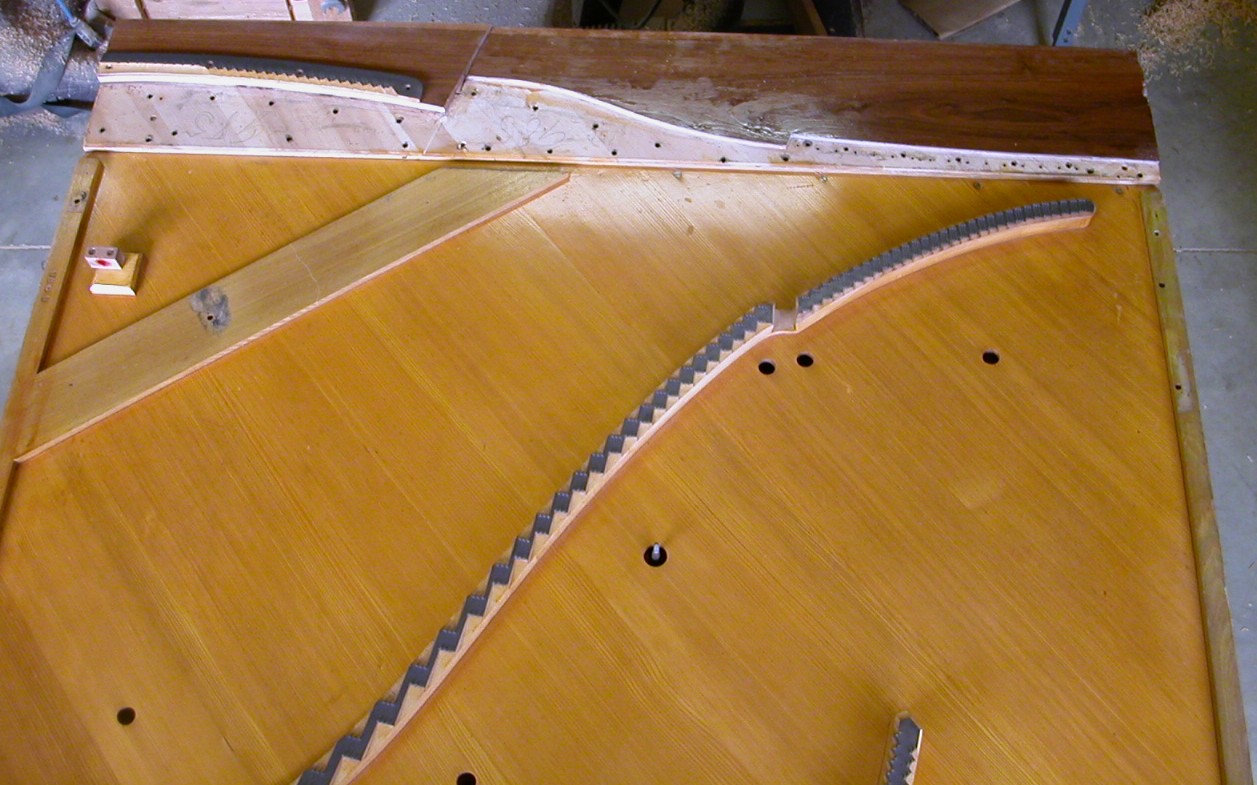
Now to deal with the sound board and bridges before stringing. We removed the bass bridge and stripped the “modern” finish off the sound board. Technicians viewing this photo will notice that there is a hole for a nosebolt very close to the rim – evidence of some radical restructuring in the past. Also the low end of the treble bridge is ready to take a jog, and yet it is truncated. Why this radical work was undertaken in the past is still a mystery!
Bass bridge with new base is glued and screwed in place.
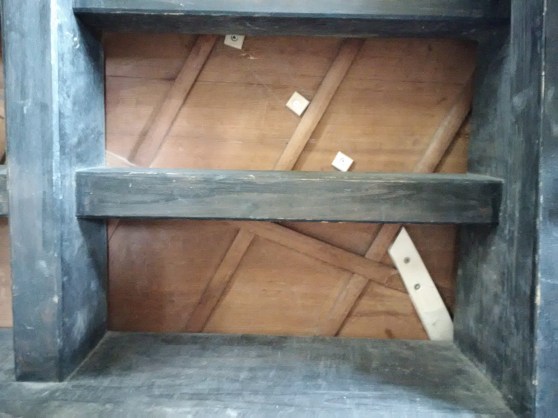
A view from below shows the attachment ot the bass bridge with new soundboard buttons and a reinforcing member.
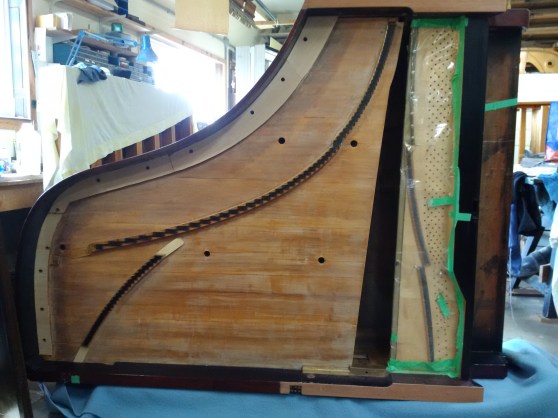
Photo-op while the piano is on its side:

Bosendorfer pianos have heavily framed construction underneath, but all of spruce for acousical reasons.
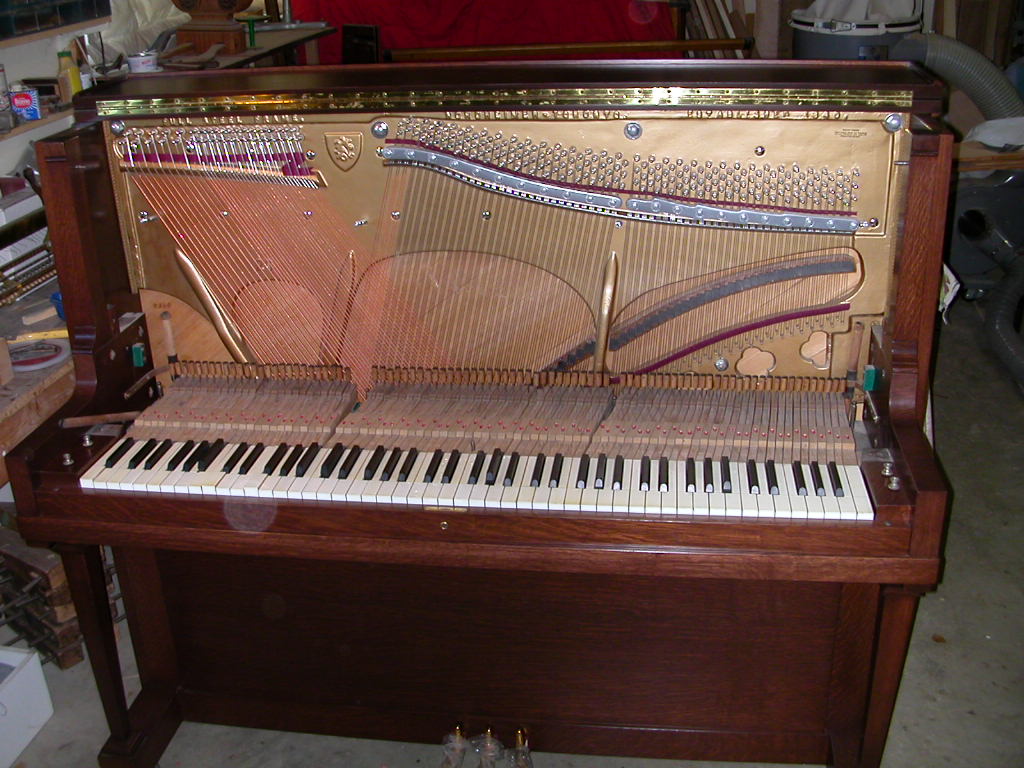
A recent completed upright piano project is a total rebuilding of an early 1900’s Heintzman upright, E scale. Delivered to new owners March 17, 2016.
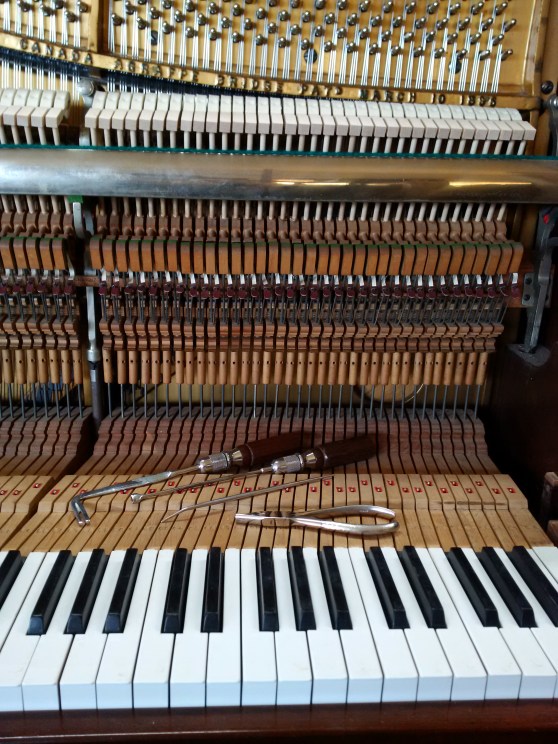
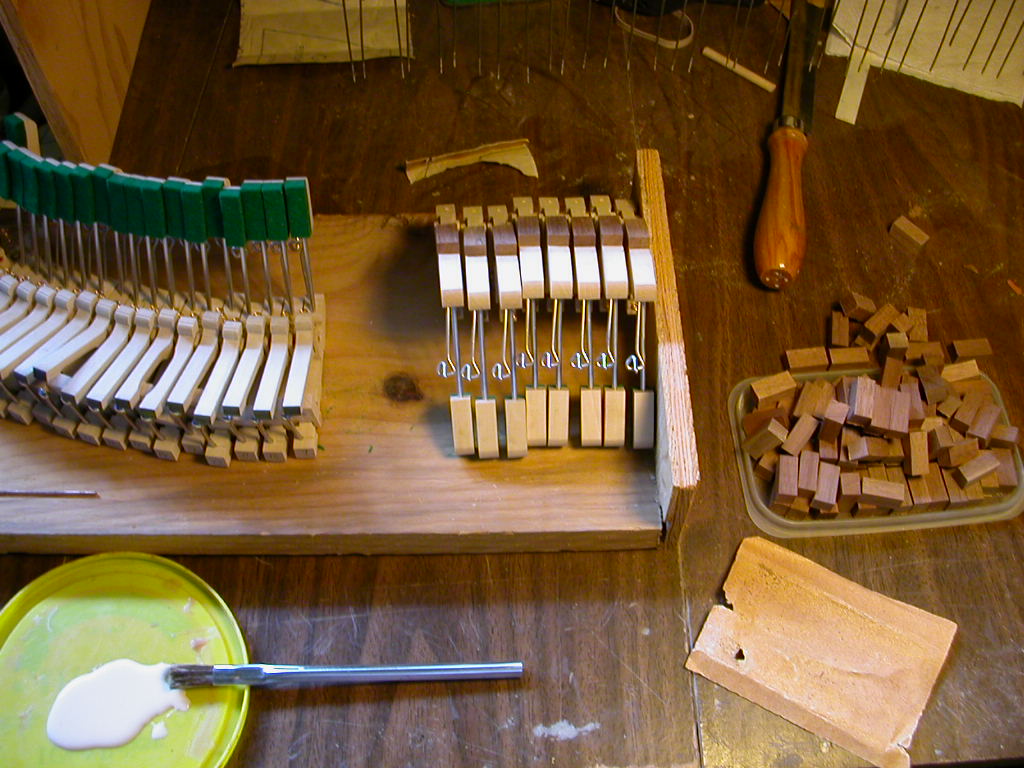
Here are a few pics of the hammer installation procedure:


New catch leather, bridle tapes, shanks and Abel hammers sized for the correct weight for this big piano. As hammers are installed the catches are supported to ensure that they are all at the correct height and angle to the hammer shank and thus the touch is consistent.

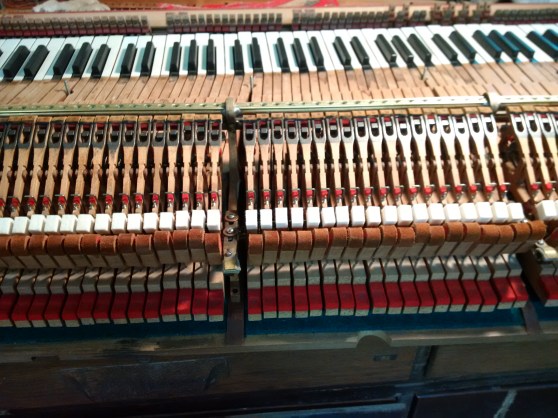
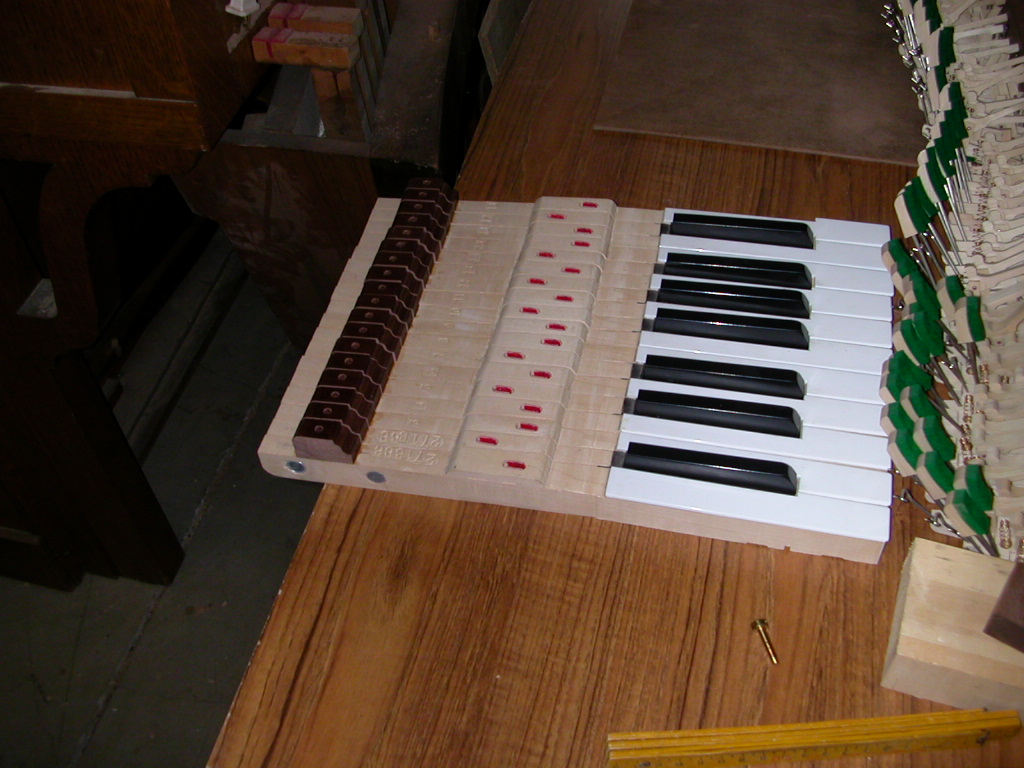
Next procedure after hammer installation is install and level the keys, regulate and voice, and tune many times before delivery to the new owners. The newly-resurfaced keys require levelling and spacing out, but once that is done the keyboard looks like brand new.
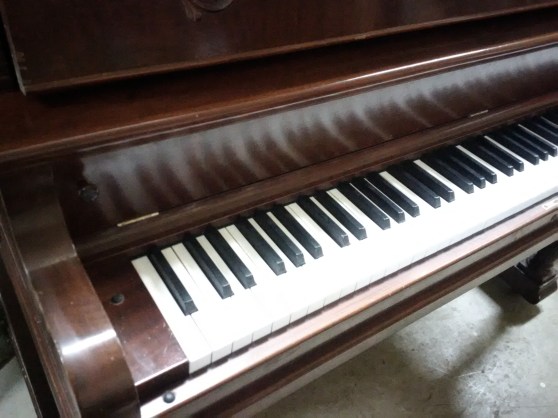
Keyboard resurfacing by my colleague Bruce Halliday yields a beautiful result.
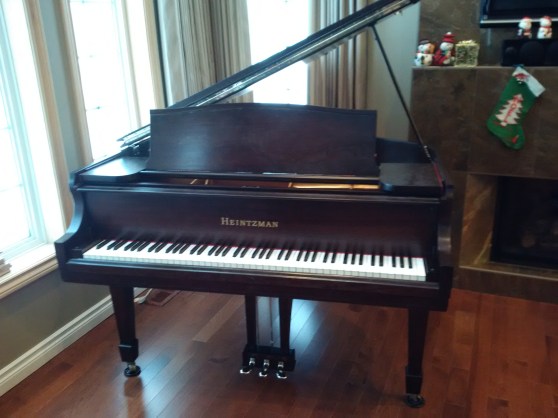
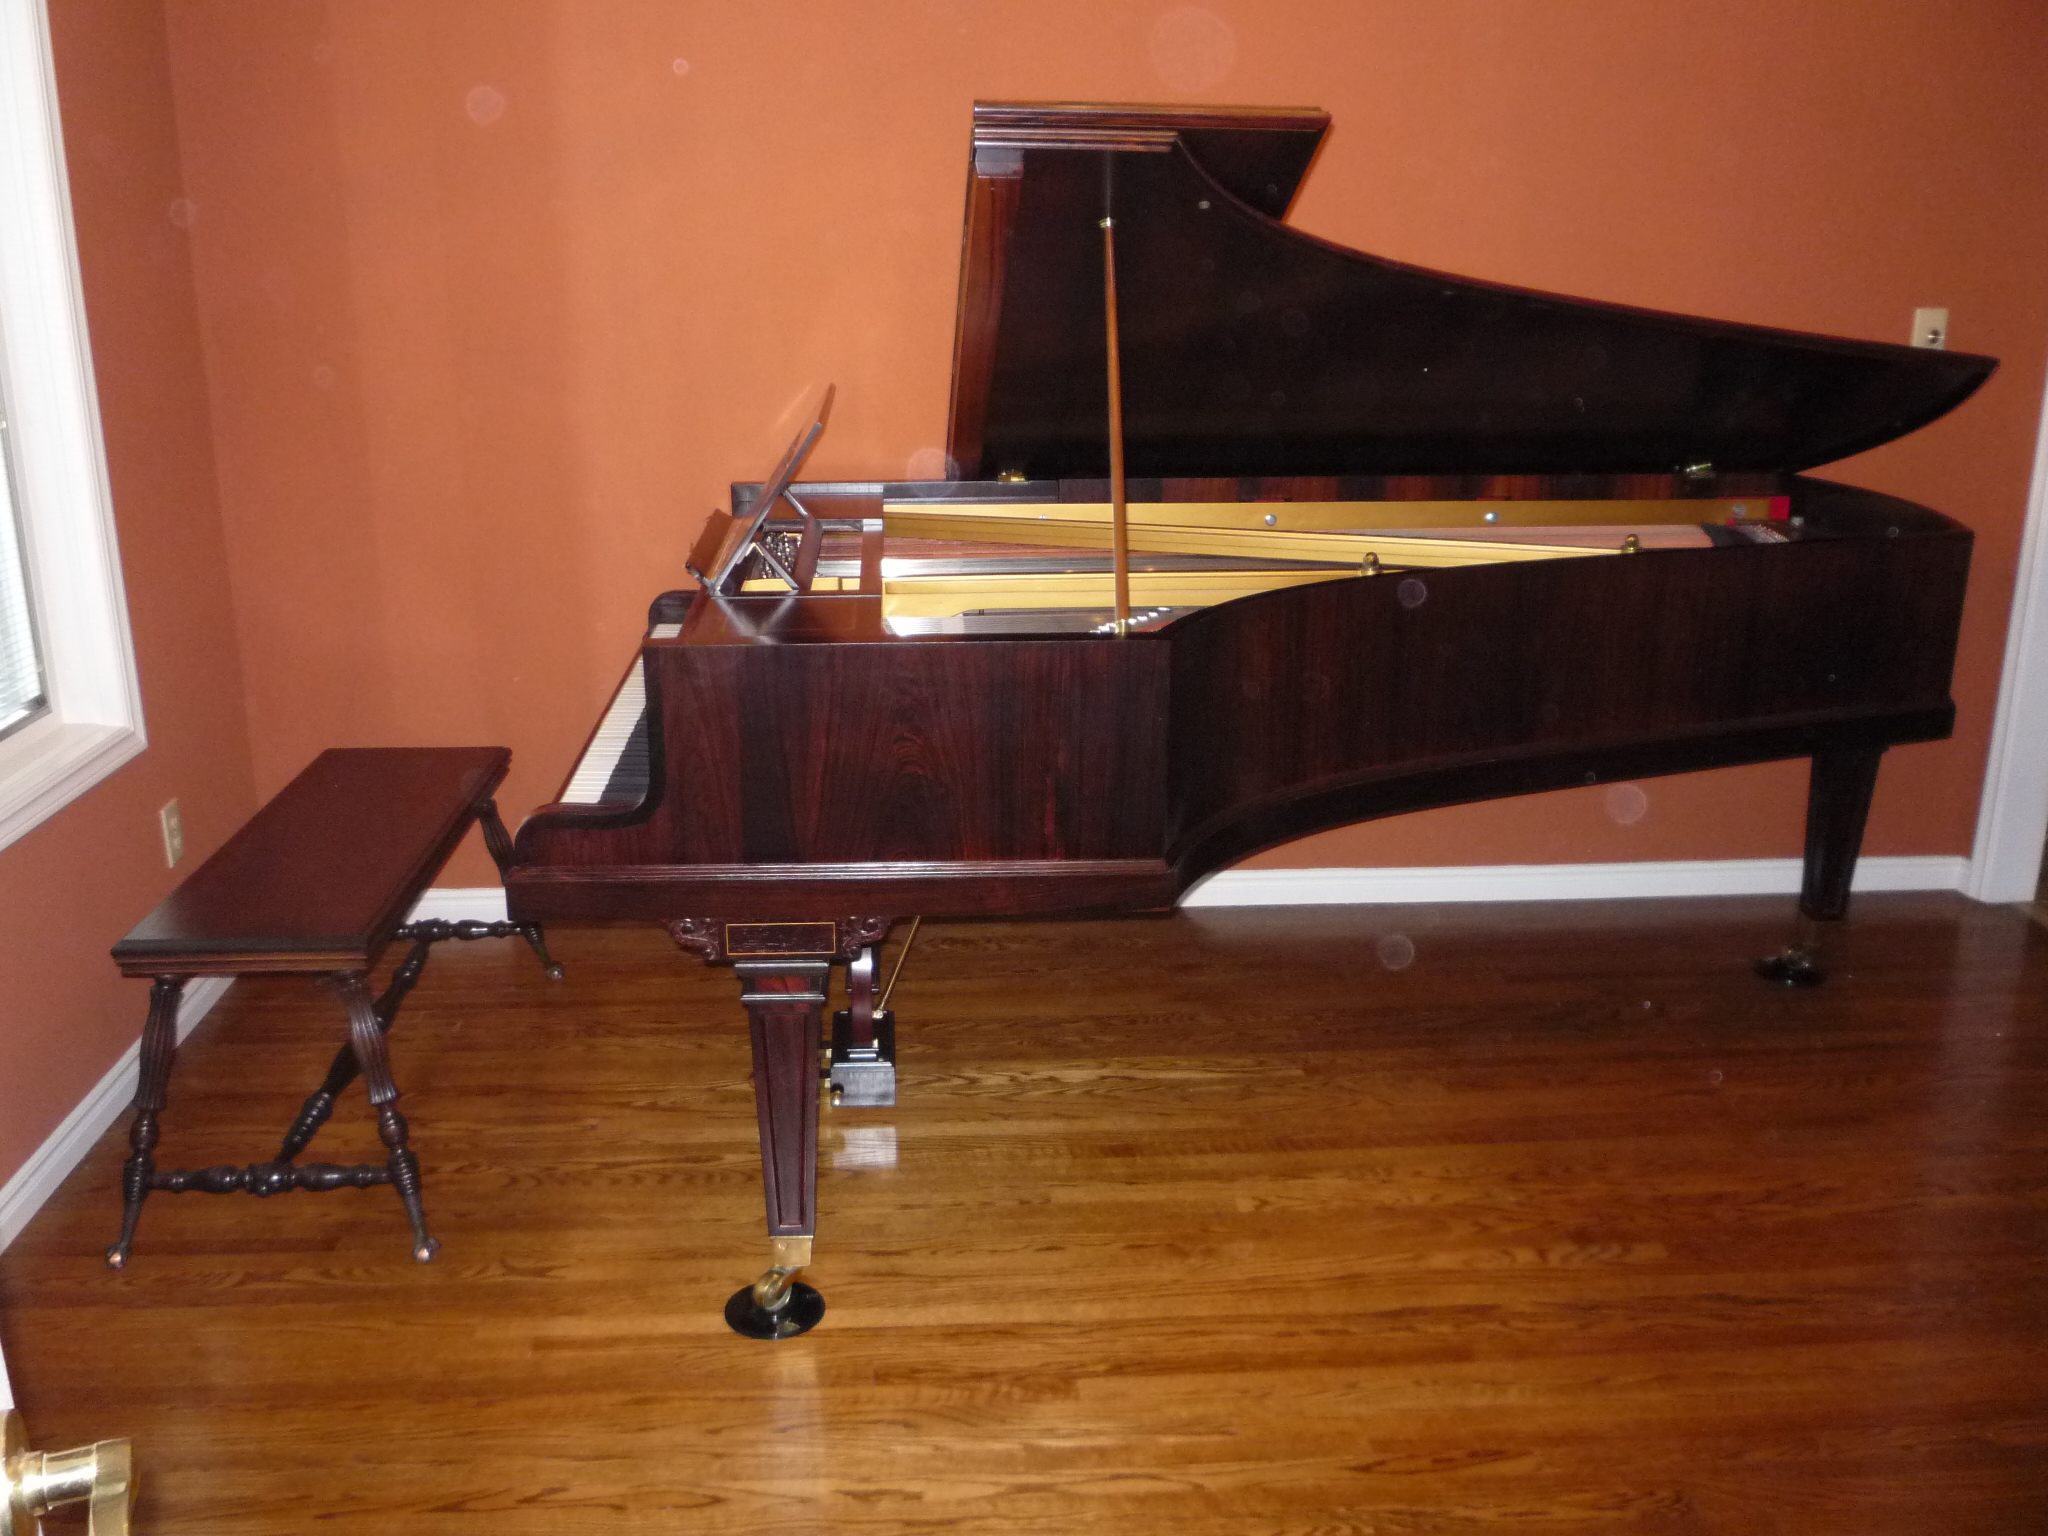
Our most recent small grand project is a Heintzman E Miniature grand, 5′ 6″, refinishing by Live/Work Interiors and Cabinetry of Sarnia. We restored the workings to as-new condition, replacing pin block, strings, hammers, dampers and knuckles. Delivered just in time for a Christmas party in December 2016.
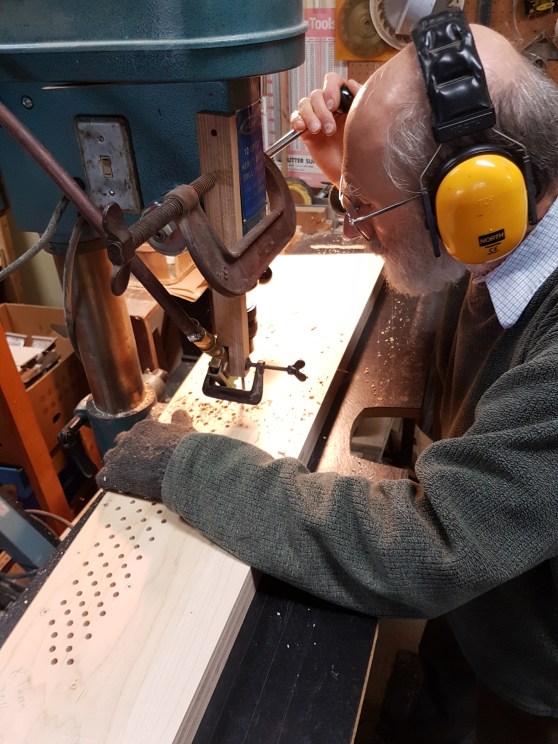
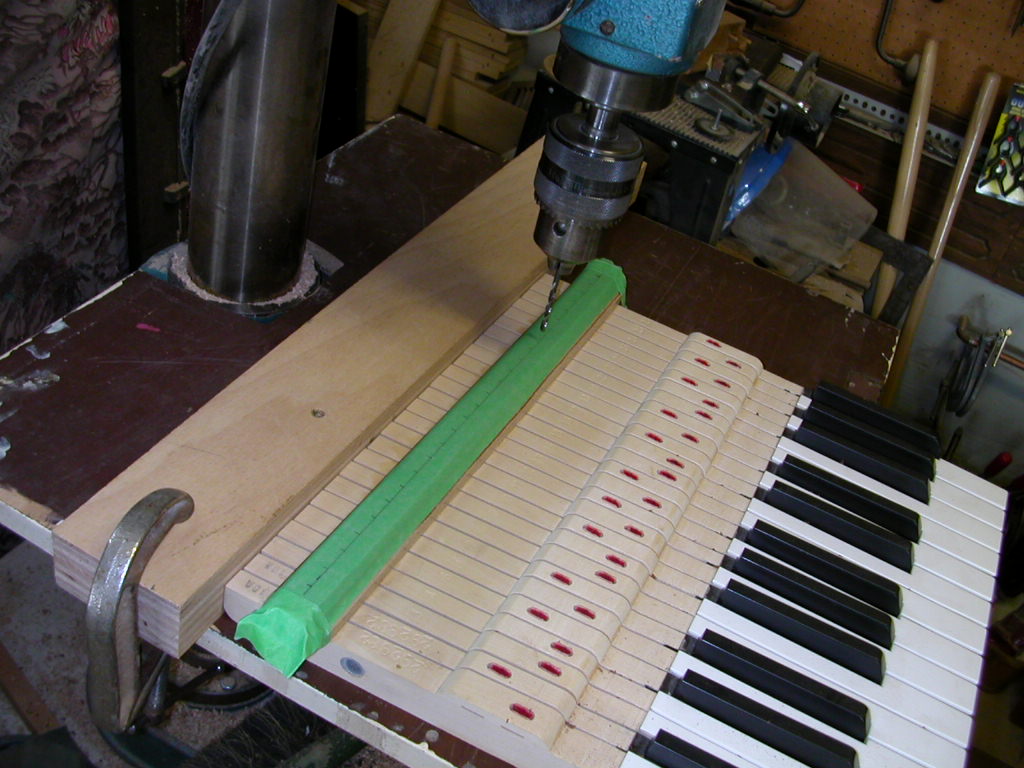
Drilling the Bolduc pin block for new 2/0 tuning pins
Old and new pin blocks for comparison, astride the plate
New pin-block carefully located and attached to the rim
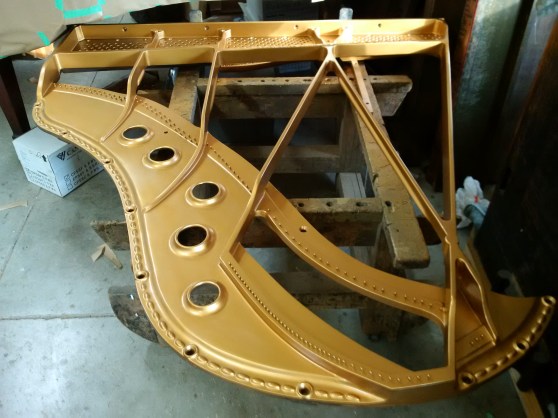
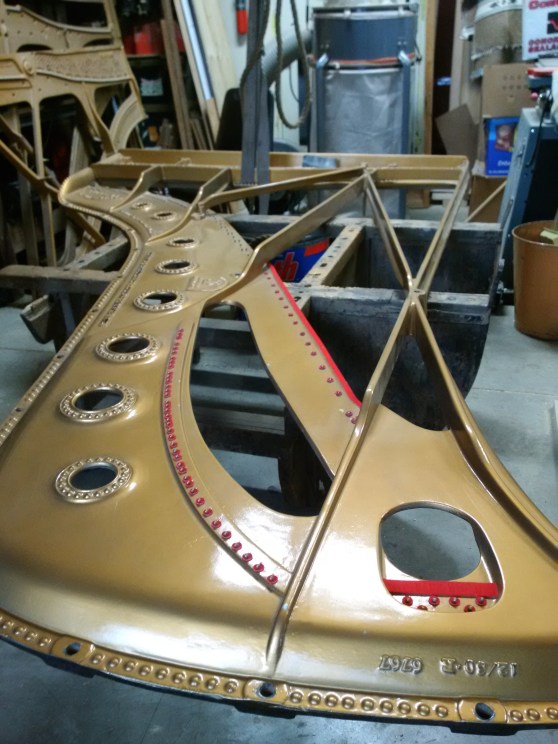
The cast iron plate was cleaned and painted in a metallic gold to suit the new cabinet finish colour, a dark mahogany similar to its original

Lettered and numbered
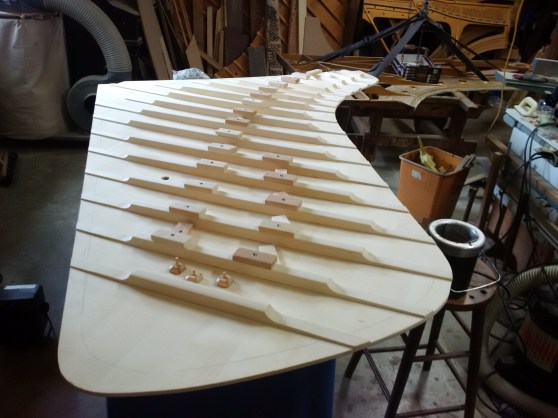
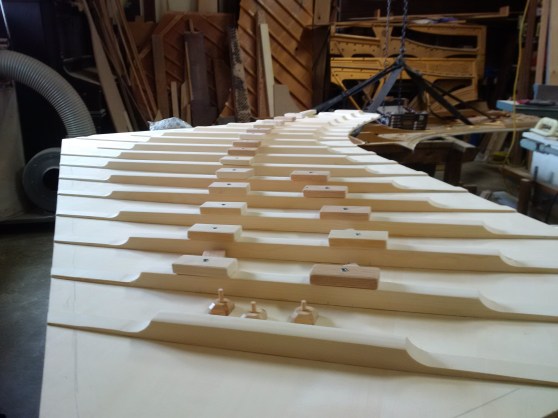
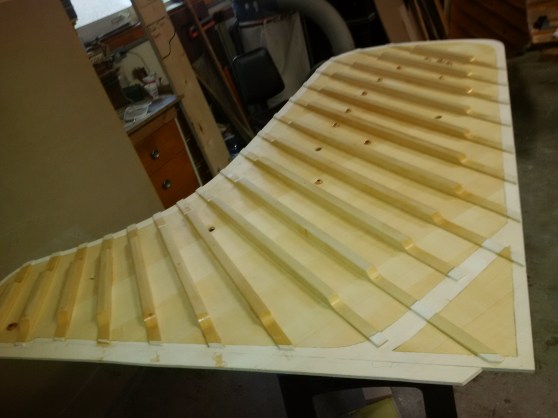
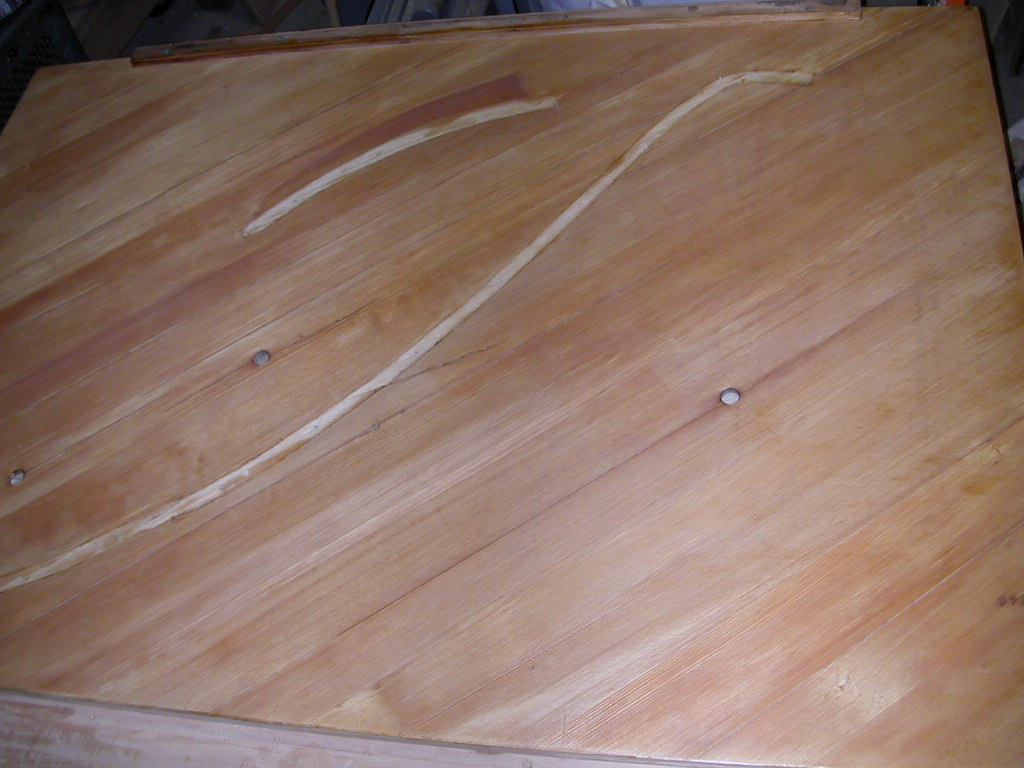
Several cracks in the soundboard required shimming with spruce shims after the soundboard panel was firmly glued to the ribs in the affected areas
Another view of the soundboard with our special soundboard clamps in place
New Abel knuckles installed on the original hammer shanks
Damper heads cleaned, wires polished and new Renner damper felt installed
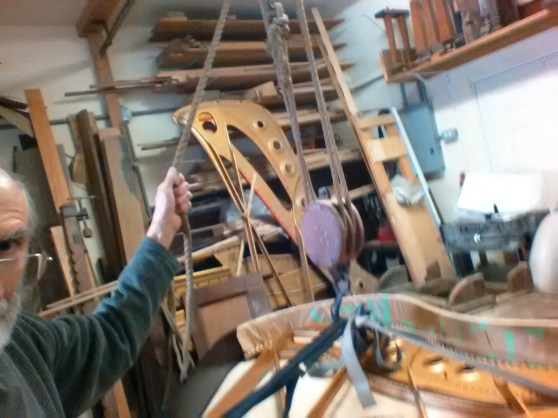
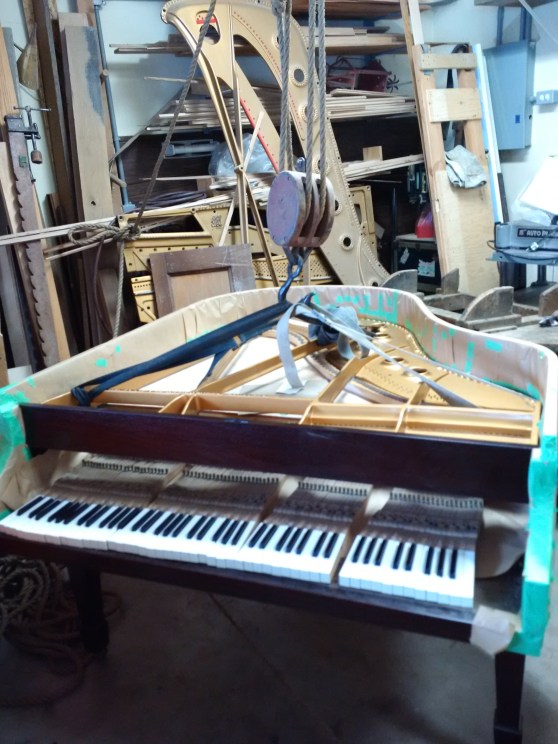
With the soundboard finished and a new decal in place, it’s time to drop the plate into the piano, this time using our block-and-tackle for fine control of the procedure
Part-way along in the stringing process, using a newly calculated stringing scale with Roslau and Pure-Sound wire

A post-delivery tuning to finish my work in 2016.
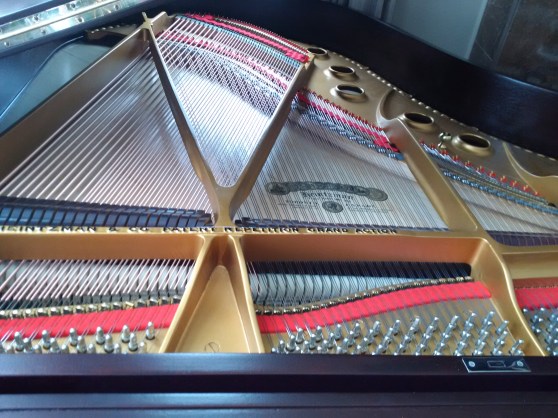
Below is a look at an early Heintzman grand, built in the 1890s and quite different in style and tone to the one above. This one, a Model B, 6′ long, was for most of its life in a prominent home in Strathroy. I rebuilt this instrument in 1977 and then it spent the next forty years in London, now it is moving to a new life in Stratford. The action has new Renner wippens, shanks and hammer heads.


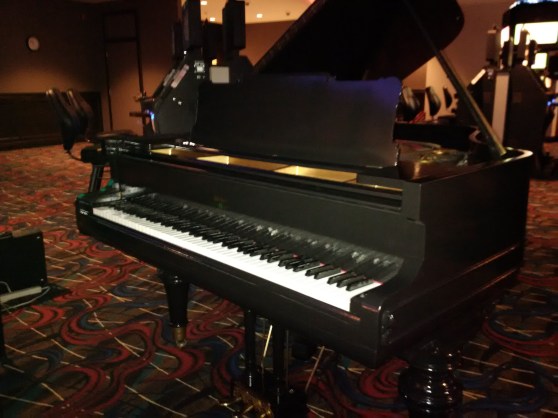
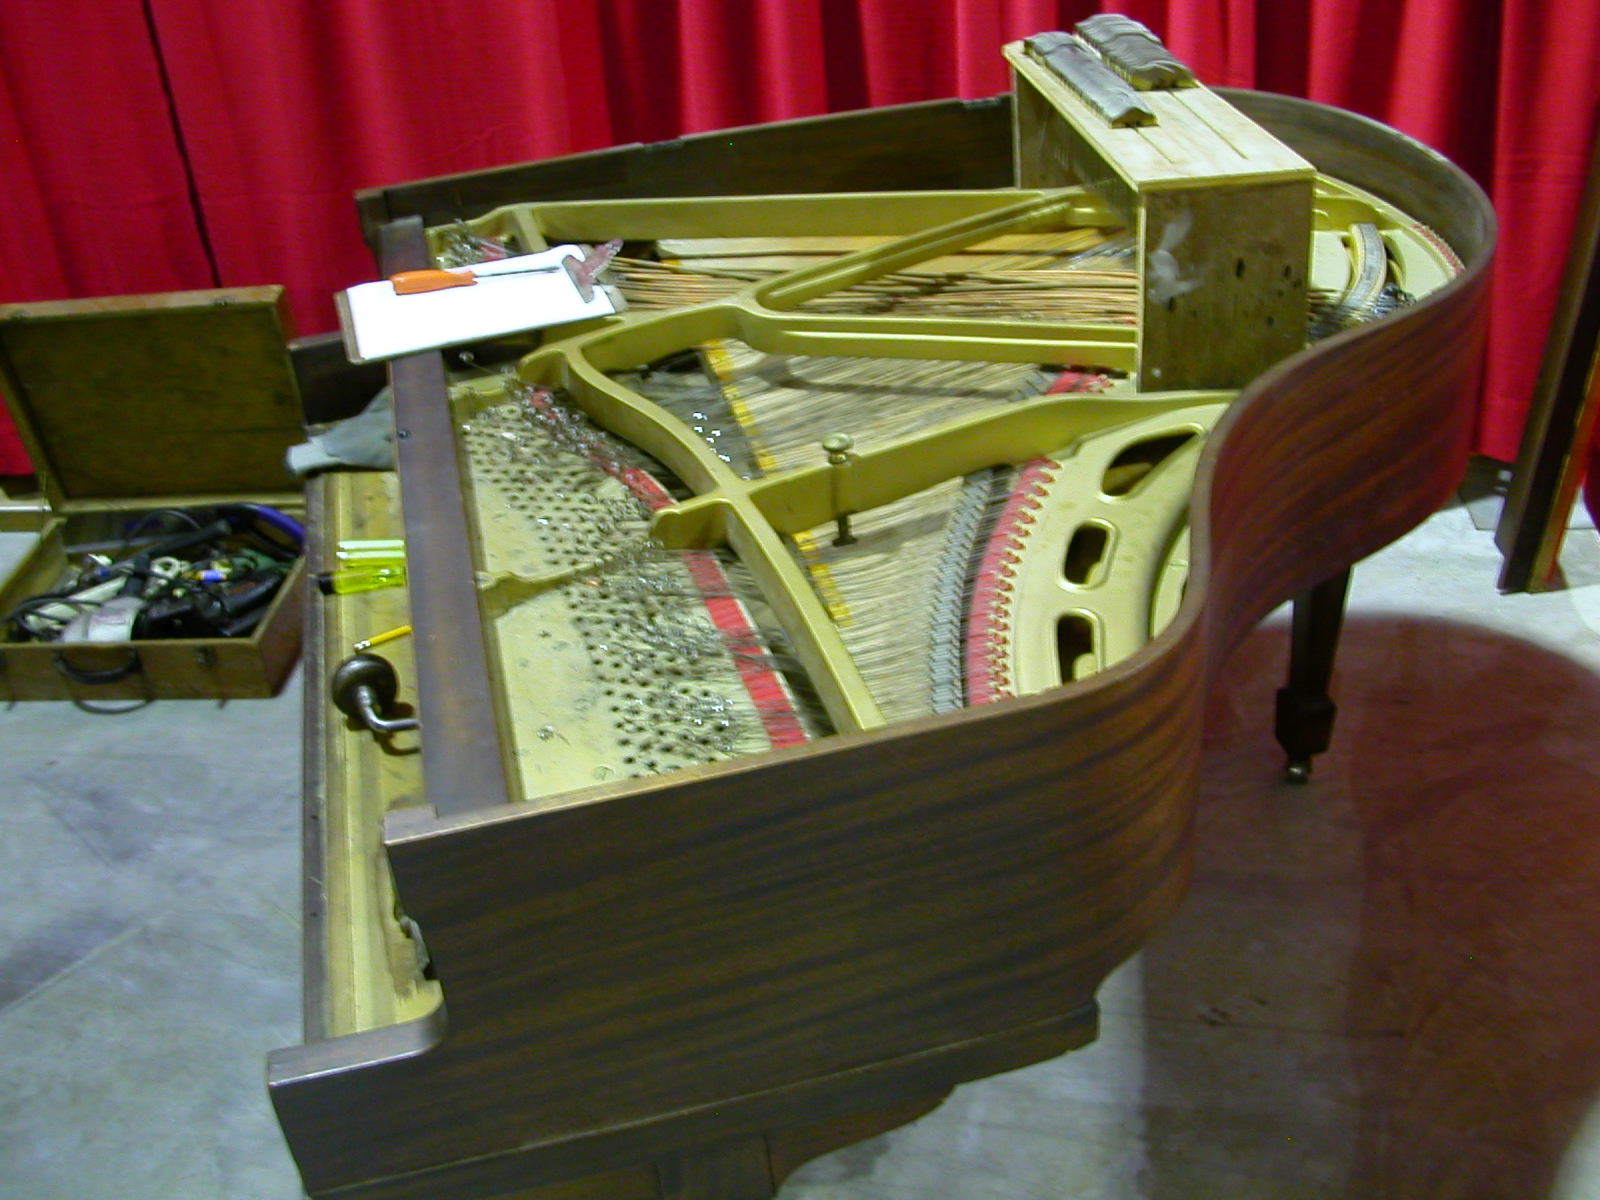
Below: a project in 2015, a Weber grand (New York City, 1900), outfitted with a QRS electronic player system
Below is shown the oldest Heintzman piano to pass through my shop, an upright from the early years of production in downtown Toronto in 1870.


Originally built in 1870, rebuilt in 1982 by Ralph Thorn with a new pin block, new strings, Renner hammers. Just two strings per note in the treble. Faux-rosewood finish.
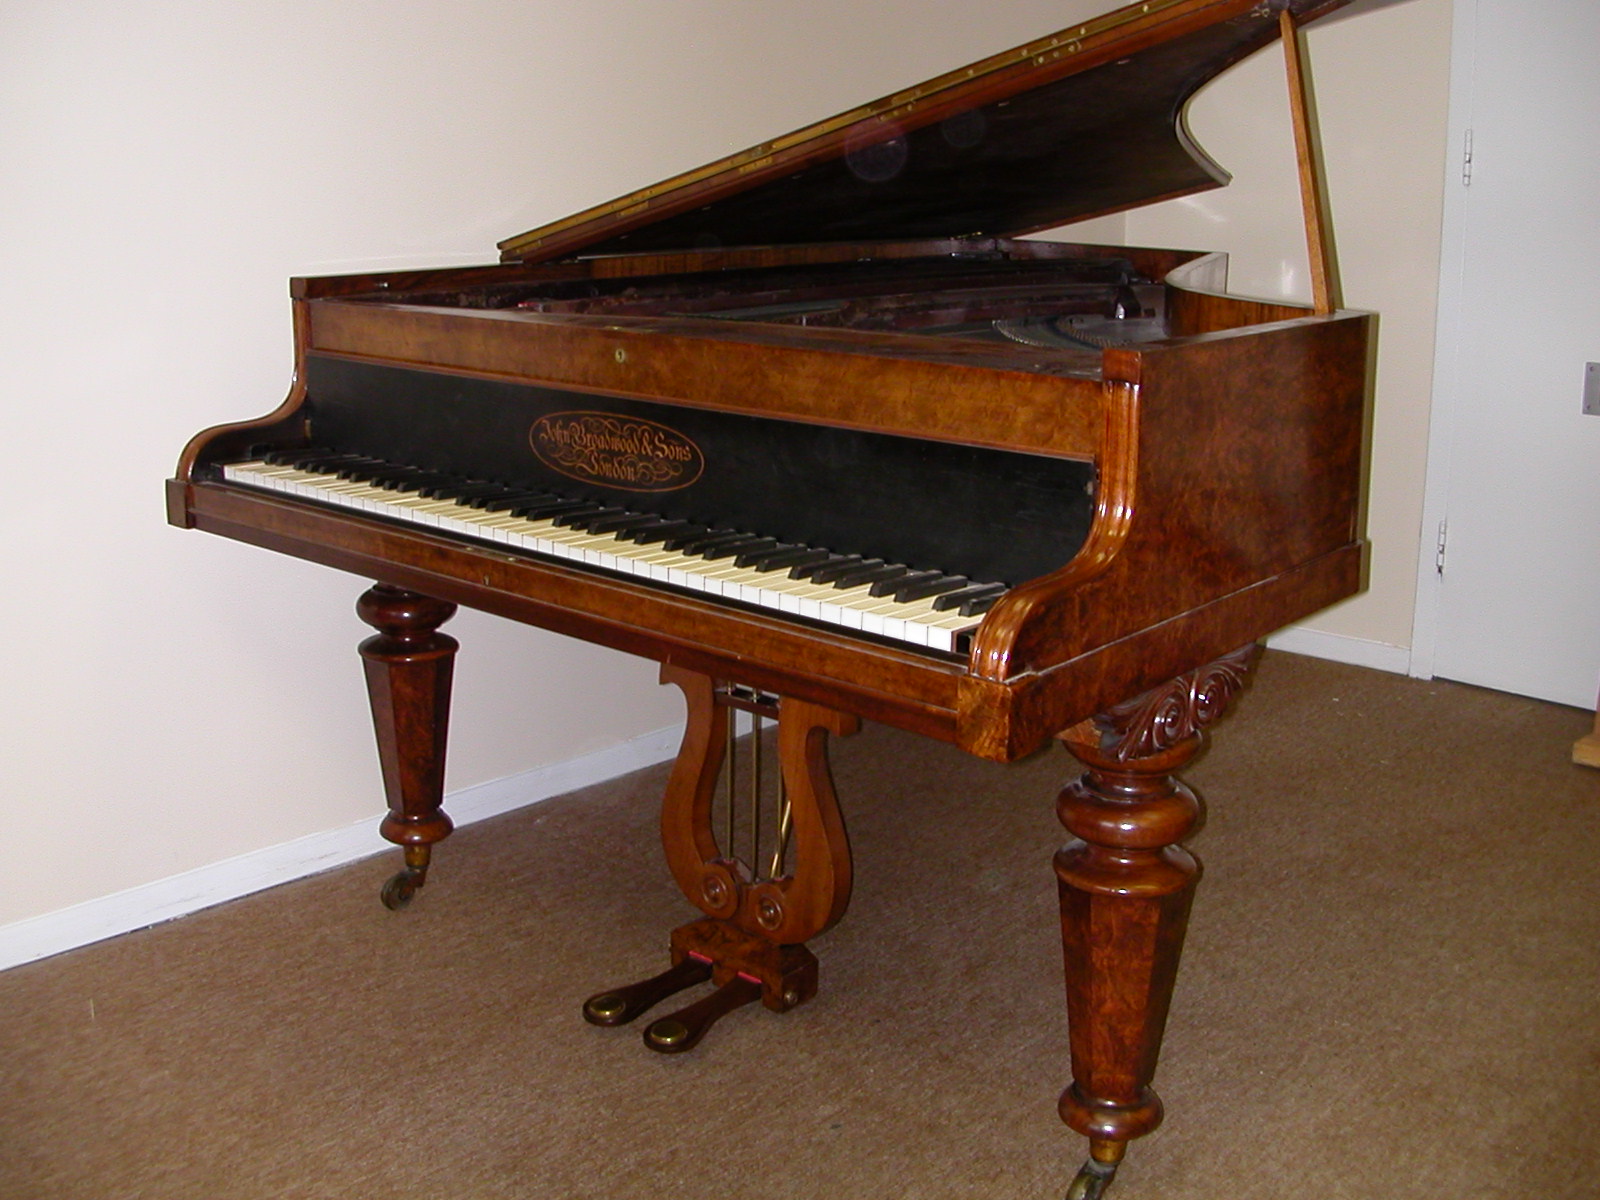
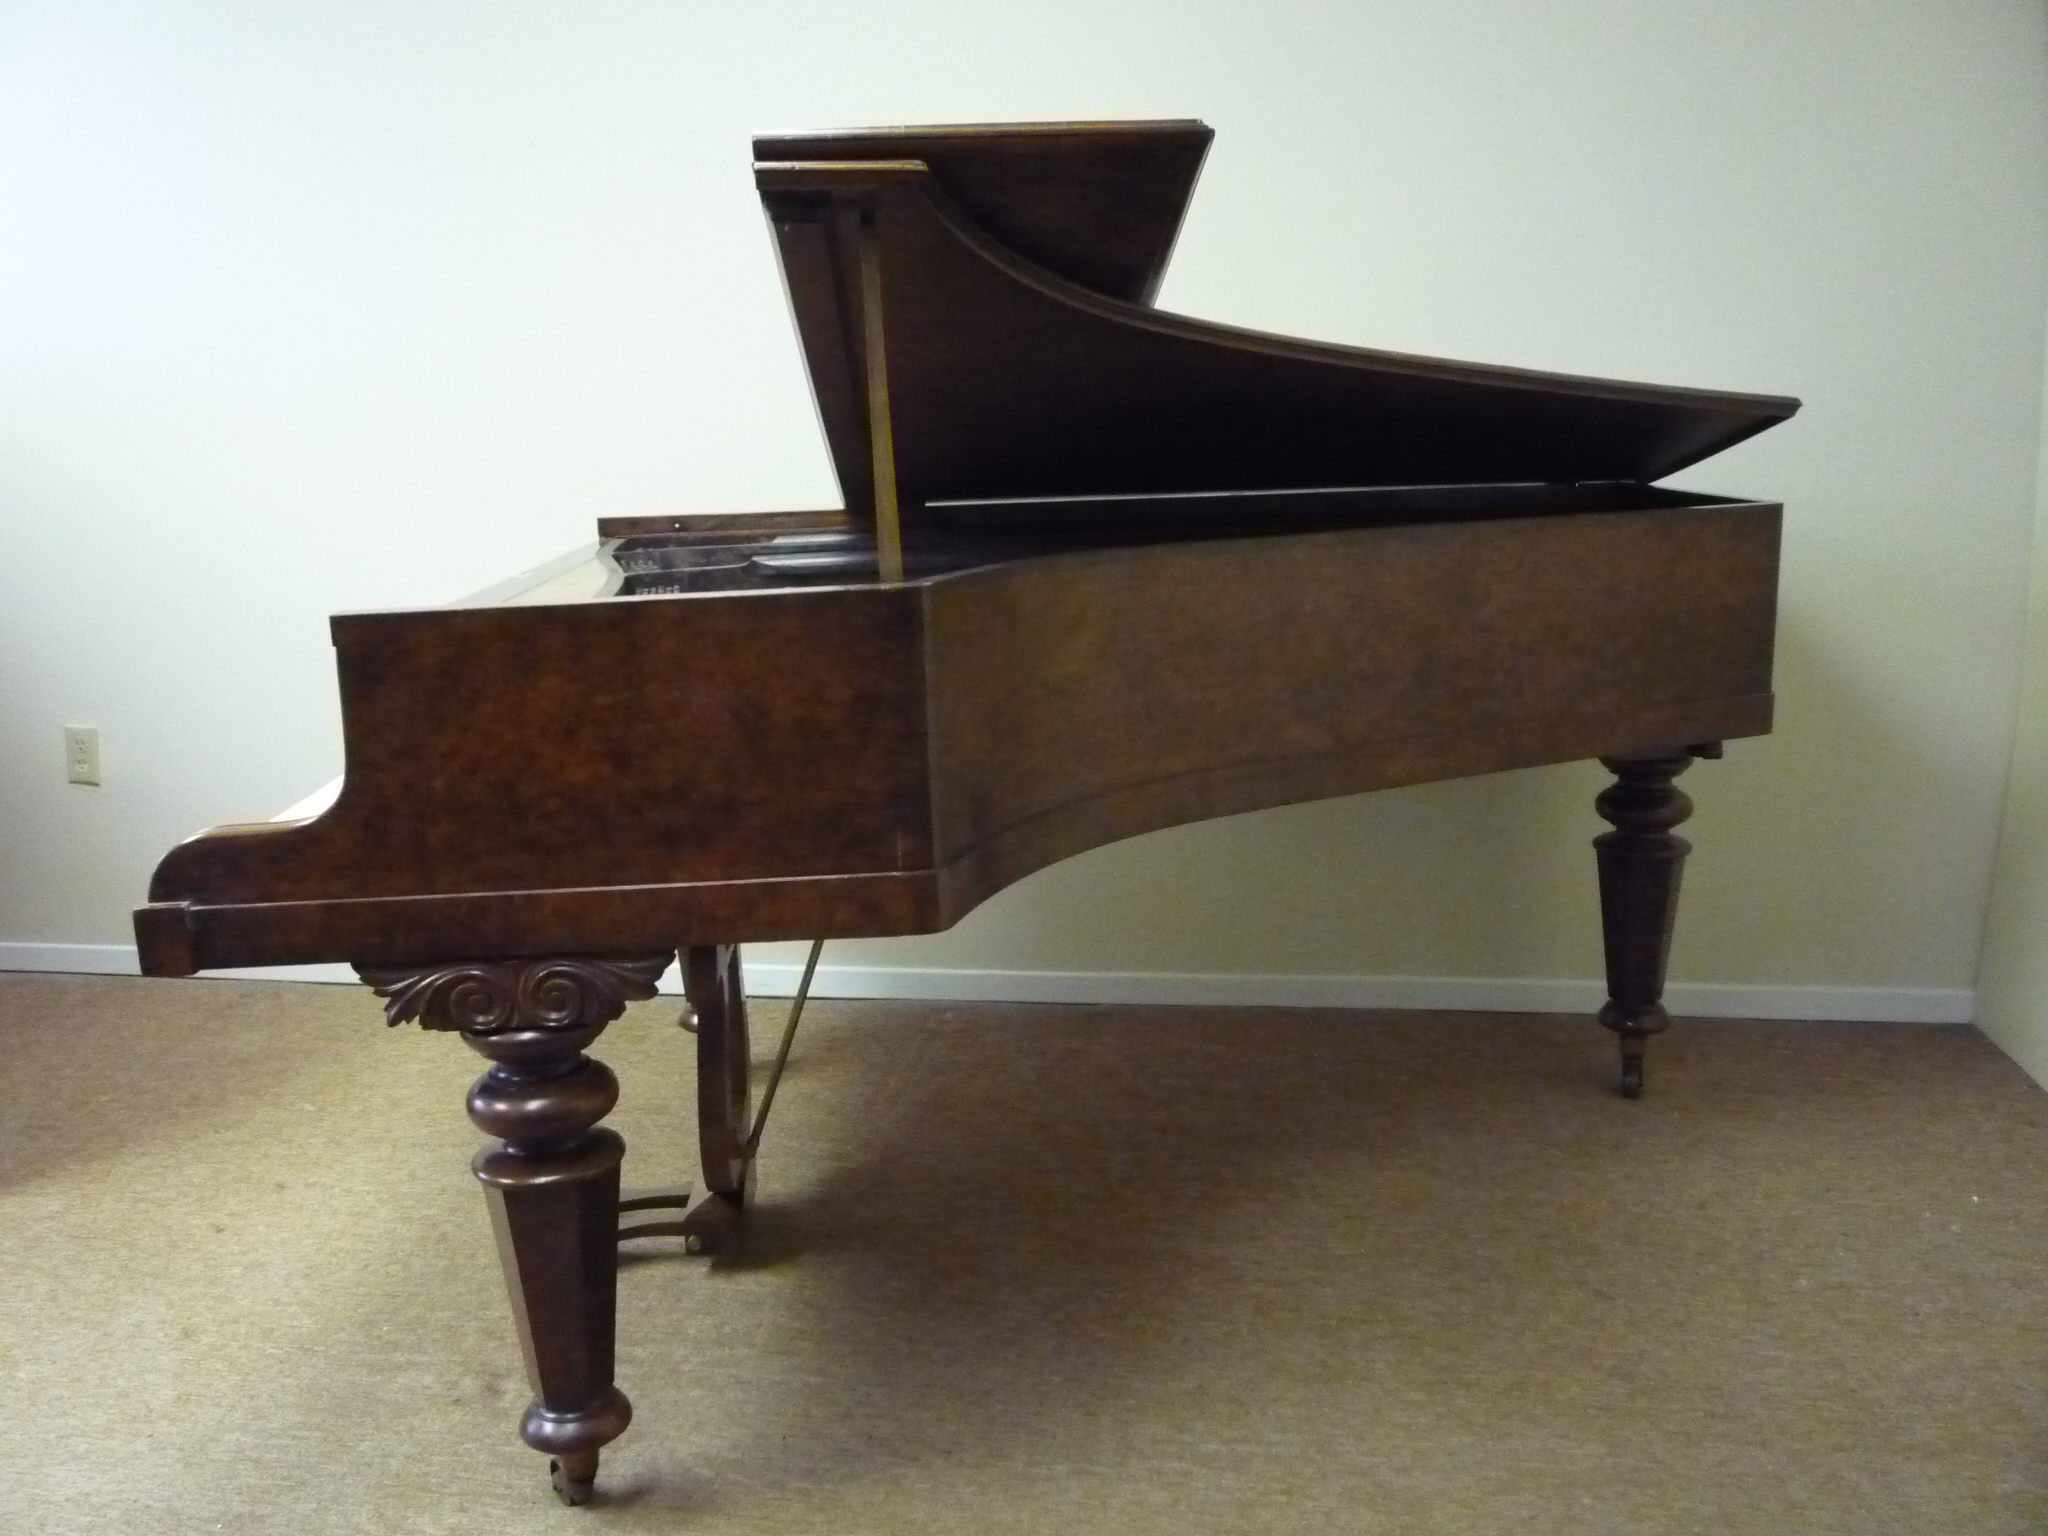
Broadwood 6′ Grand Piano
Built ca. 1870, London England
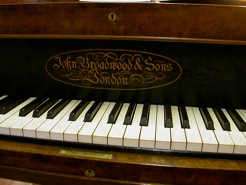
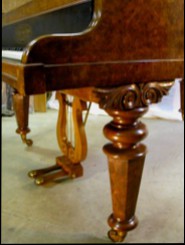
A rare find, historically and musically important. Finished in a tortoiseshell burl walnut and ebony with hexagonal legs. Straight-strung, overdampers, English grand action. This is the type of piano many composers of the 19th century knew and used, including Beethoven and Chopin. 82 note range (C to A) in ivory and ebony. We are currently in the process of a total rebuilding project on this fine instrument.
Available for sale. See its respective website here.

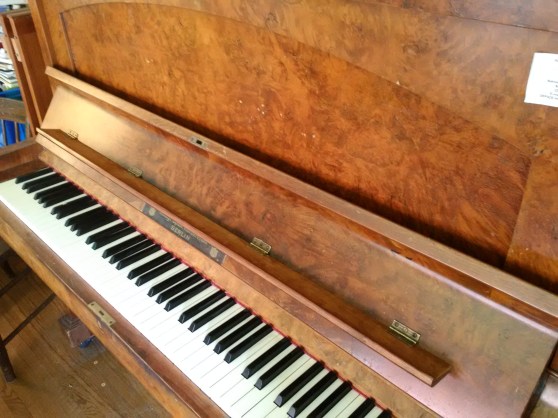
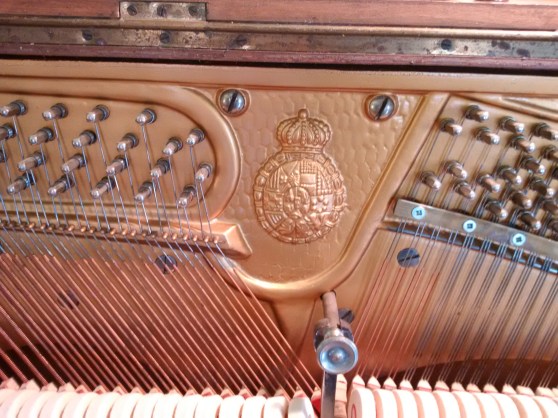
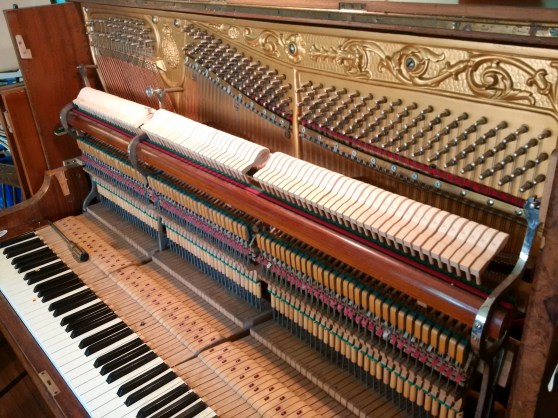
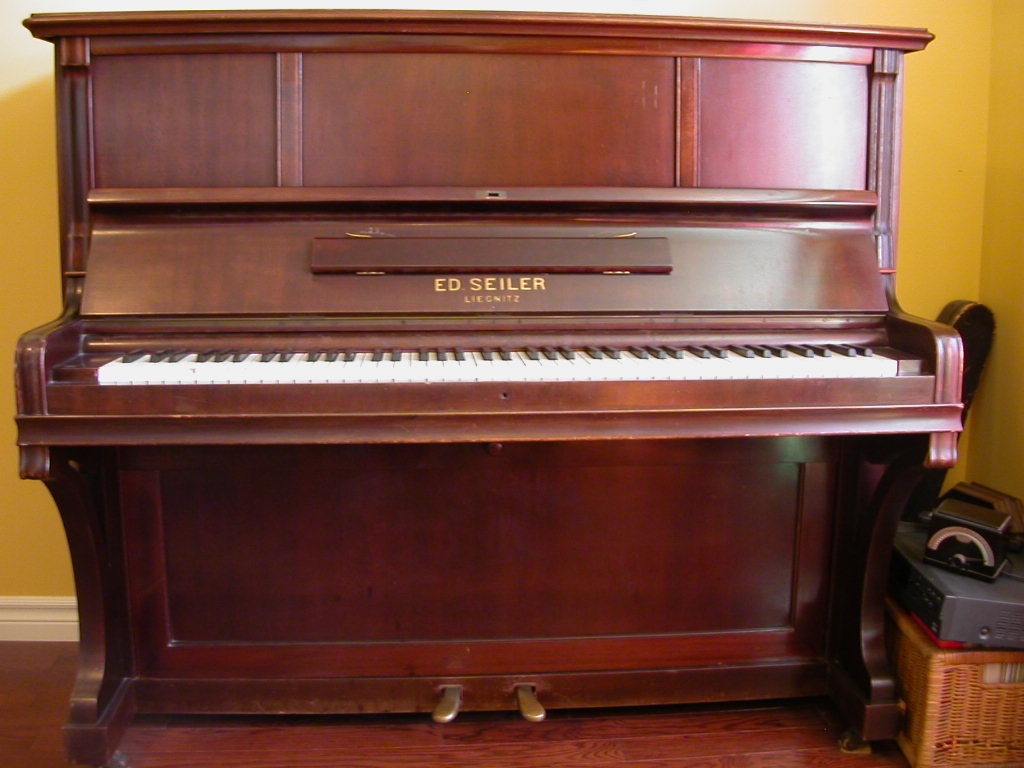
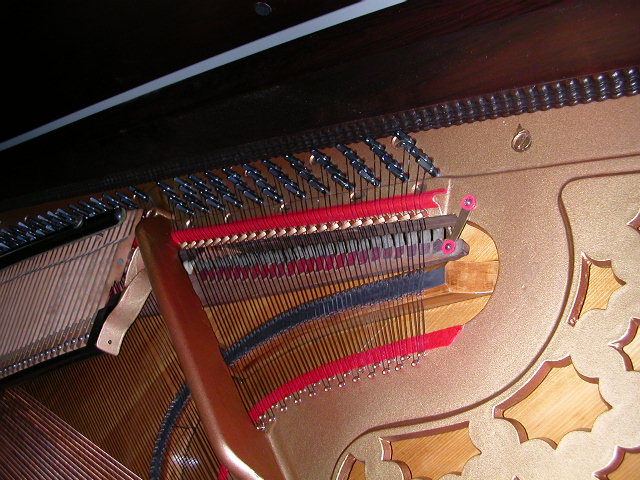
Seiler 52″ Upright Piano
Built 1908
Owned privately, recently rebuilt. Beautifully constructed with the finest attention to details. This was a very satisfying project.
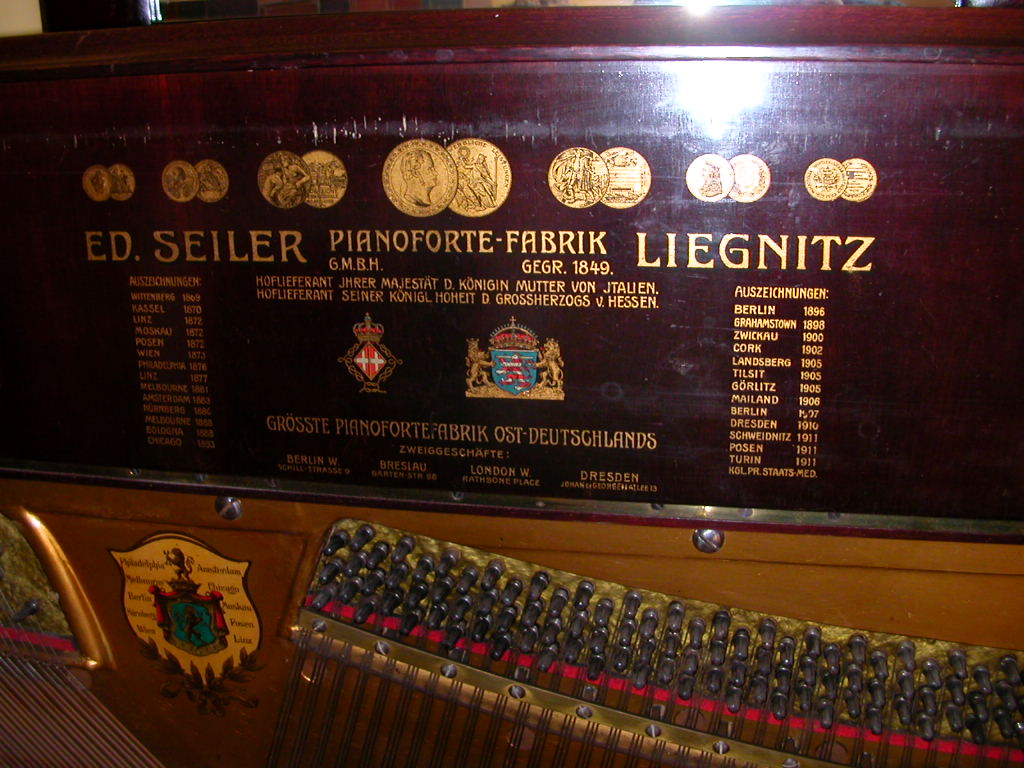
Decal on the inside face of the lid
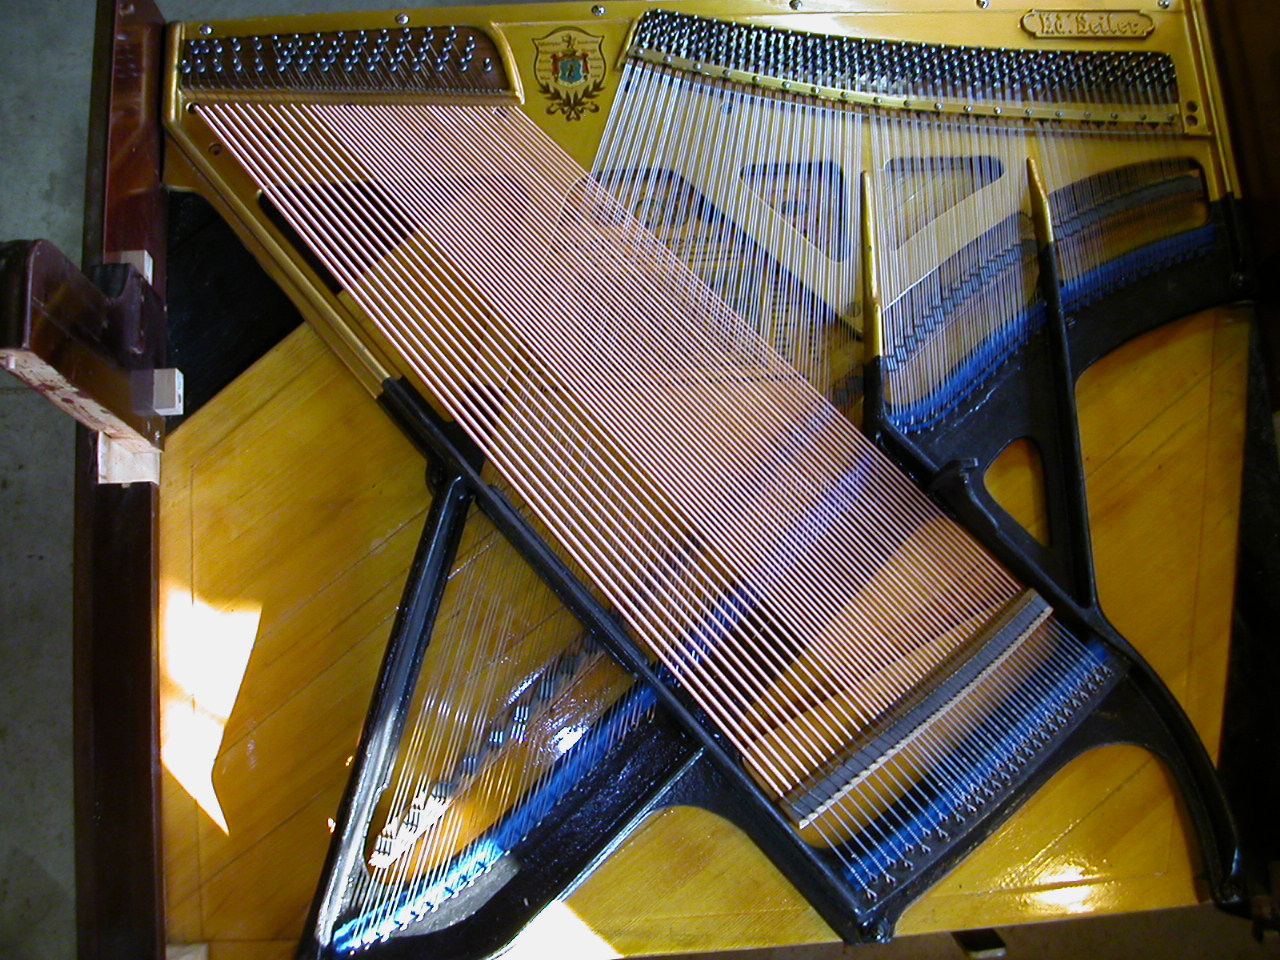
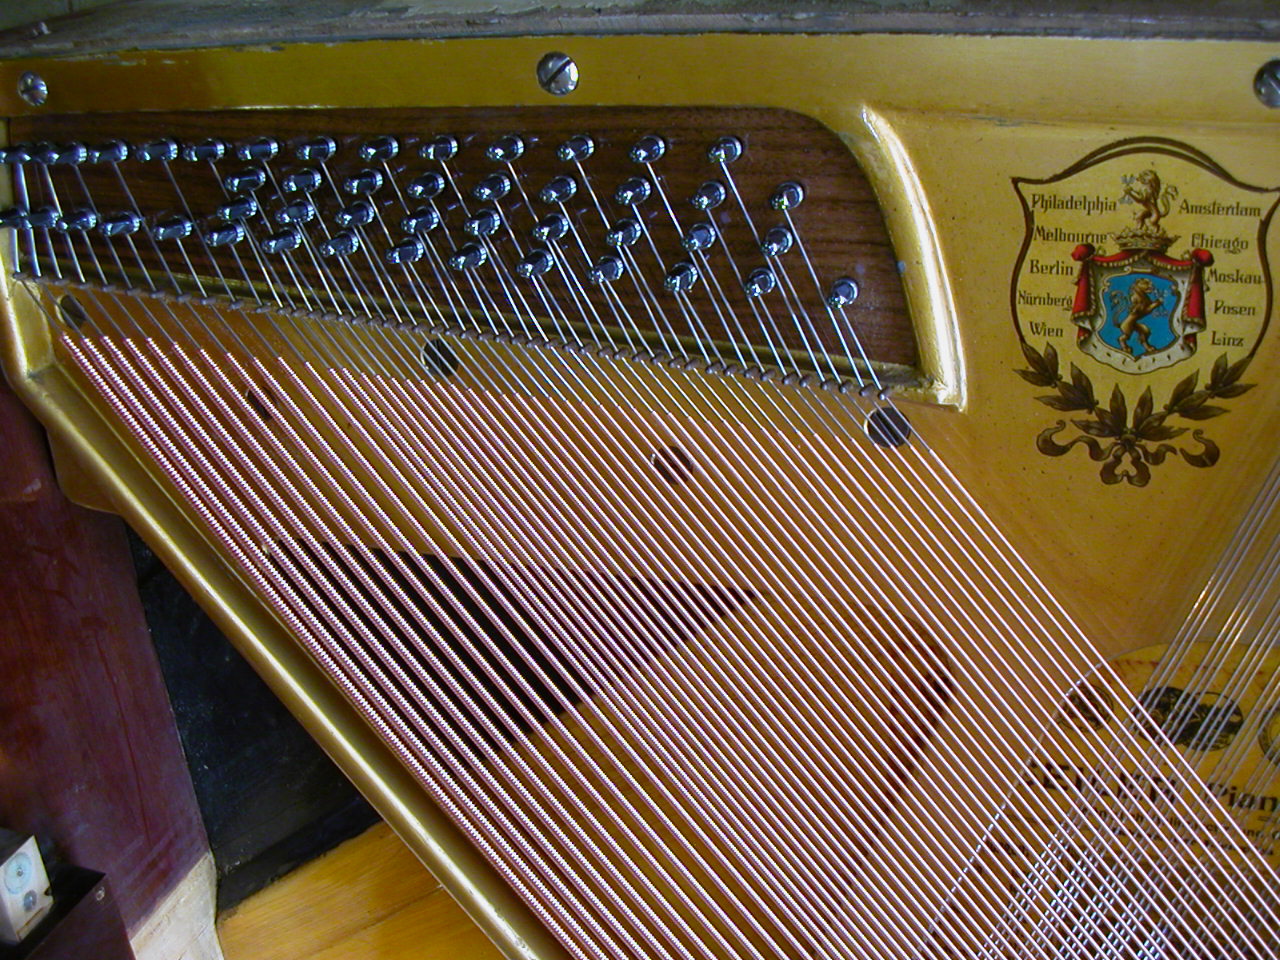
Ready to install the dampers. Note the large soundboard decal behind plate and strings.
Dampers all installed and regulated, now to install the hammers.
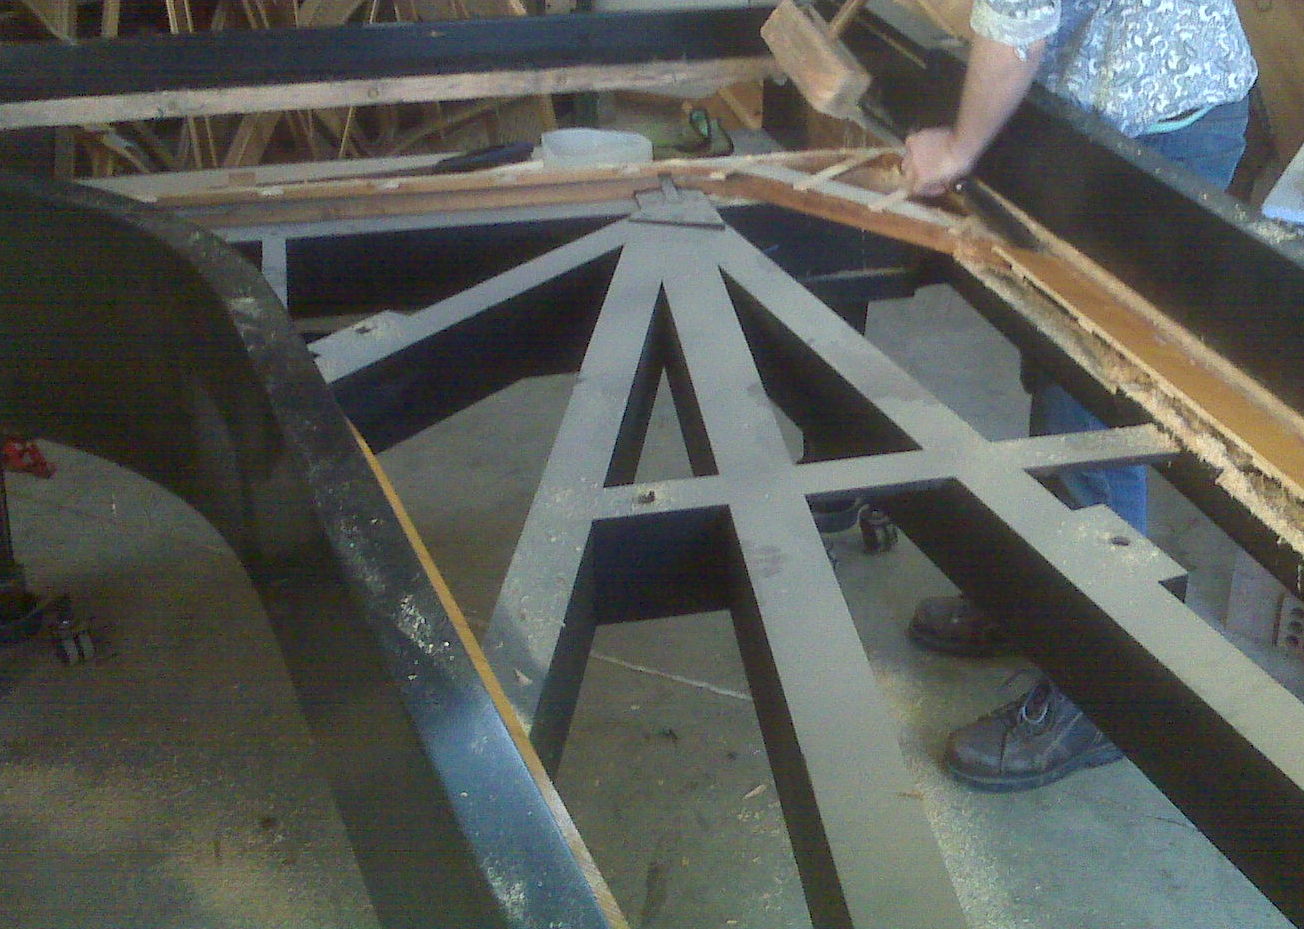
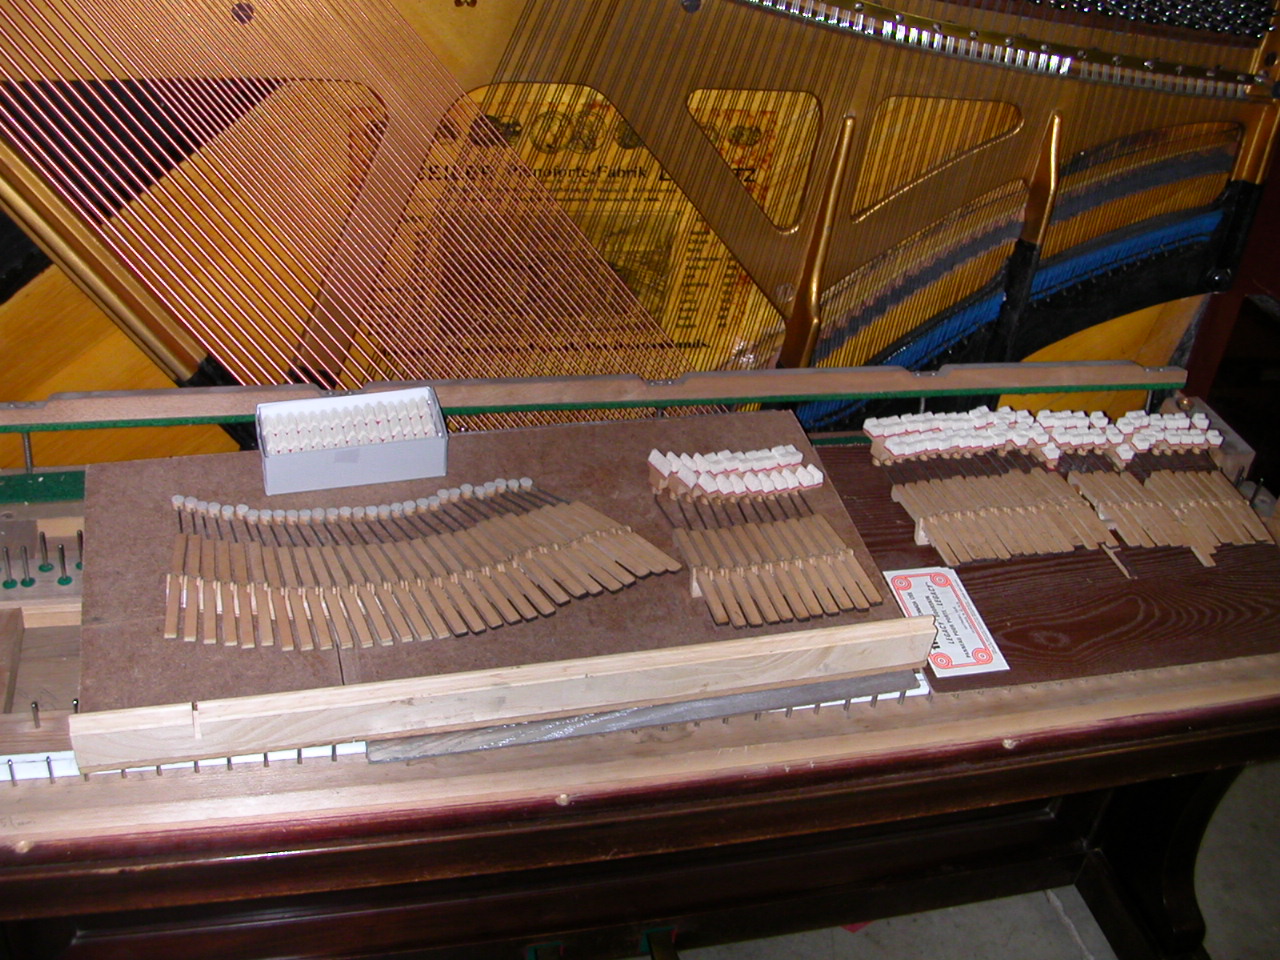
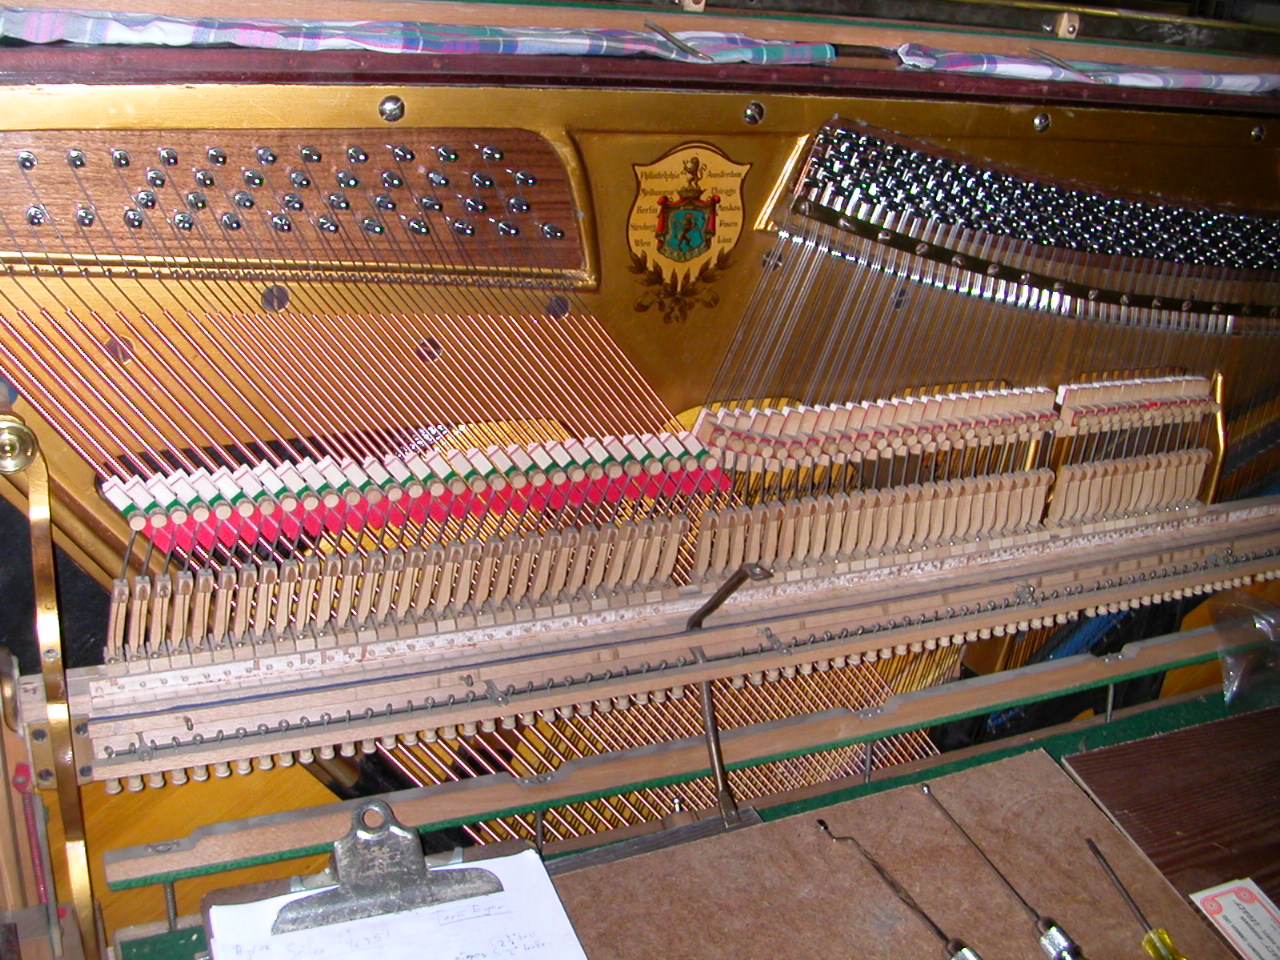
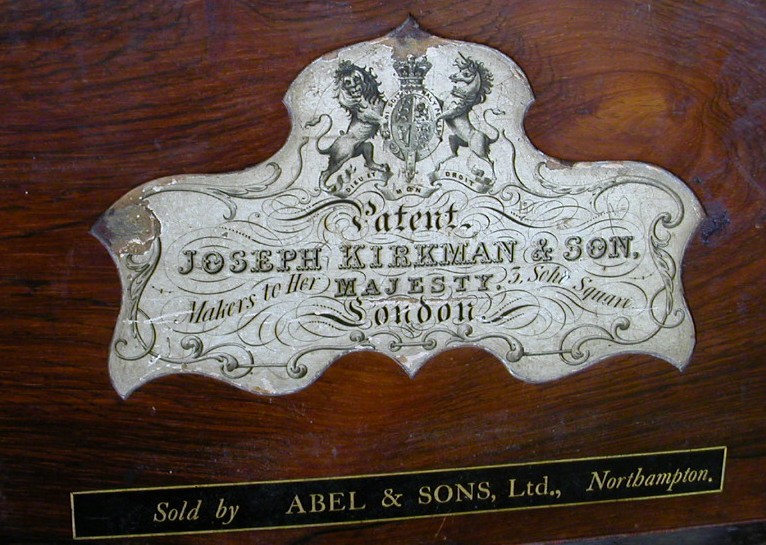
Kirkman 6′ Grand Piano
Built 1853, London England
Rebuilt in our shop in 2009. One of the top English builders of the 18th and 19th century, very rare. Ornate cabinet with unusual details such as fold-down keyslip. All bichords from low C to high G, 80 notes. This project included constructing several case parts that were lost over time, including a fold-down keyslip as found in harpsichords.
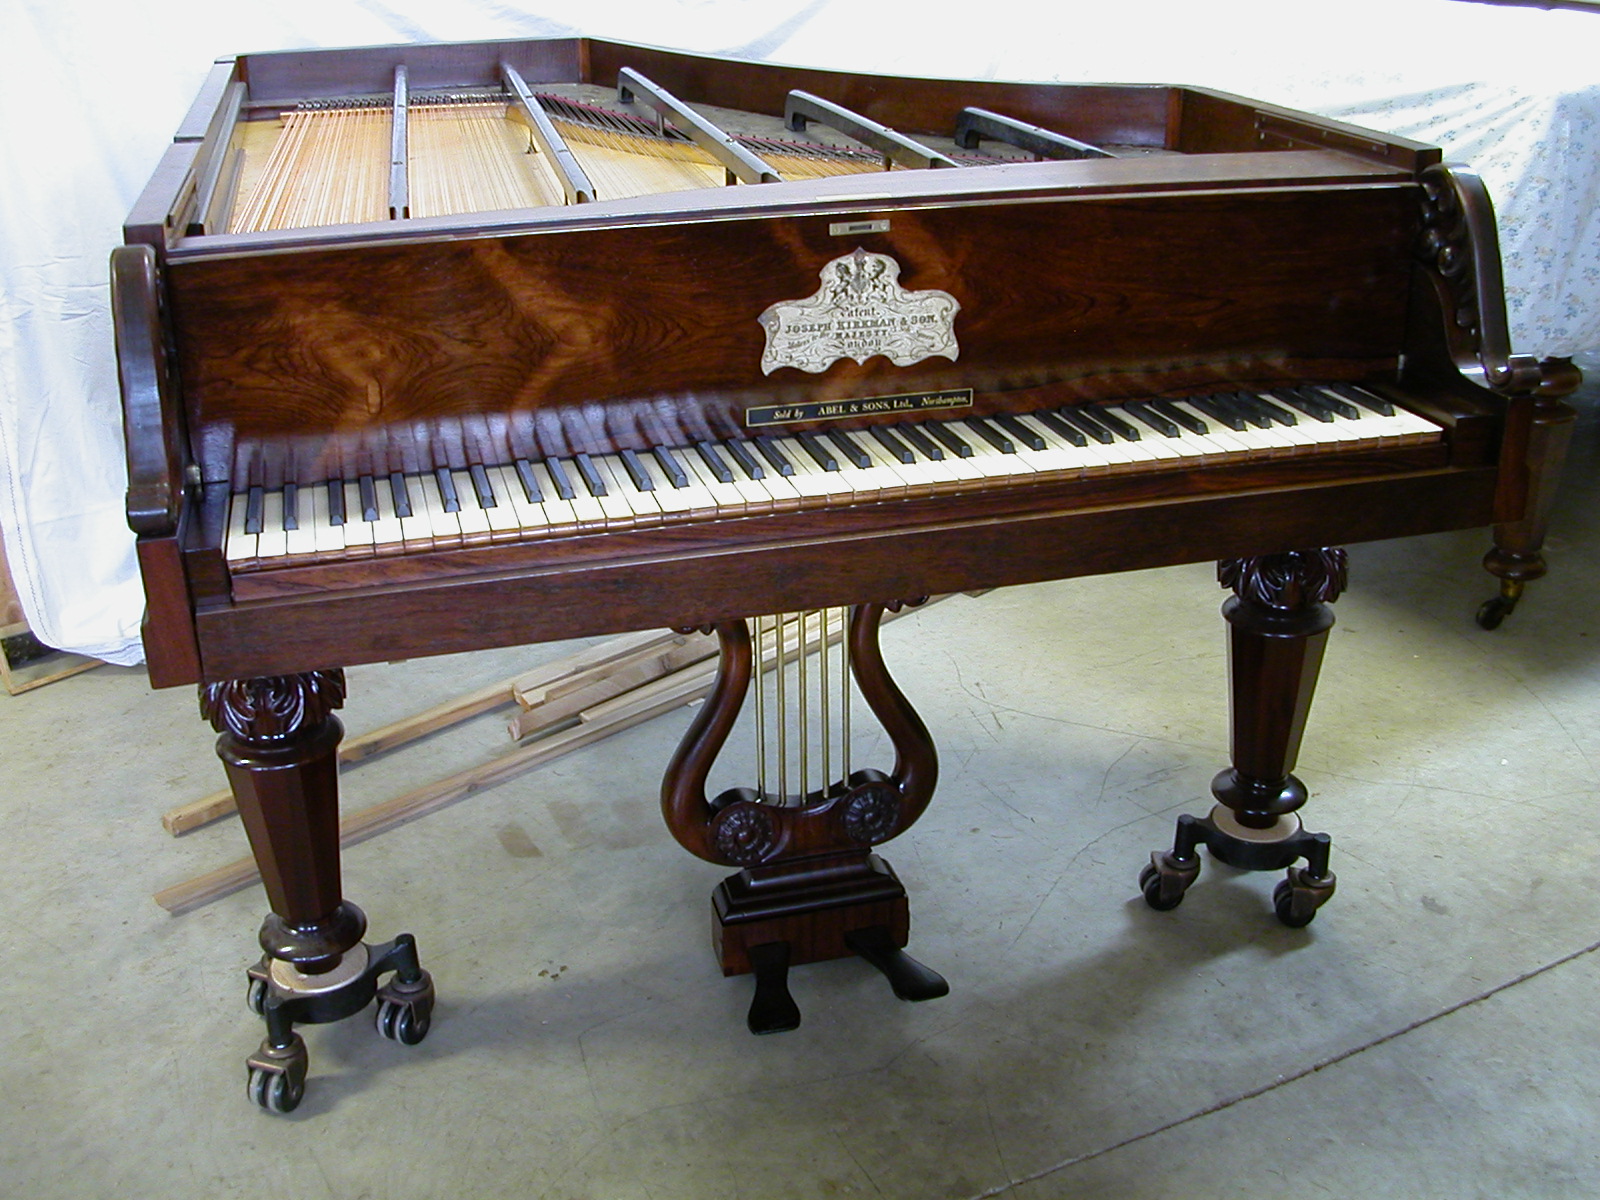
Notice the pedal lyre with five rods but only two pedals. Three rods are “just for show”.
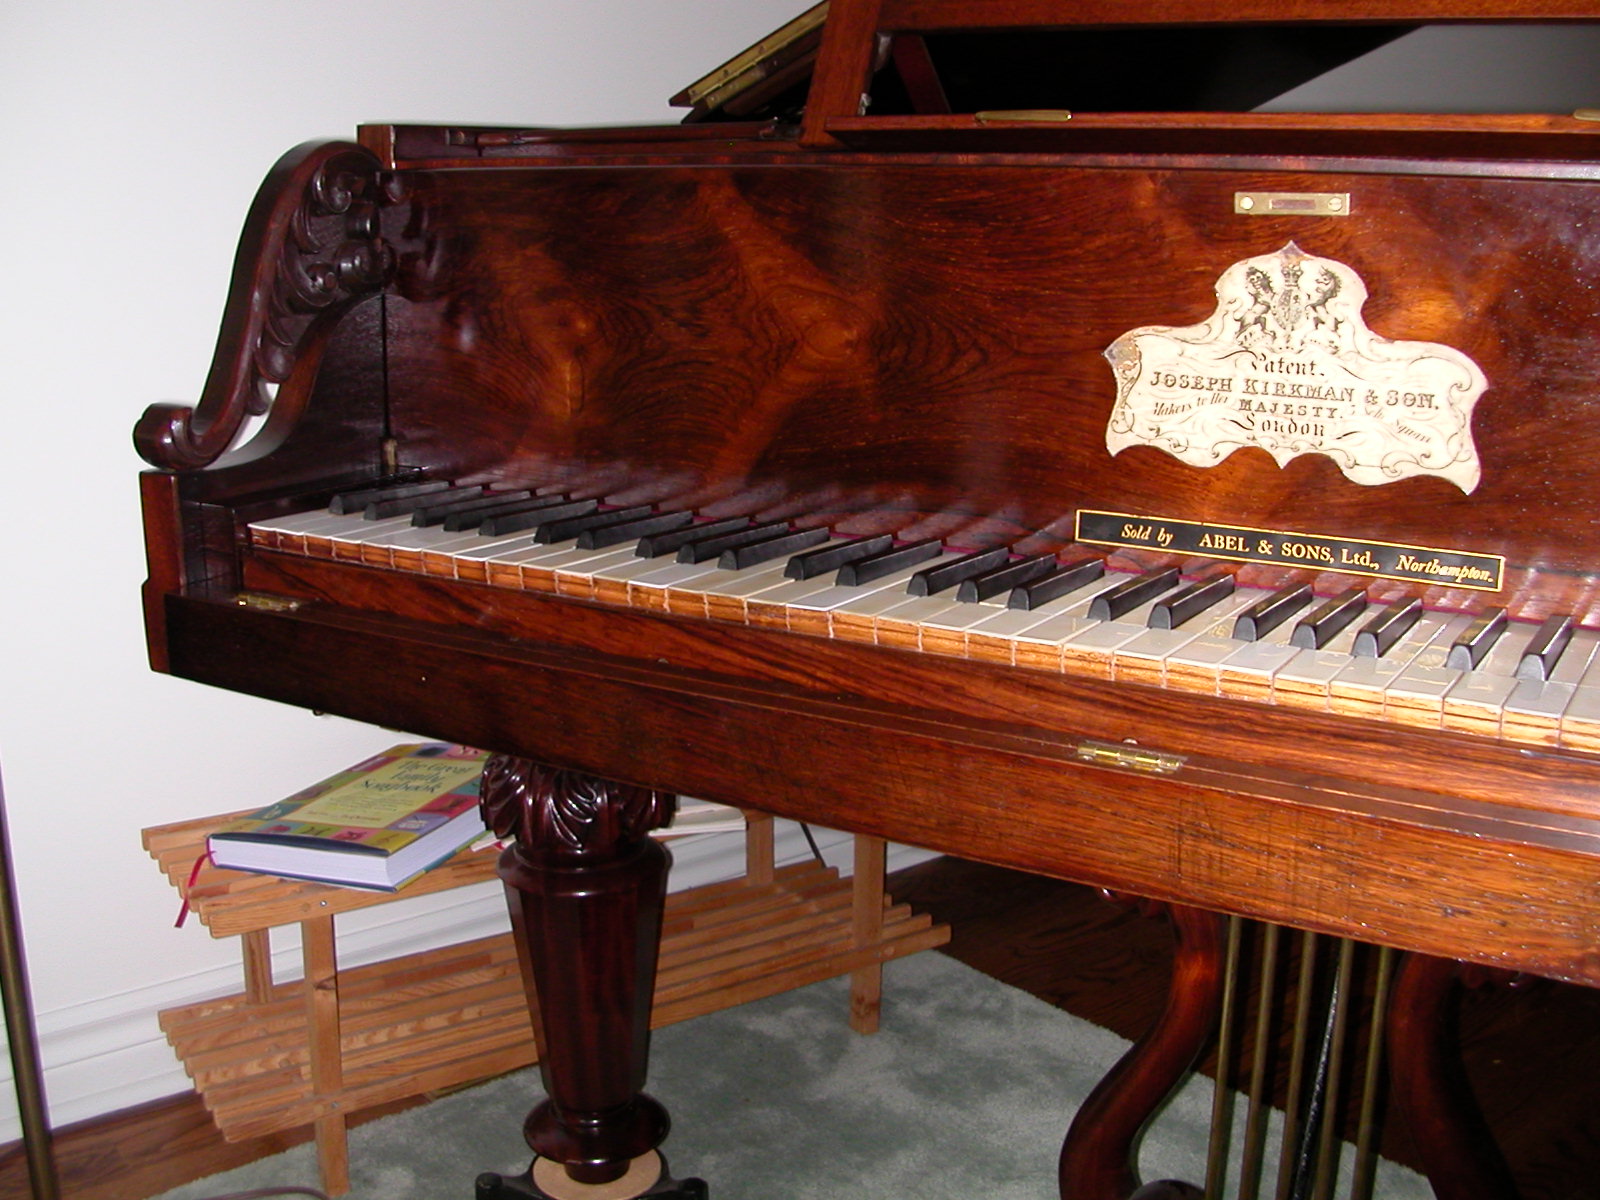
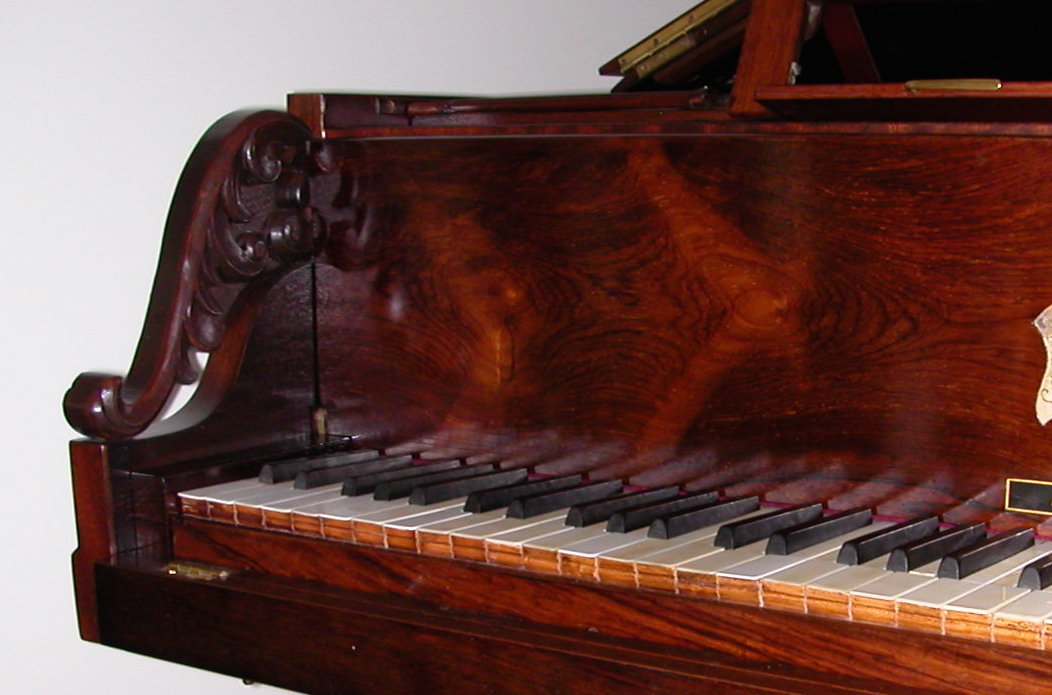
Ornate details abound, including the carvings on the cheeks, approximating what was originally there based on evidence of the mounting holes and other extant examples. The fold-down keyslip is visible in the two photos above.

This piano has a composite plate with a flat piece of steel for the tailpiece and bars running end-to-end to hold the tension. A straight-strung grand with two strings for every key. The “soft pedal” produces a true Una Corda effect.
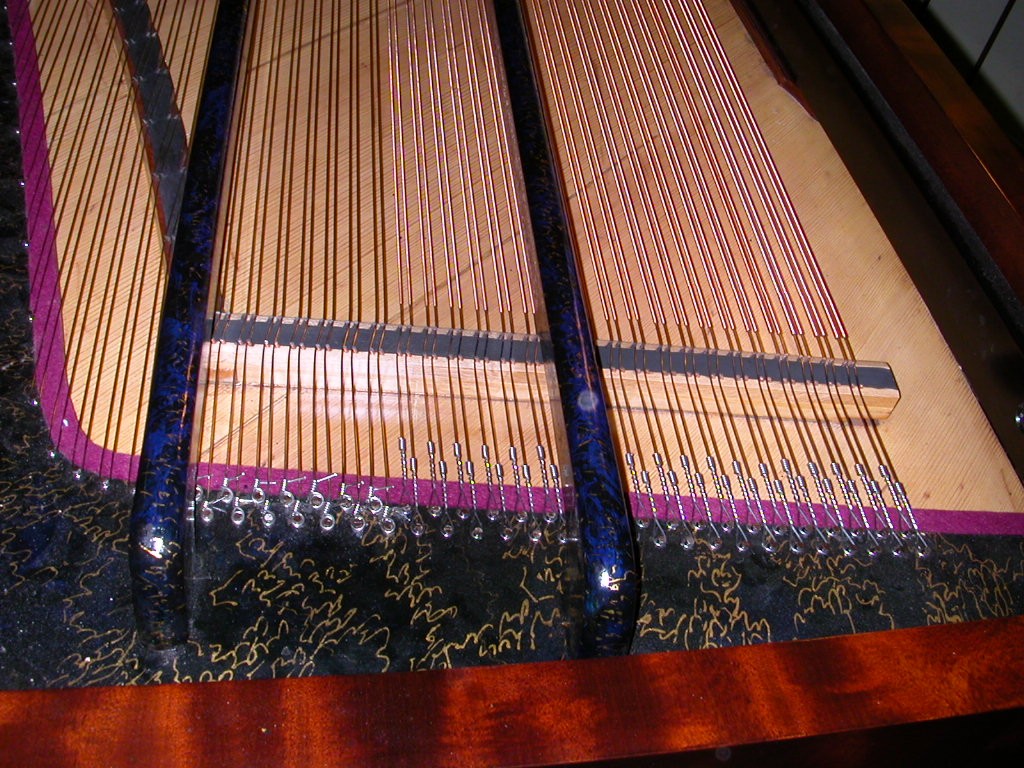 Continuous Bridge, Straight-Strung, All Bichords to the very lowest notes.
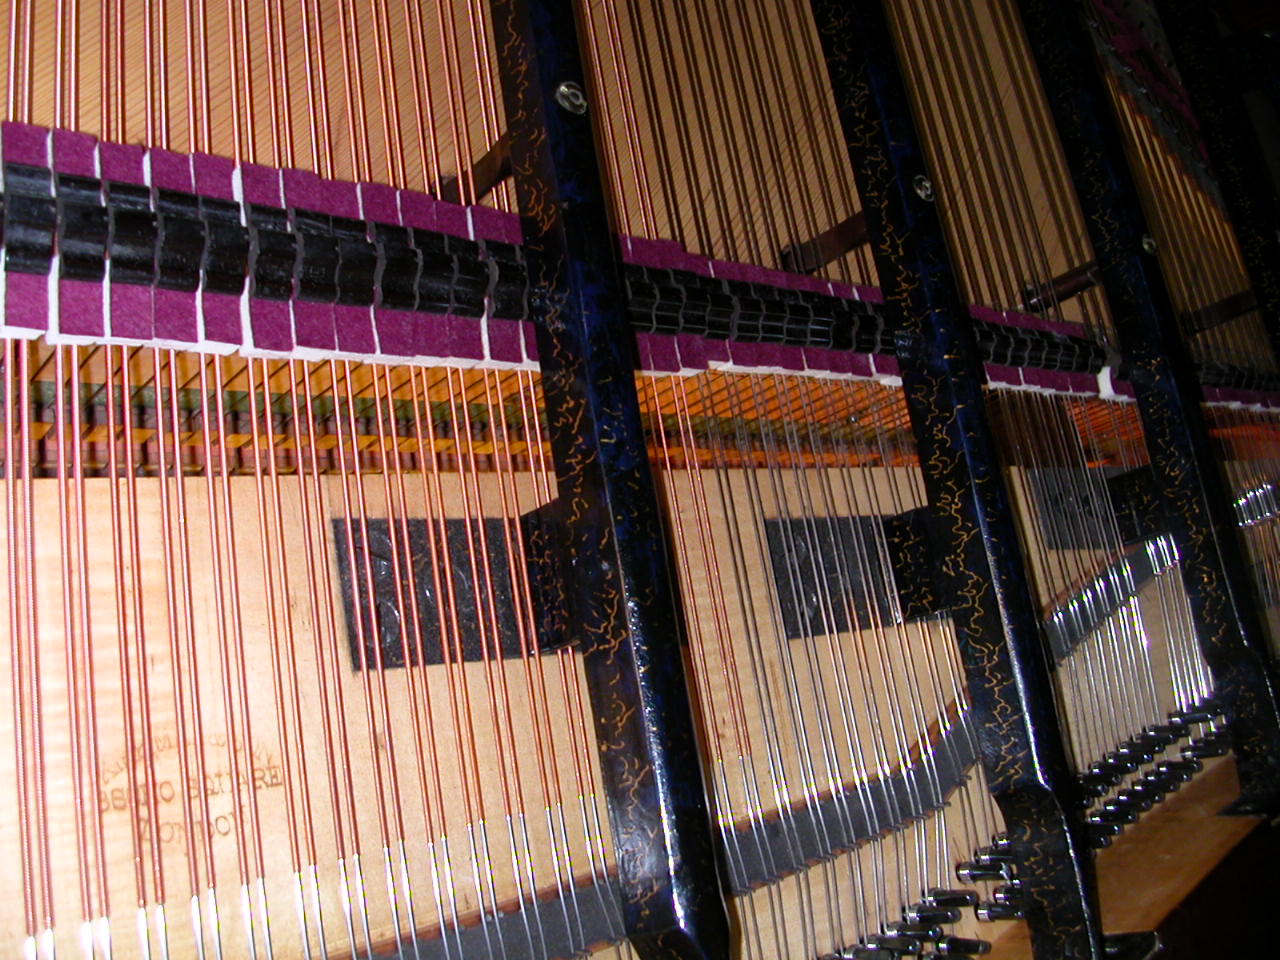
Custom Purple Felt on Damper Heads
 Custom designed Abel Hammers, English Grand Action
The empty case stripped and sanded, starting the staining process with ebony on the inner cheeks.

The rich grain colour comes alive with the correct stain
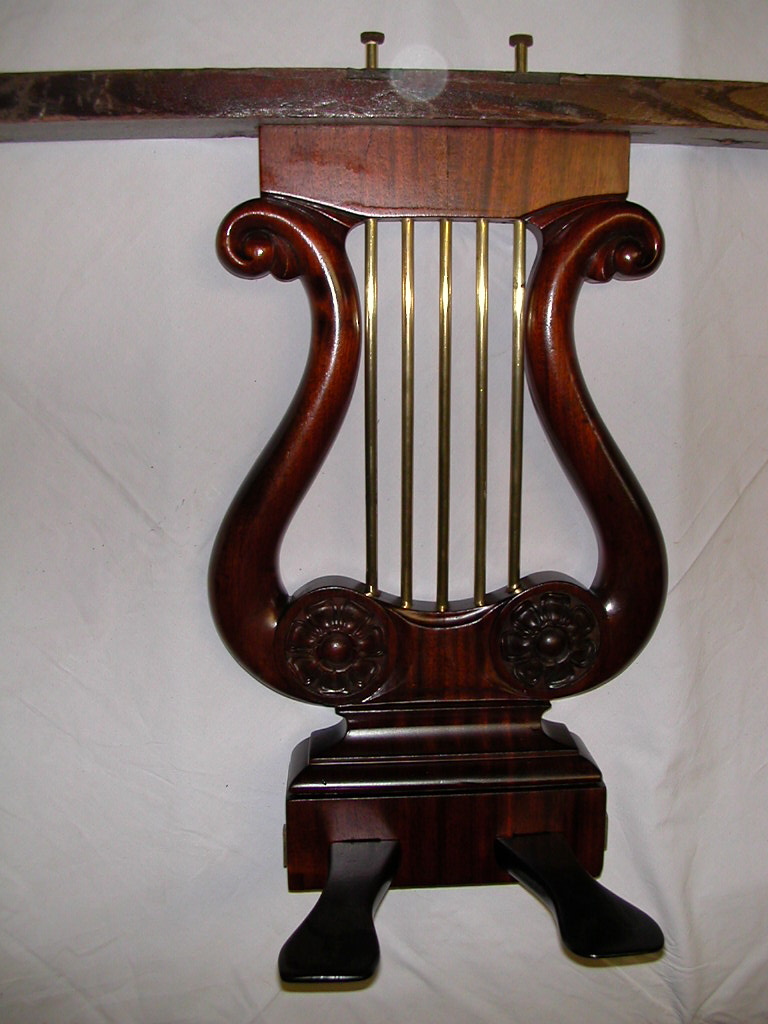
A close-up of the unusual pedal lyre
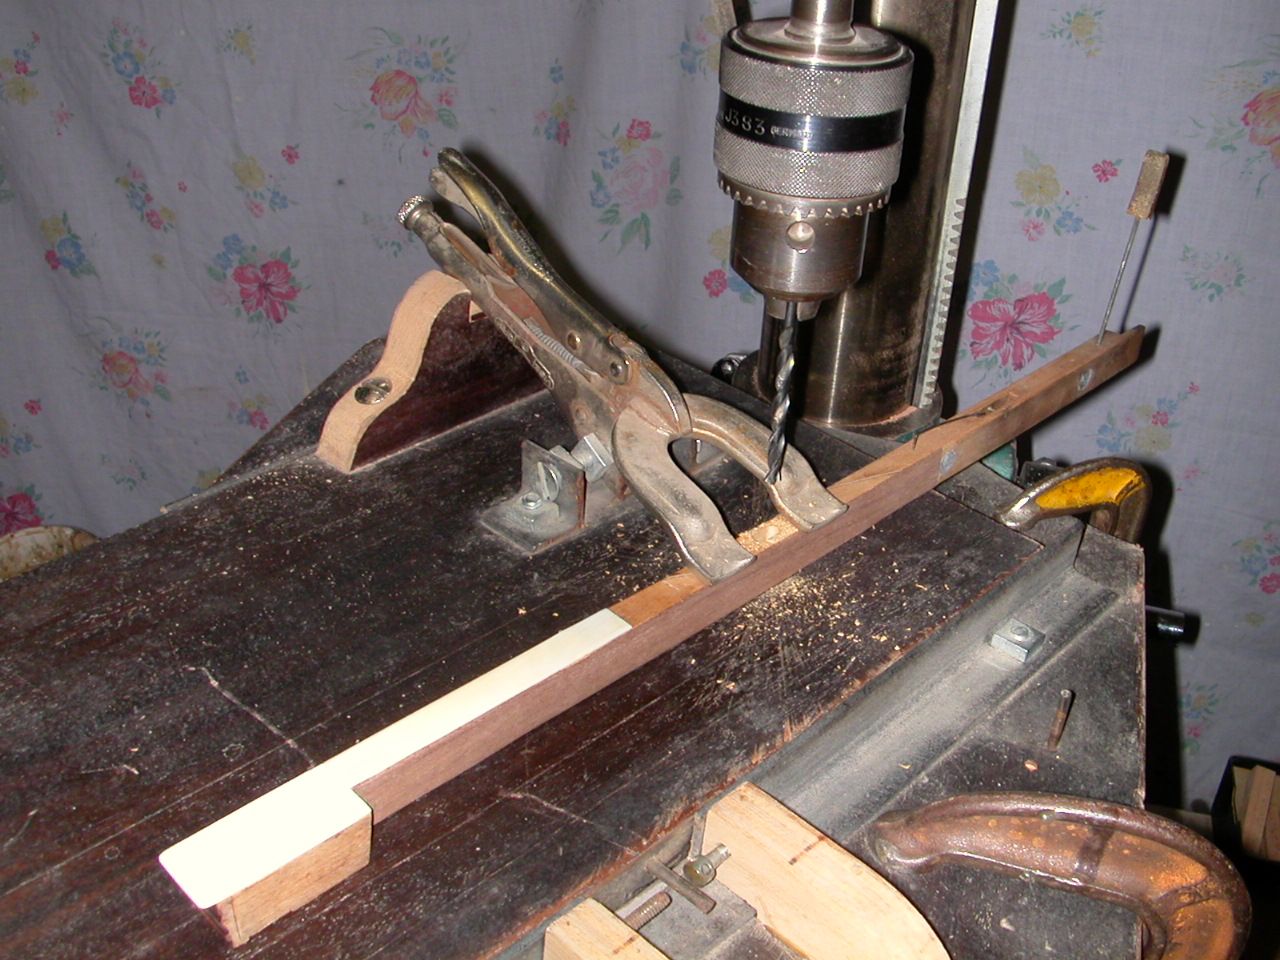
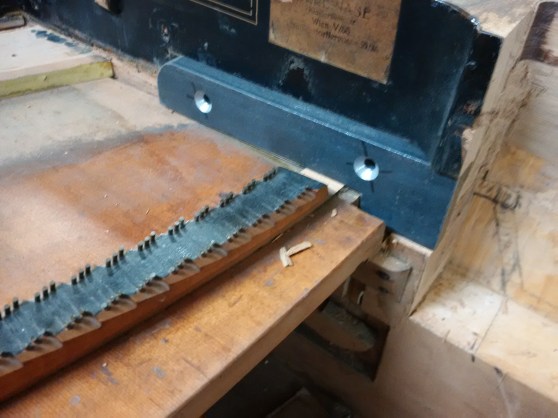
The keys had no cloth bushings, and I decided to furnish them with bushings. The key mortising jig creates the carefully dimensioned mortise in the exact location for the bushing cloth.
The keys with bushings in place
I include pictures of recent upright piano projects for private clients. All have some wonderful details, even on those by manufacturers that are often considered to be inferior. With attention to careful rebuilding, excellent hammers and computerized re-scaling of the treble wire, the older instruments are wonderful pianos. As part of the rebuilding process the pin block is replaced and ivory keys restored. In most instances, the sides are removed from uprights to facilitate the extensive structural repairs, and later attached as is done in normal piano building procedures in factories. See also the “Feature” page.
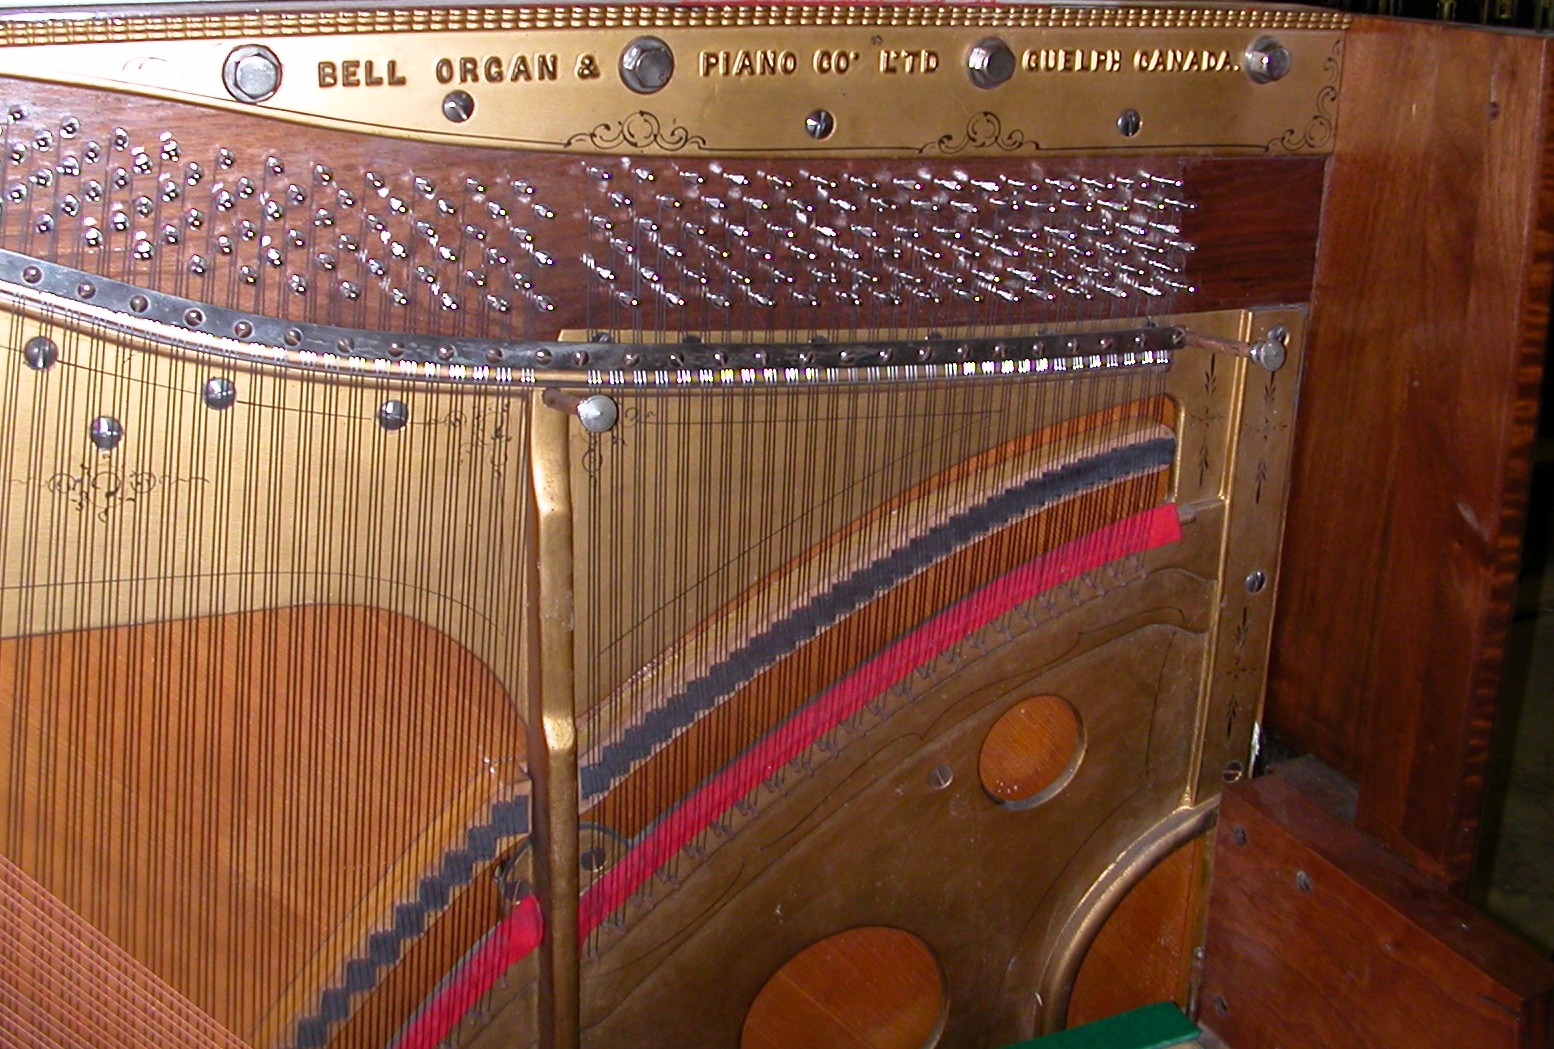
Bell 58″ Upright Piano
Built 1890, Guelph Ontario
Laying-out the design for the pin-block – where to locate the tuning pins, a detail necessary in the case of “open web” blocks as found on most 19th century pianos.
New Maple Pinblock with Walnut Veneer
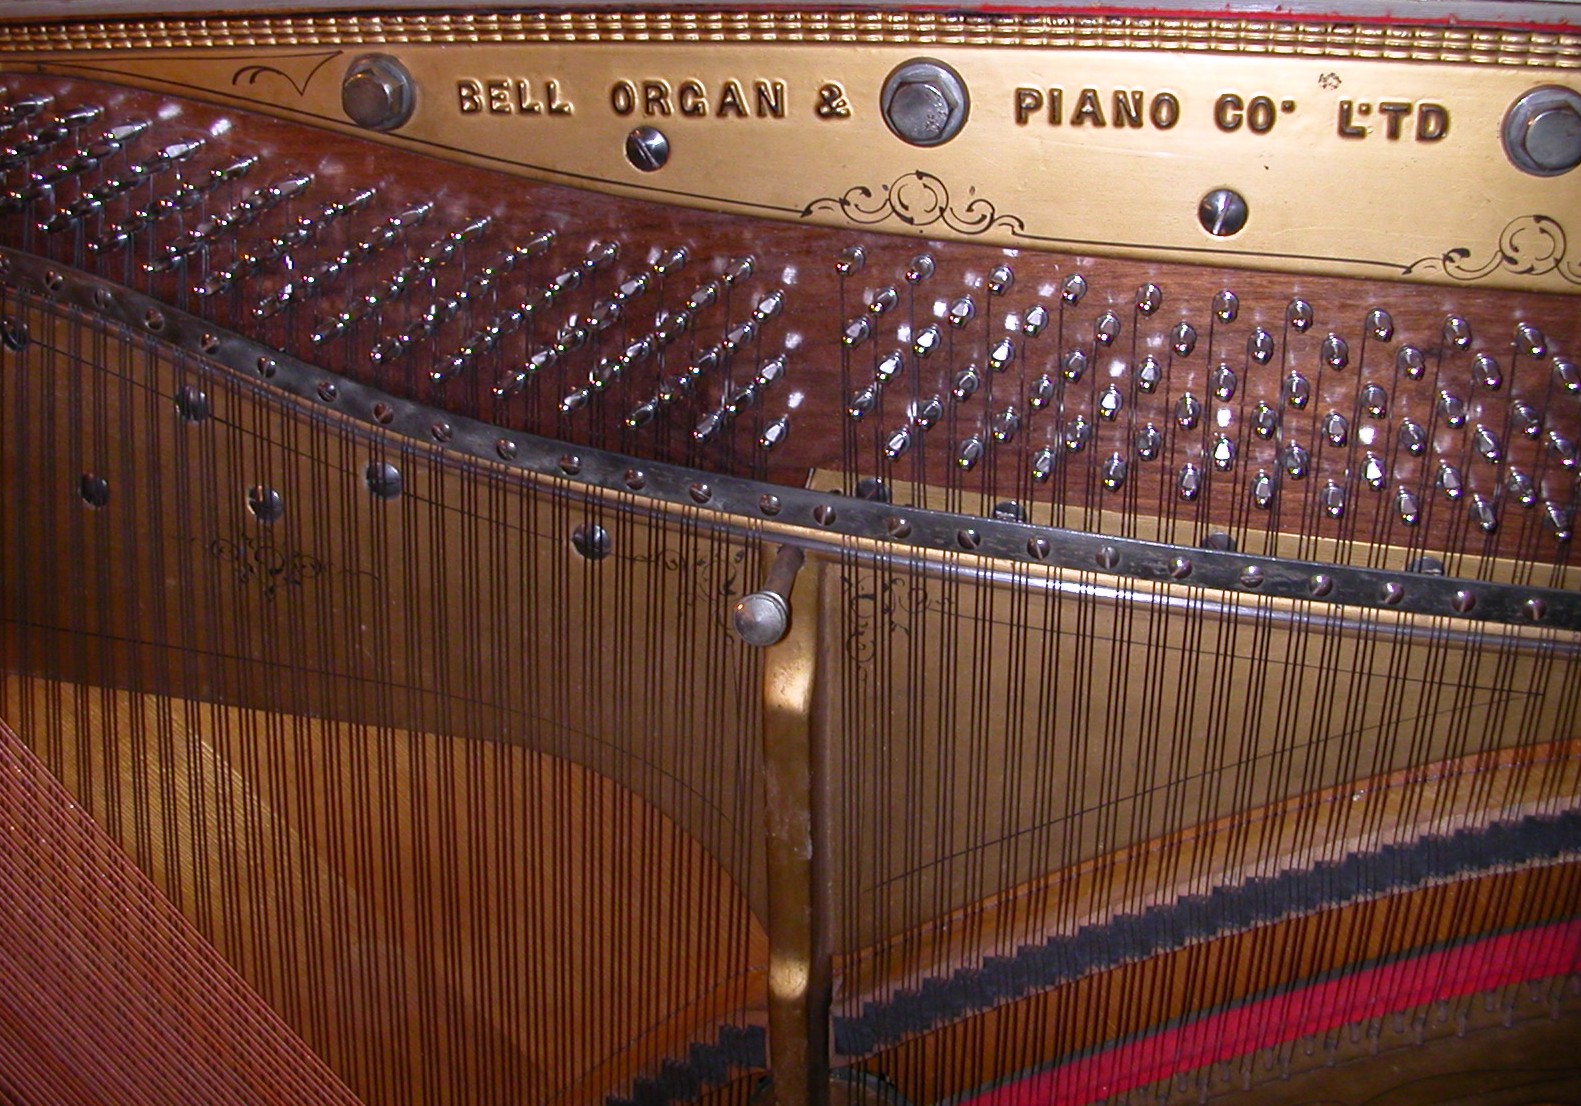
New strings in place, ready to glue the sides onto the “strung back”
Heintzman Upright Piano Model A
Built 1920, Toronto
Underwent a complete restoration following a fire. Refinishing by Live/Work Interiors, Sarnia
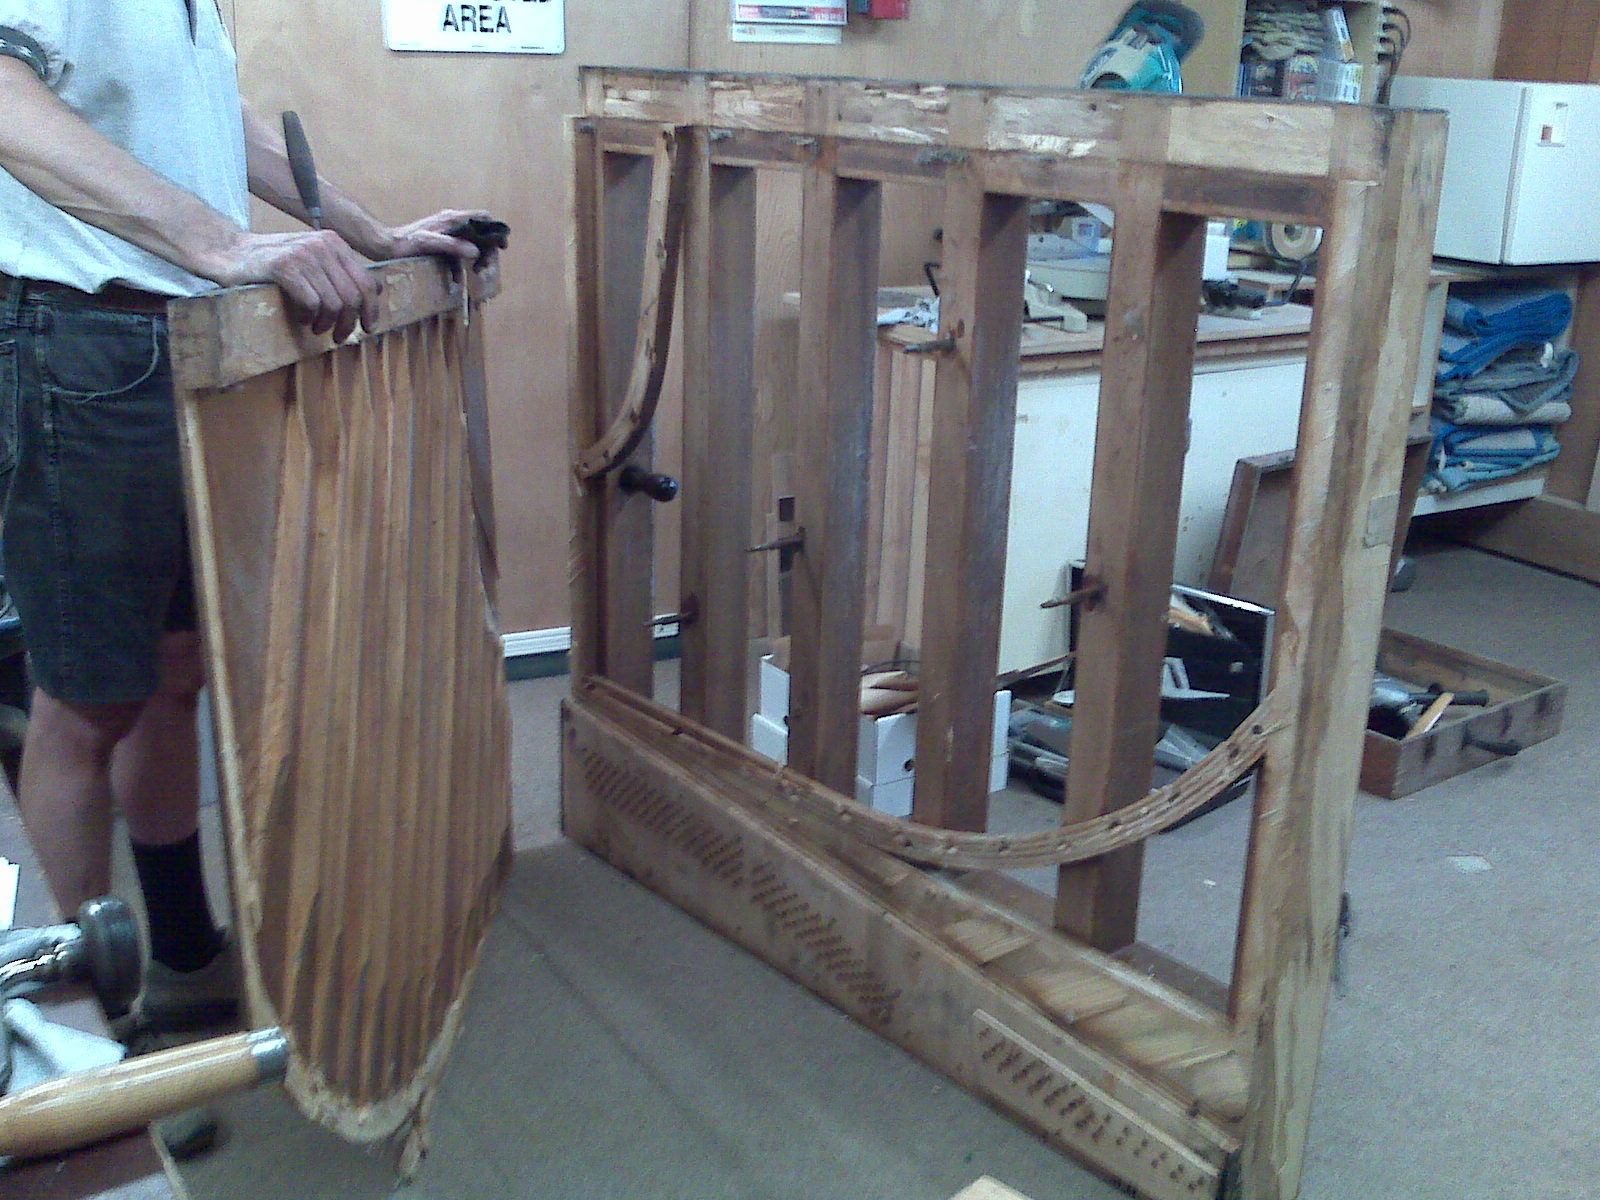
Removing the soundboard to allow for a complete cleansing of the smoke residue, and a thorough repair of the soundboard.
All cloth and felt replaced, excepting the centre pin bushings

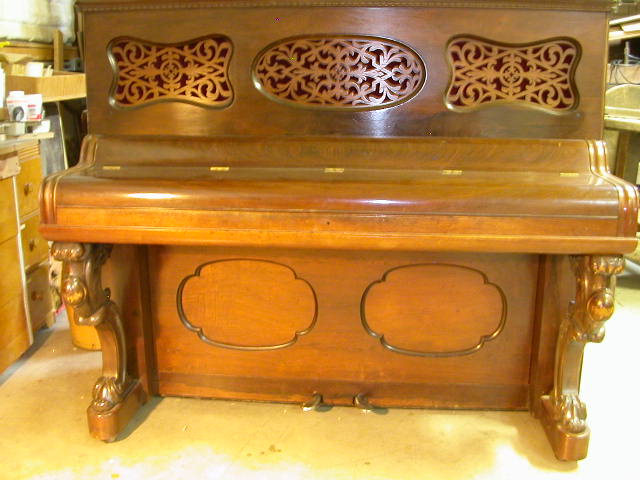
Nordheimer 54″ Upright Piano
Built 1908, Toronto
A total rebuild in our shop a few years ago. Refinishing by Robert Dressler.
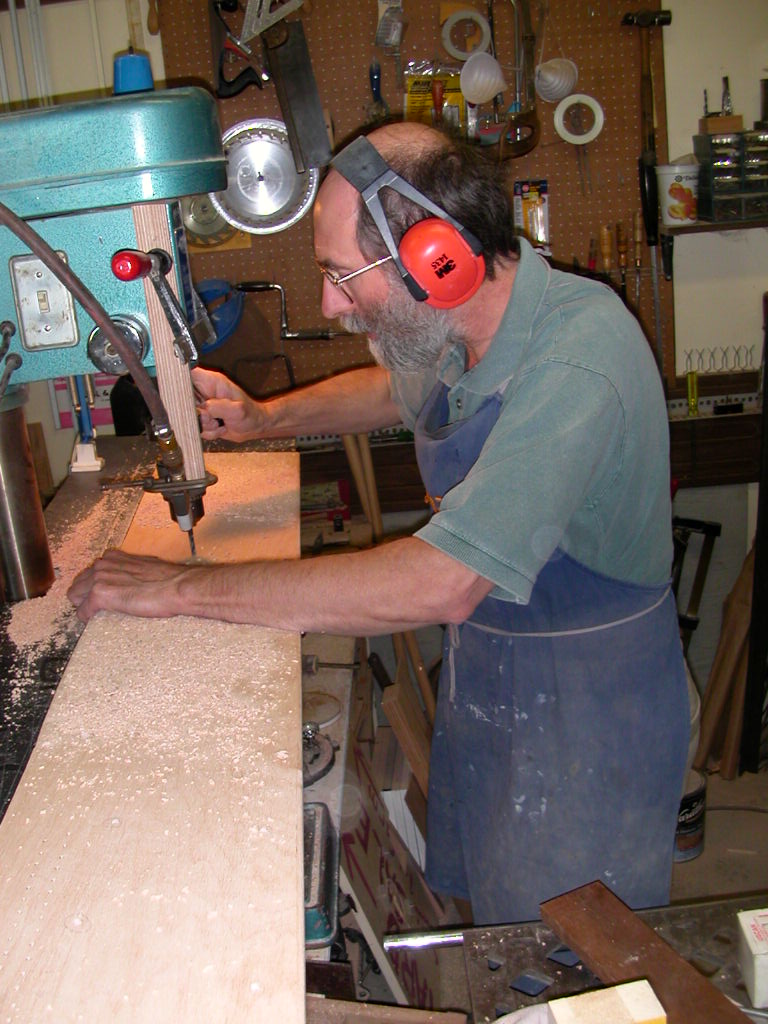
Drilling the pinblock with an air-cooled drill bit
Soundboard repaired with bridges removed
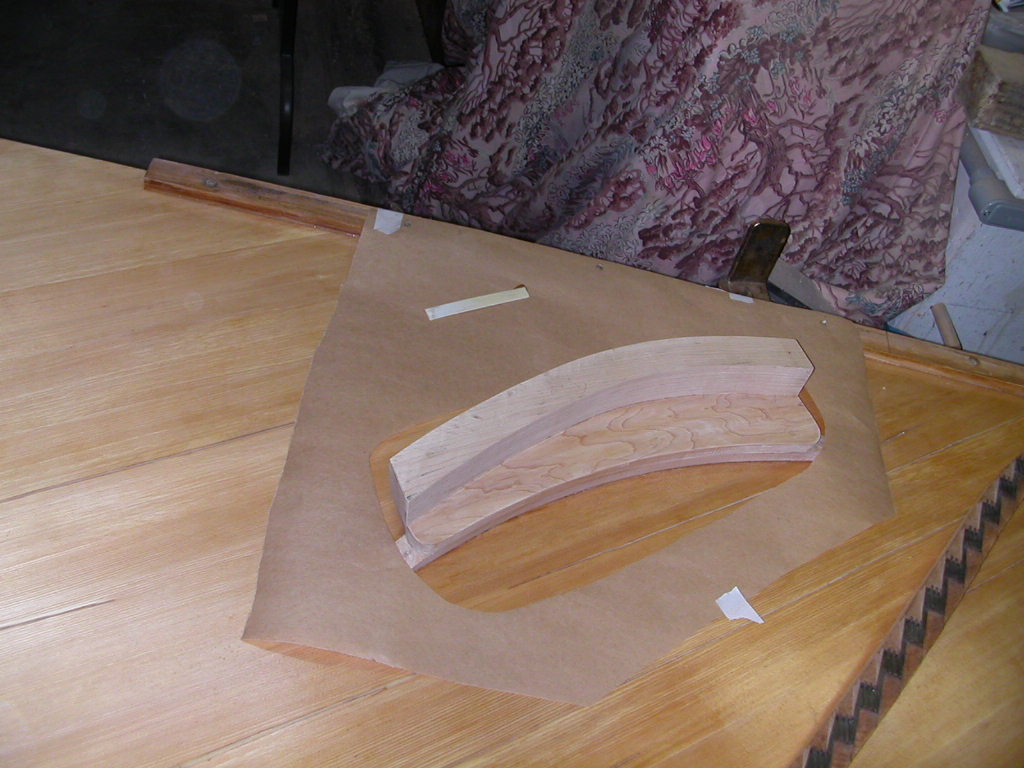
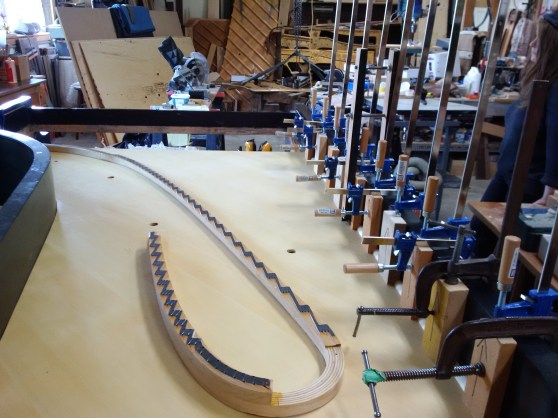
Mapping the location of the bass bridge to maximize the length of the cap in the available space
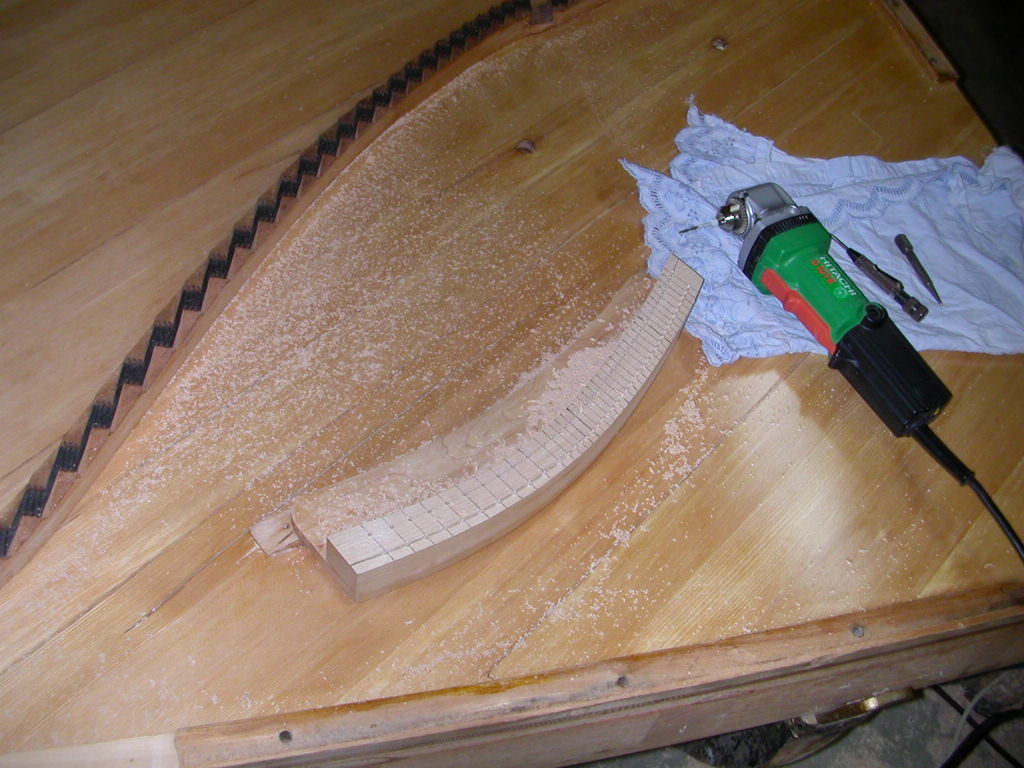
Drilling for the bridge pins on the bass bridge
The results of careful planning and execution

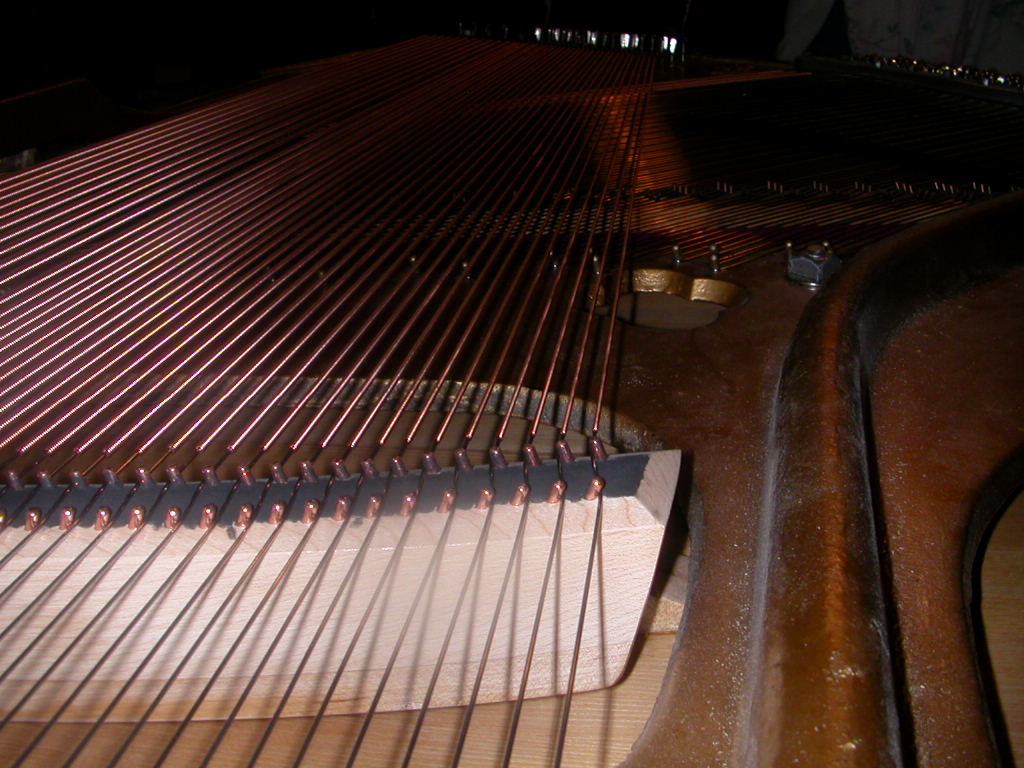
Showing details of re-designed bass bridge with a hornbeam cap
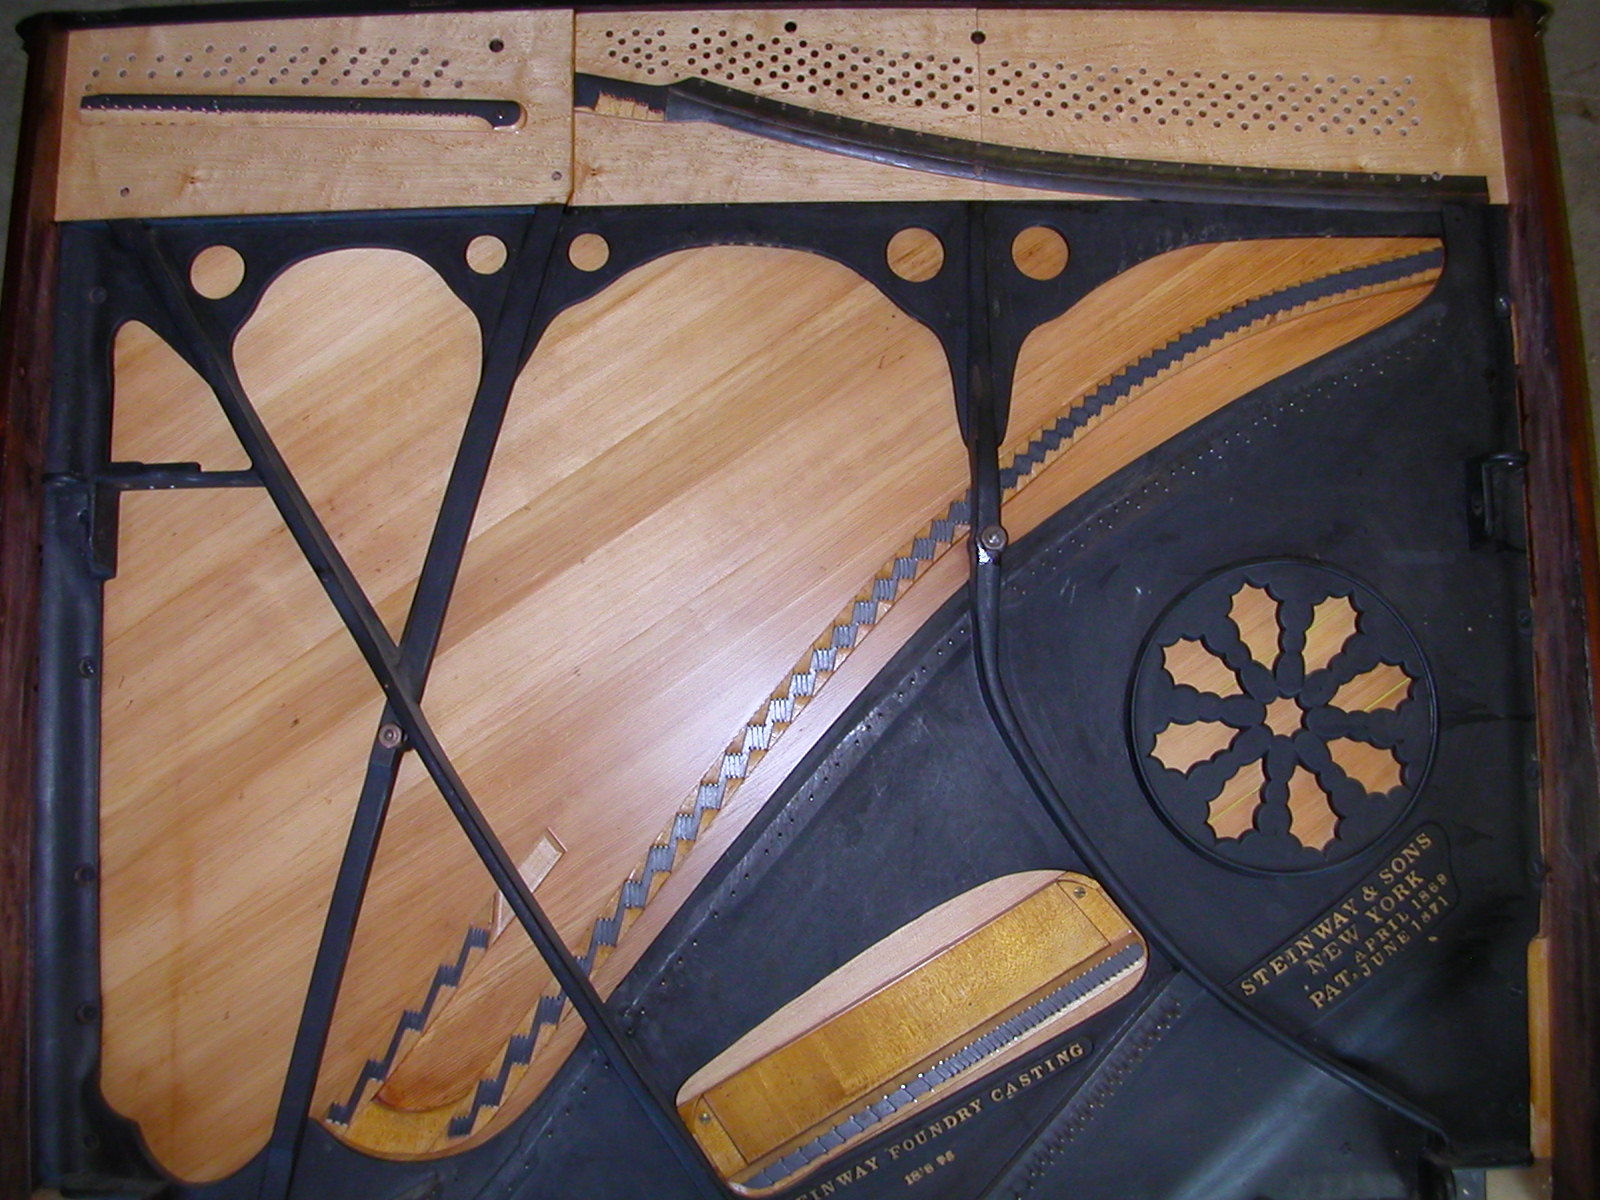
Steinway Upright Model 1
Built 1876, New York City
View the “Feature” page on this site to see much more of this piano.
“
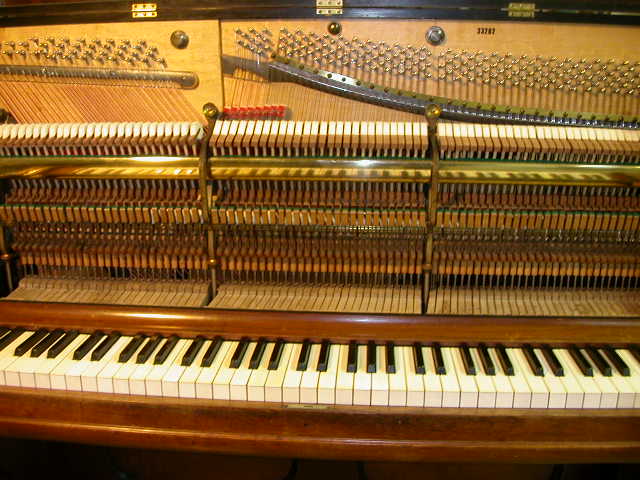
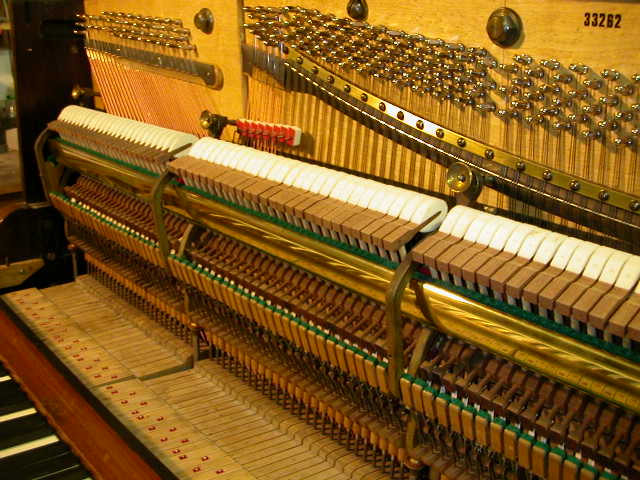
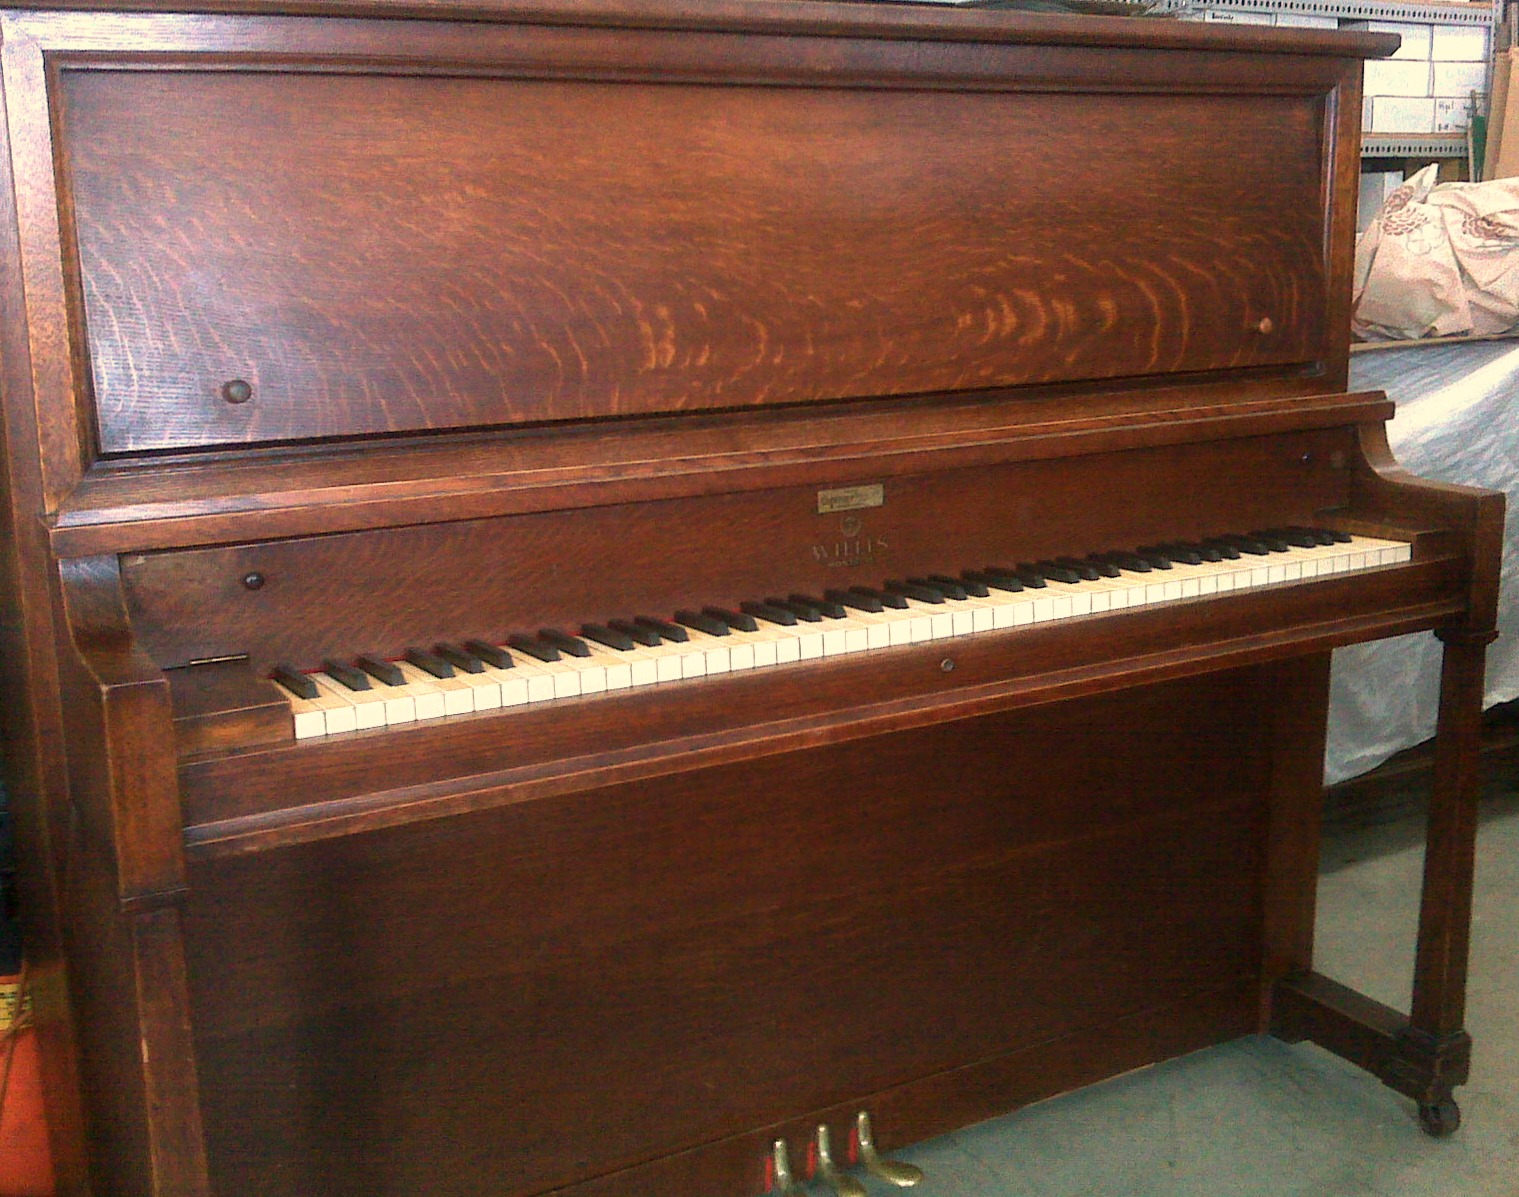
Willis & Co. Upright
Built ca. 1920, Montreal Quebec

A new cap of western dogwood for the high treble area of the bridge, ready for marking and drilling
A new pin block fitted, ready for marking holes for tuning pins
Installing strings and tuning pins
All treble strings in place, next to install the pressure bar and tune those strings before installing bass strings. Right side of the case is glued on at this point.

All strings in place, tuned several times and up on its feet

Part-way along in the action installation process
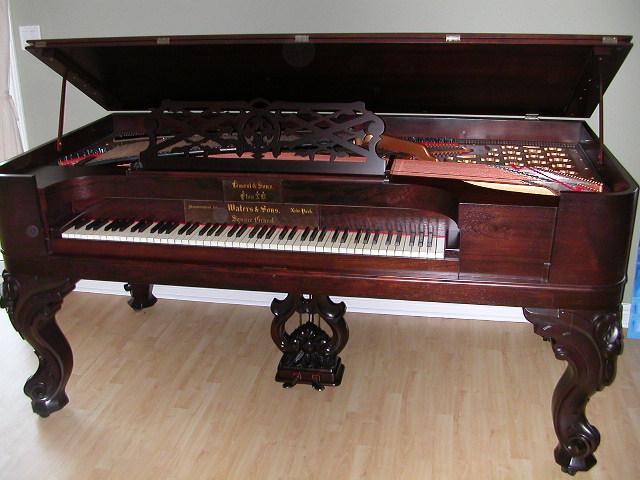
Lemont Square Grand
Built ca. 1880, Fredericton New Brunswick

Seiler Model 114
Reconfigured to Improve Ergonomics
Even a very fine piano can be improved! In this case, the posture was awkward – keyboard is higher than in comparable pianos and the pedals too far forward for comfort. Modifications included lowering the keyboard and moving the pedals back, neither of which are simple tasks but require re-design of both case and mechanics. I have performed this alteration to two of this model piano.
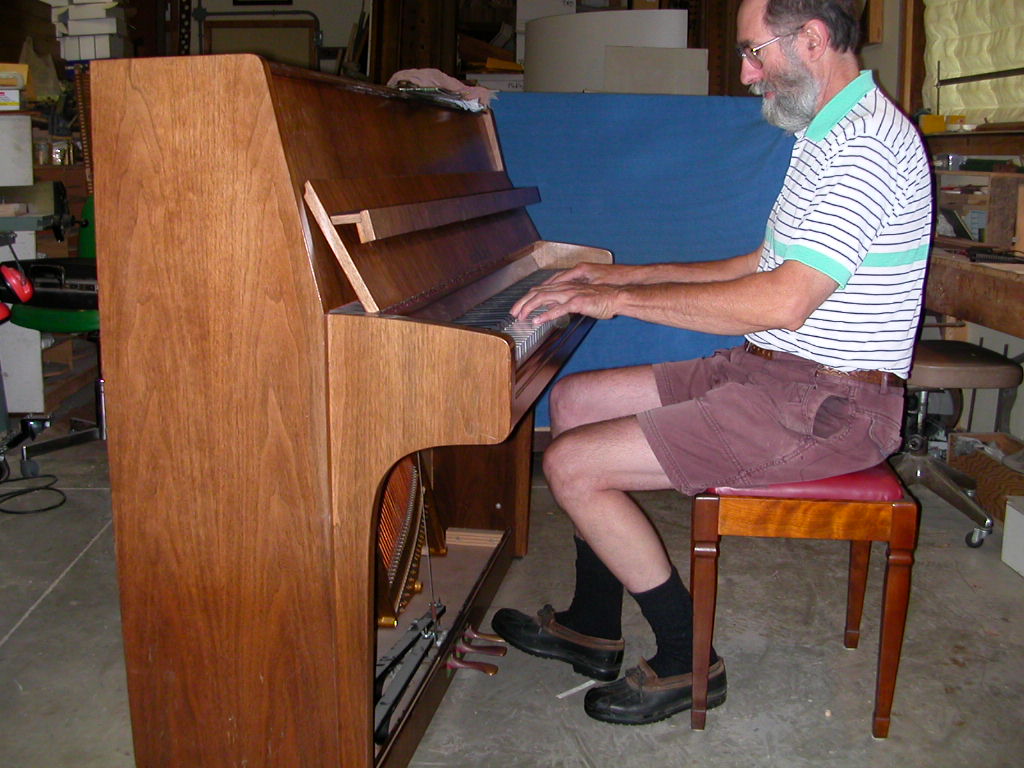
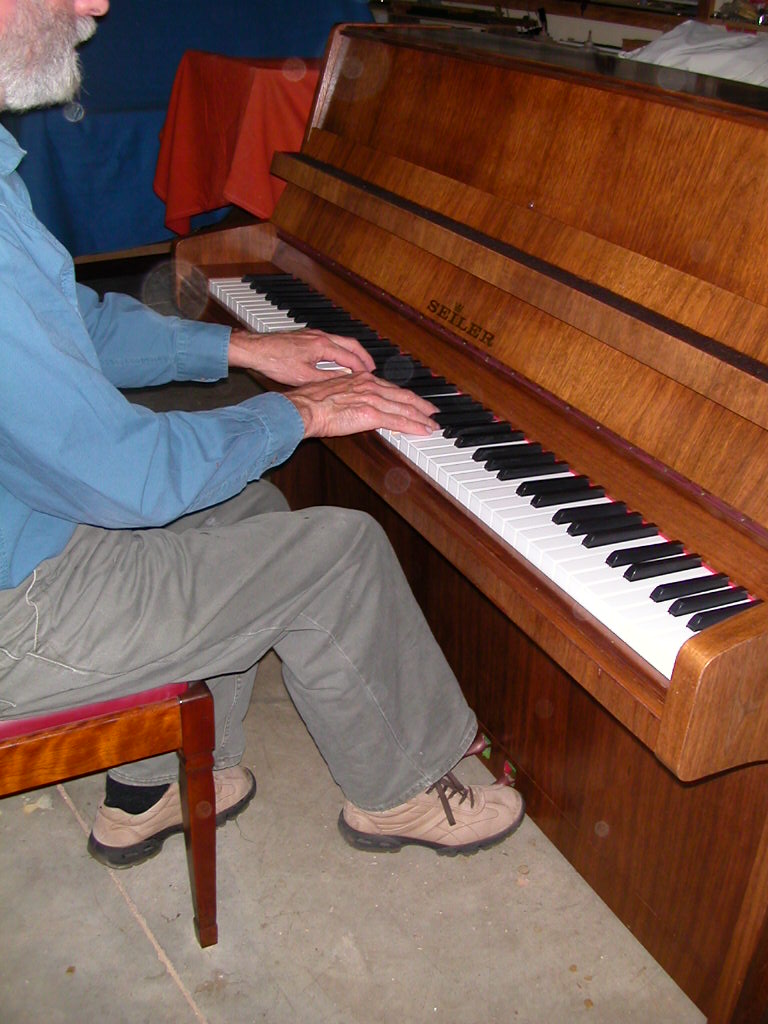
Posture after modifications. Keyboard was lowered 4cm. and pedals moved back 9 cm. Note the angle of my right knee and the level of lower arms. Much more comfortable.


Modification to ergonomics in progress. Adding blocks to the top of keys and heels to the underside of wippens to preserve the correct action geometry. Modifications included changes to almost every cabinet component.
Broadwood 8′ Grand Piano
Built 1891, London England
Cabinet work by Robert Dressler
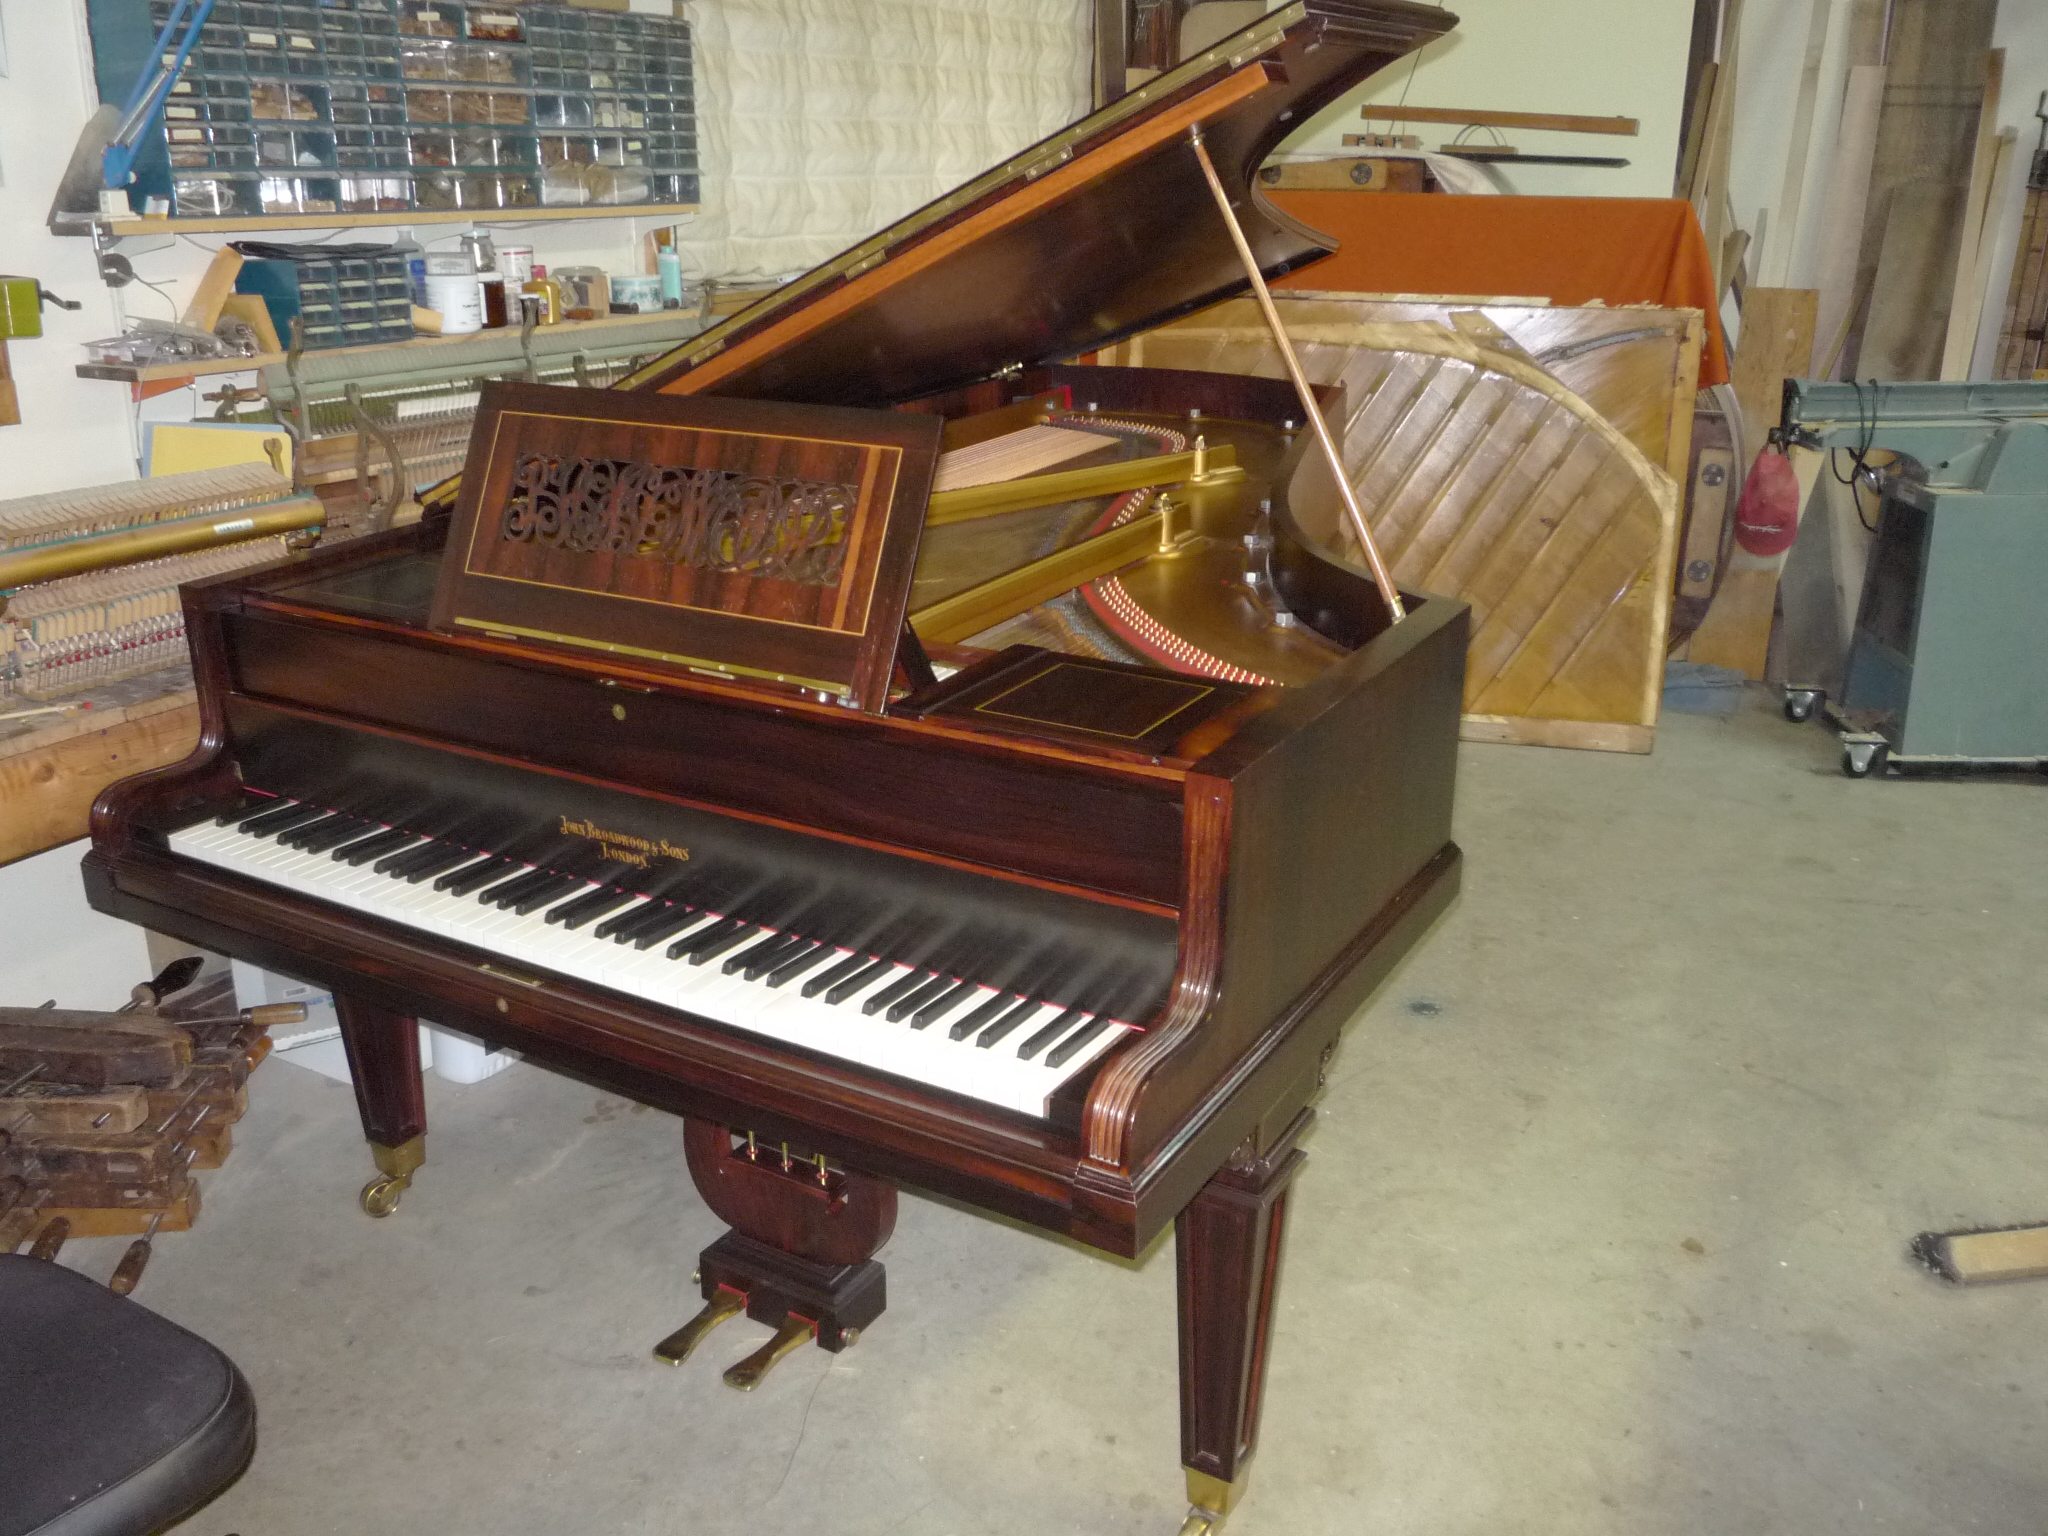
All assembled and ready for delivery – note the ornate music rest with the name “Broadwood” in scrollwork
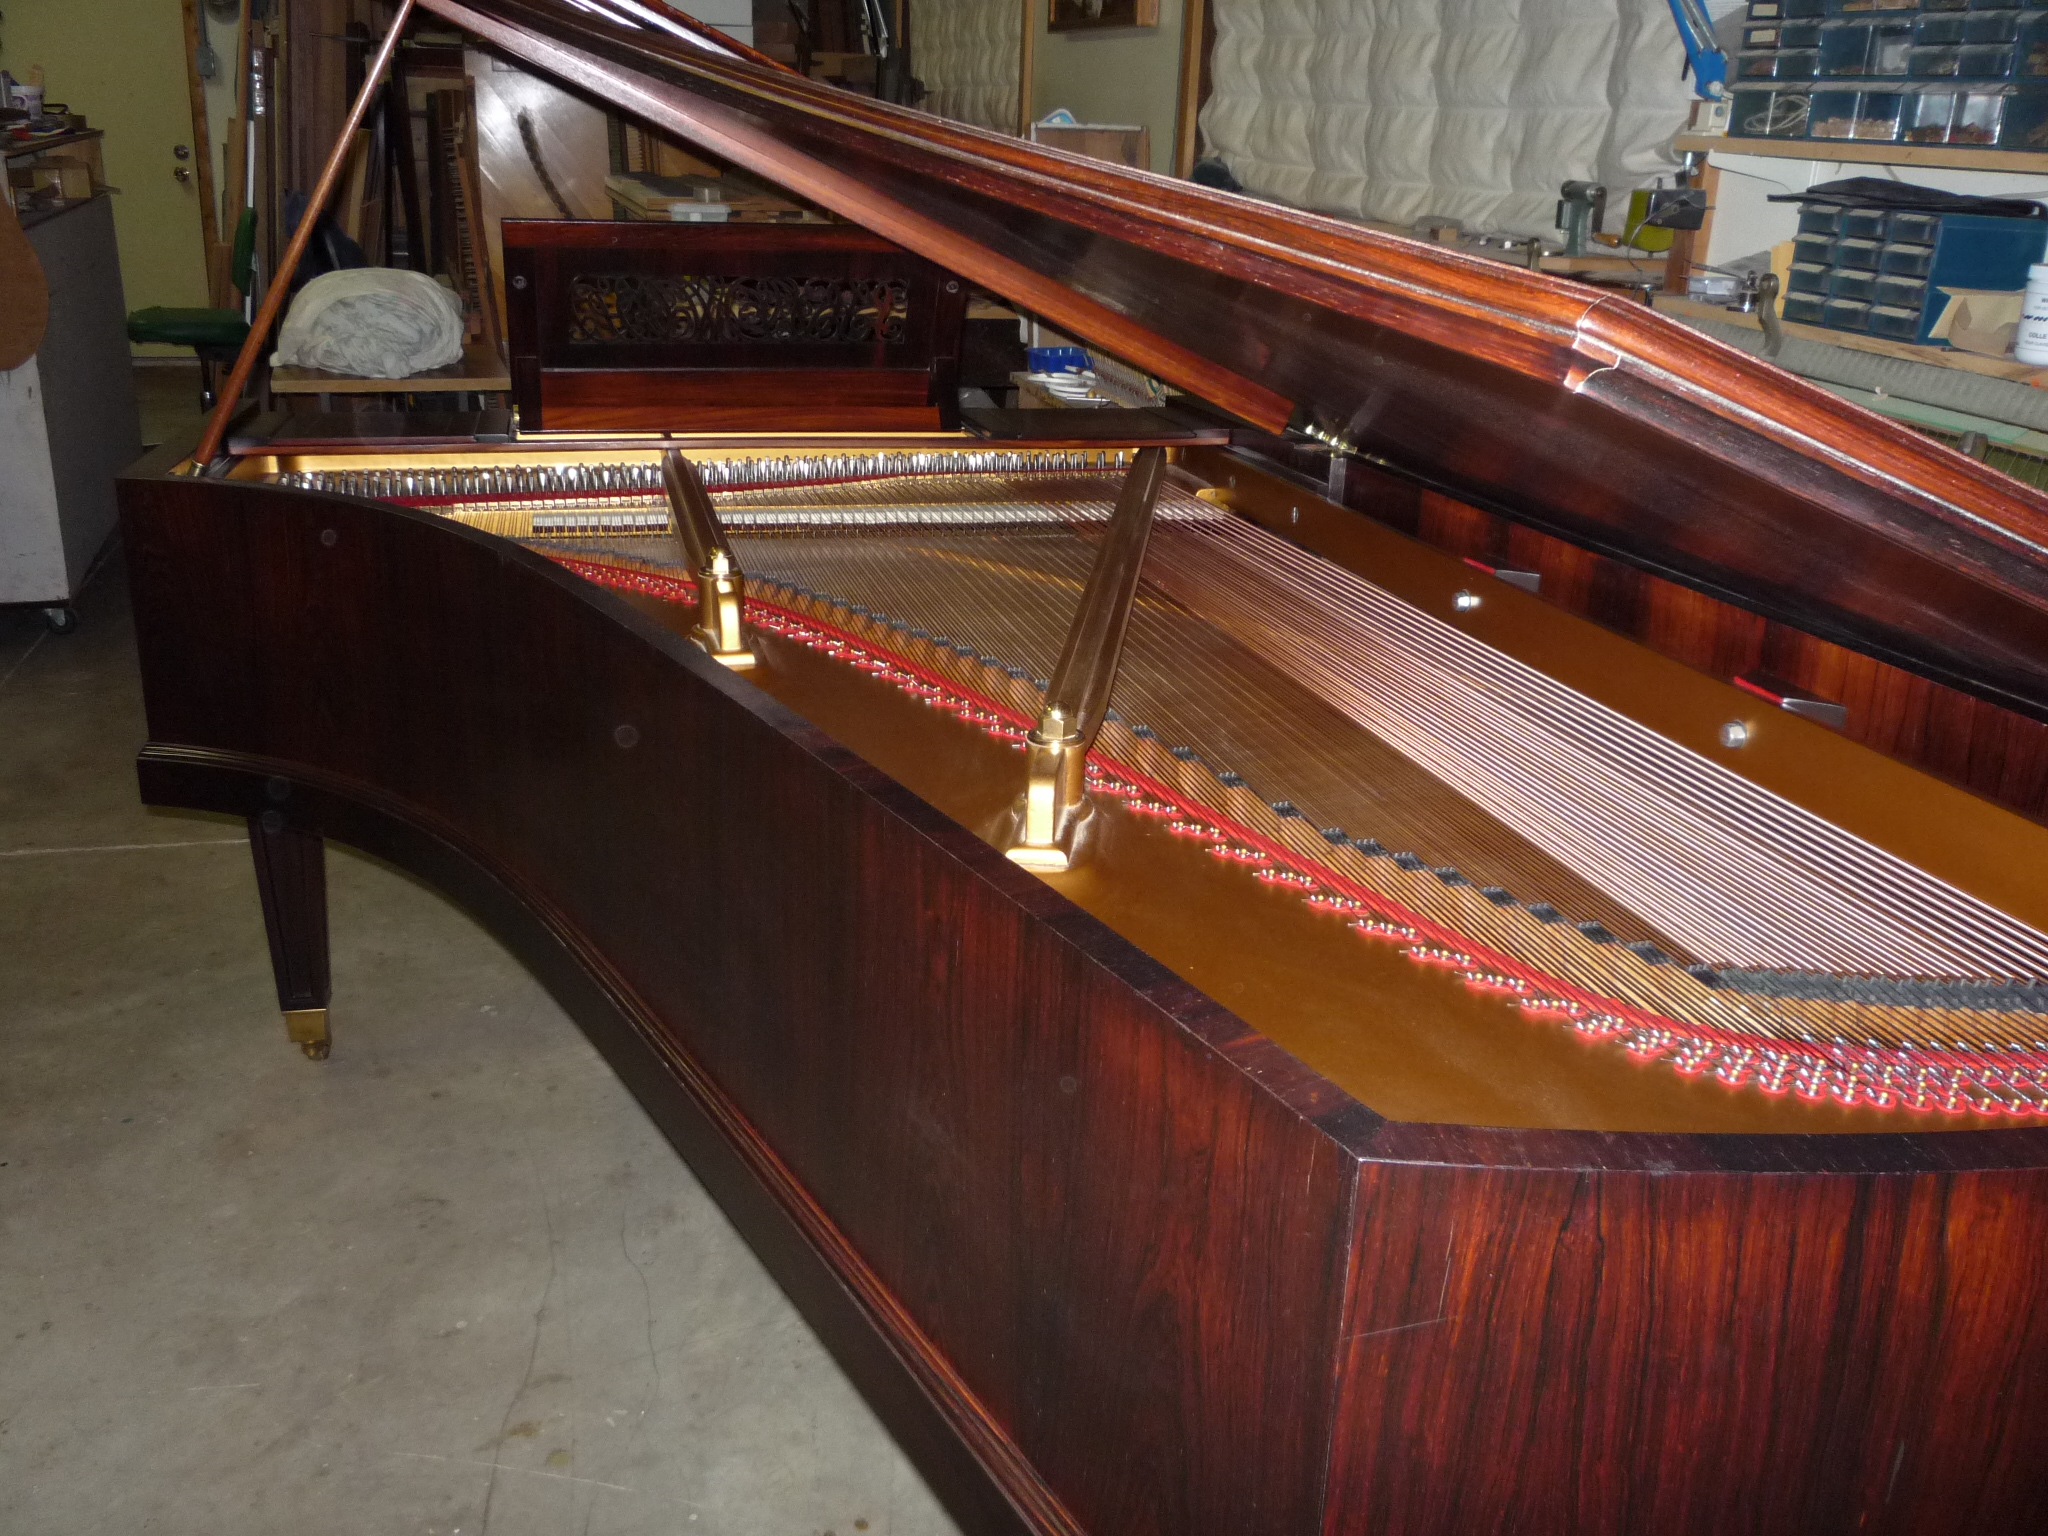

Beautiful details in the structure

The piano before stringing
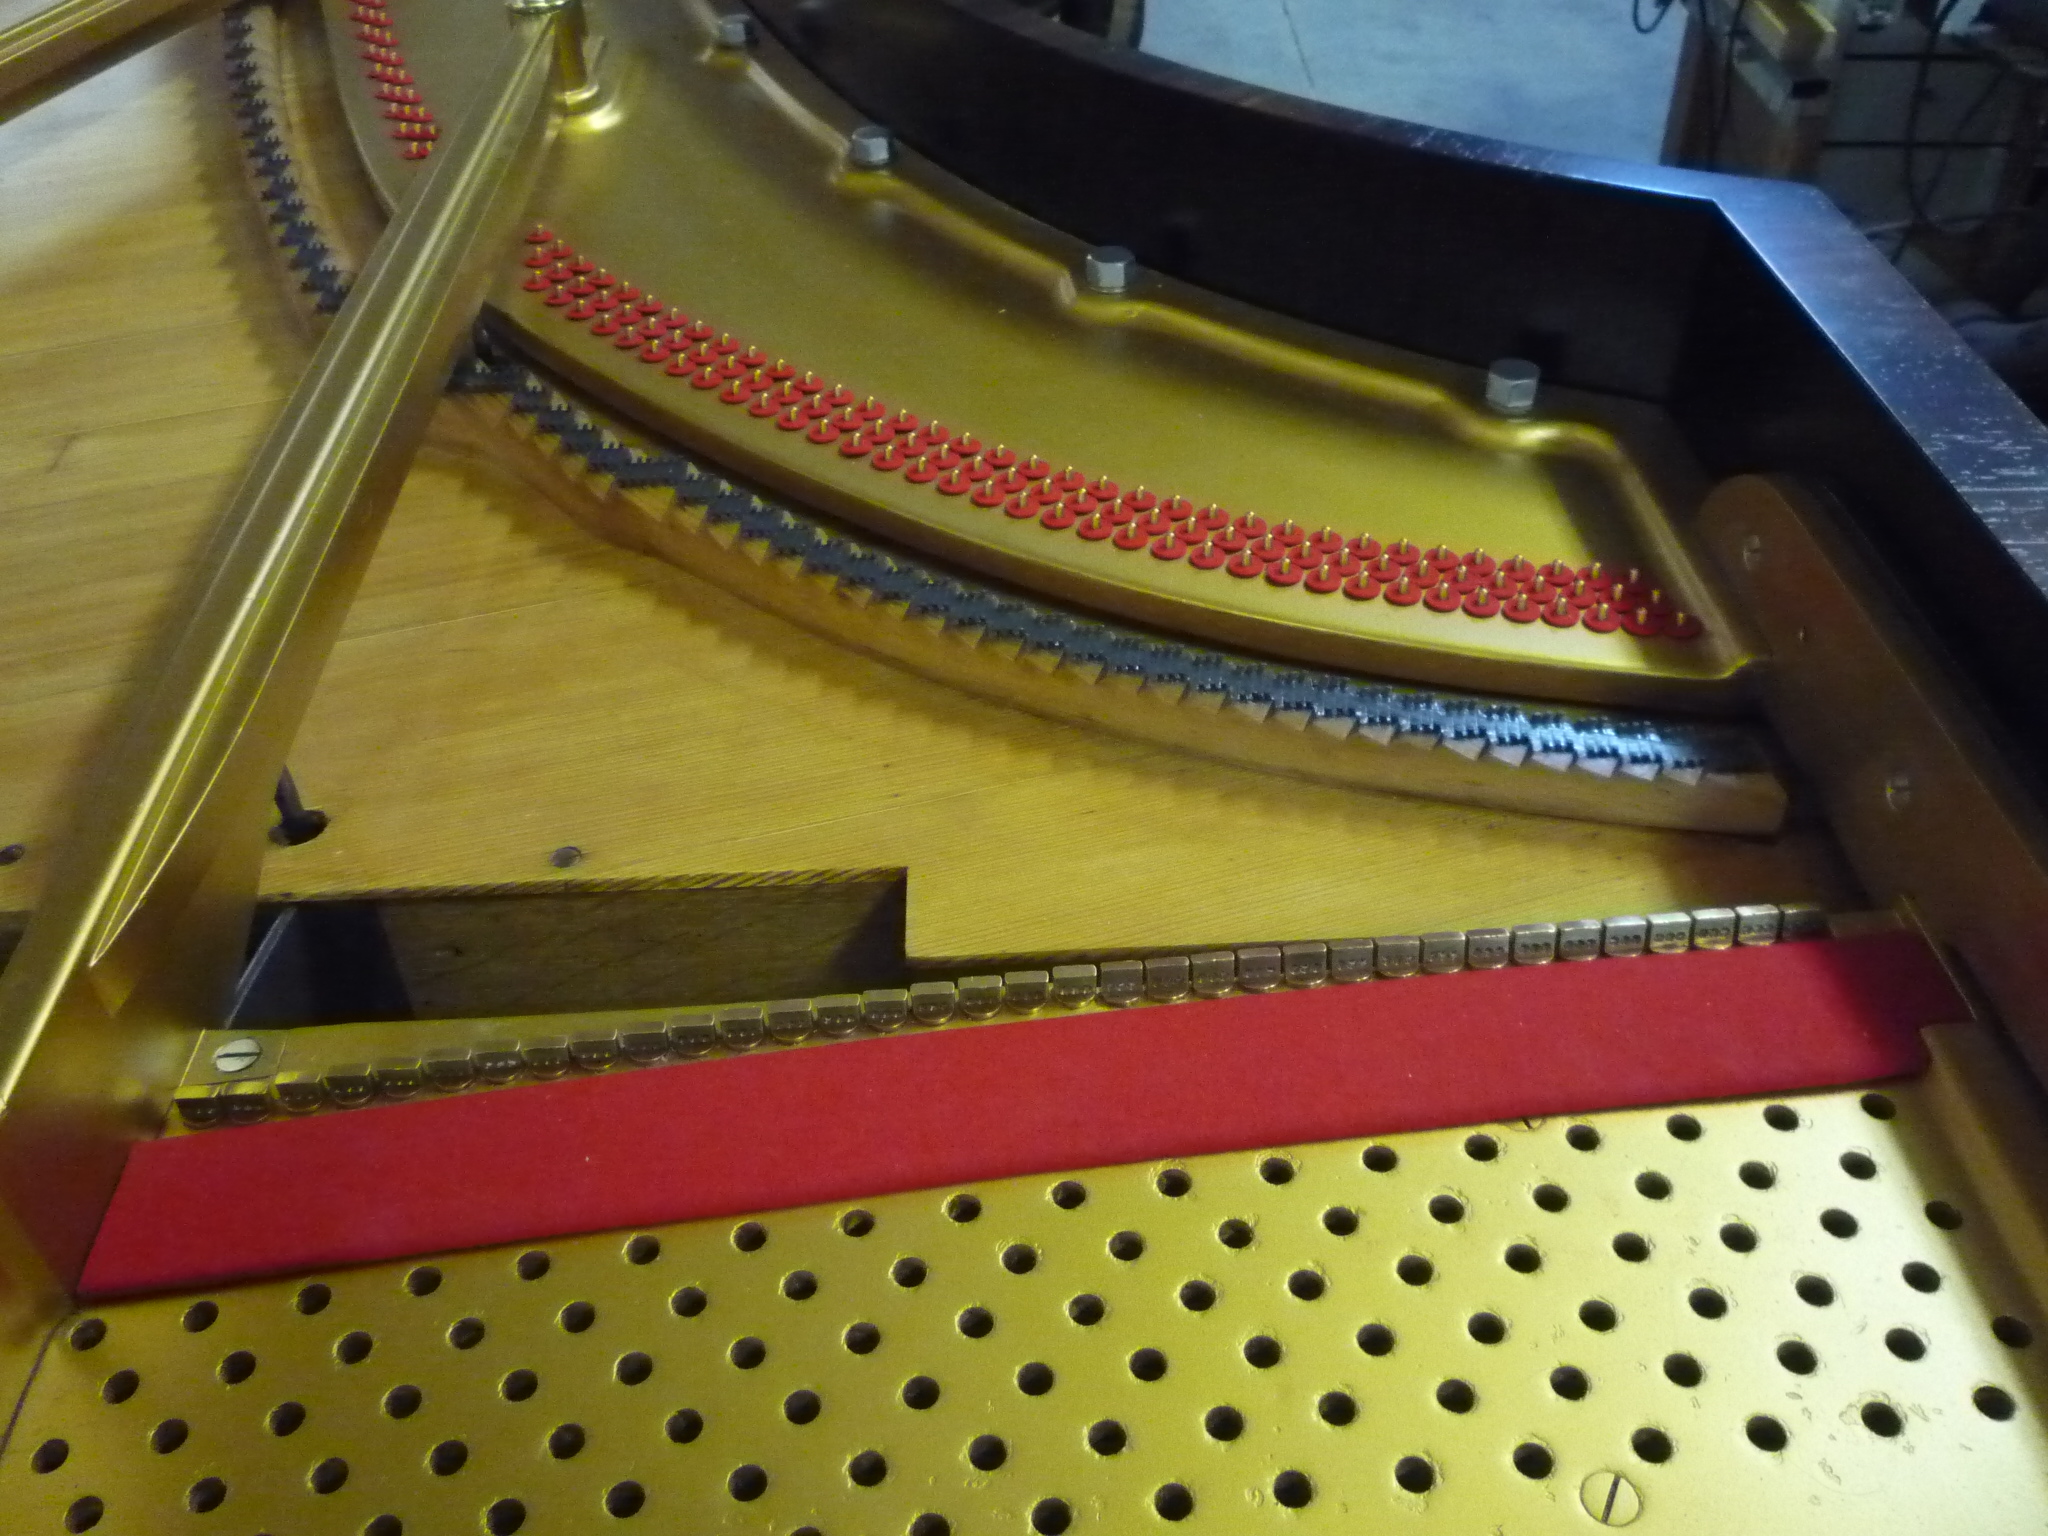
All agraffes and very detailed fitting of cloth ahead of the tuning pins (centre of photo)
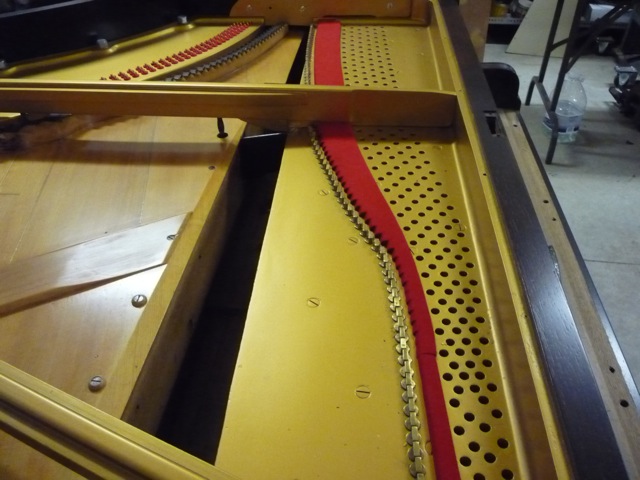
Single looped strings throughout on this very large straight-strung piano. The white line below the strings is the damper system
 Underdampers are visible below the strings
 Underdamper System
Special order Abel “Natural Wool” Hammers, Renner shanks in two sizes, and the English-style butts

Starting to “hang the hammers”
Hammers all installed and wippens rebuilt, on their respective rails
 The action stack is now ready to be added to the keyboard
Early on in the rebuilding process – Shimming Soundboard, Bridge Removed
The piano went to the refinisher’s shop first, where it was taken apart and cabinet work completed before the interior work started. Removing the pinblock creates quite a mess in this style of construction
Various Projects
More to Come!
 Steinway M Grand Piano, above
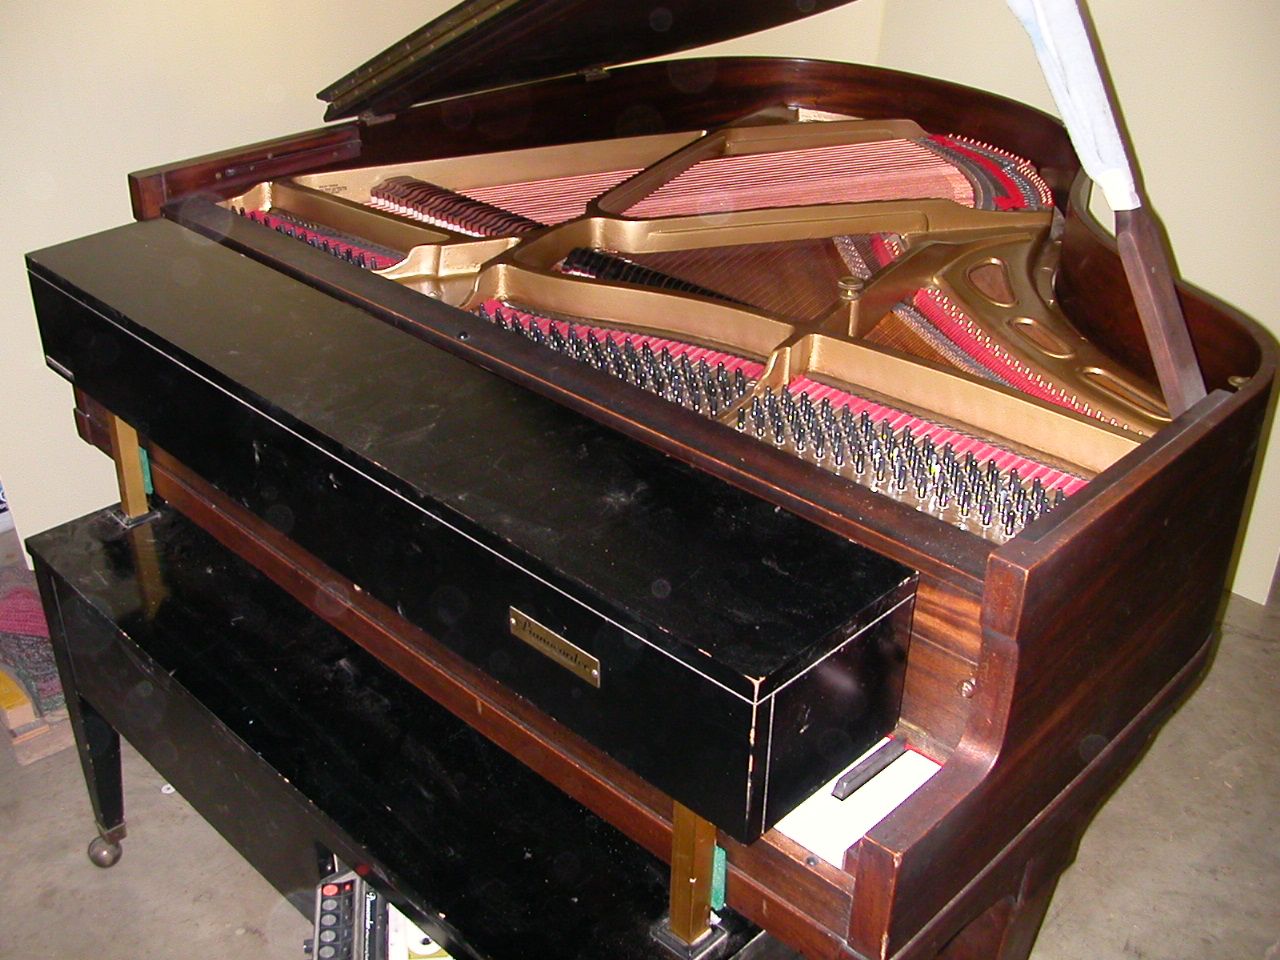
Brambach 5′ Grand Piano, below

Brambach 5′ grand
The piano was taken to pieces during the day-long “Home and Leisure Show – Day For The Arts” in Strathroy a few years ago. At 10 am it sounded its last note and work commenced.
At this point the action and dampers have been removed and strings are coming out.
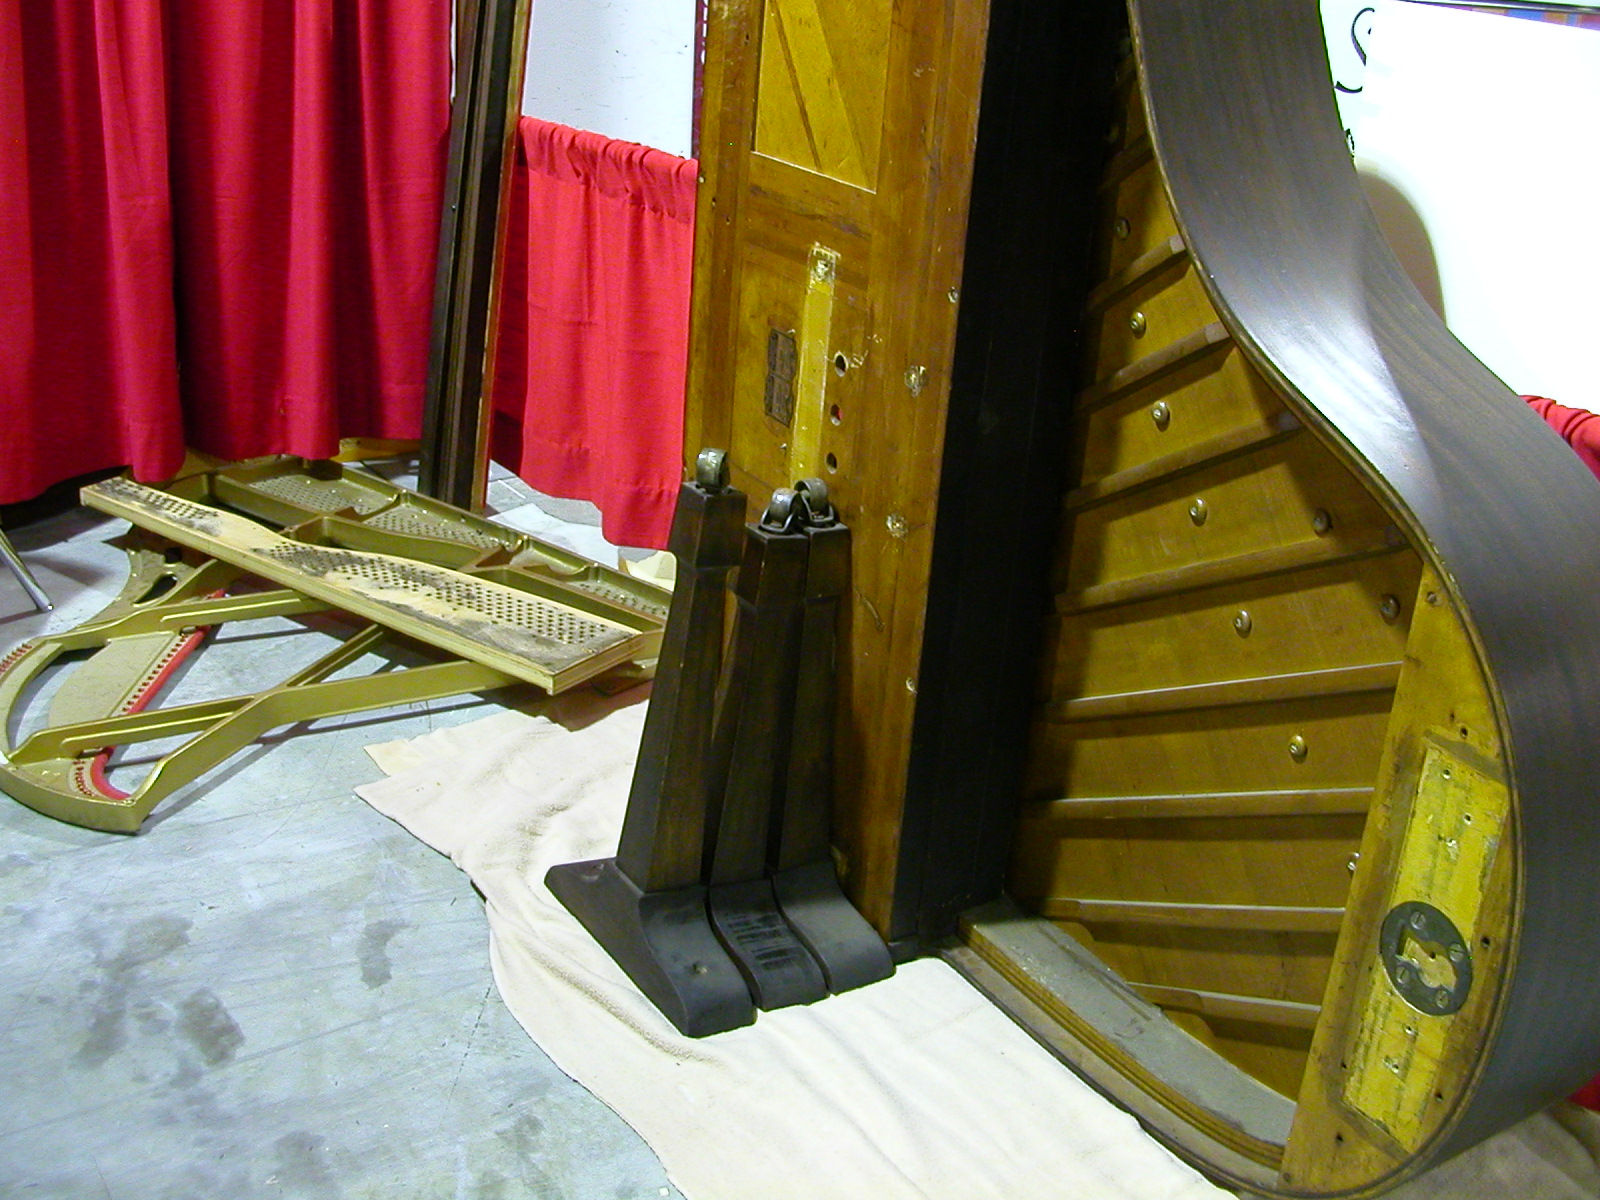
Reduced to basic components by the end of the show, now ready for the rebuilding work.
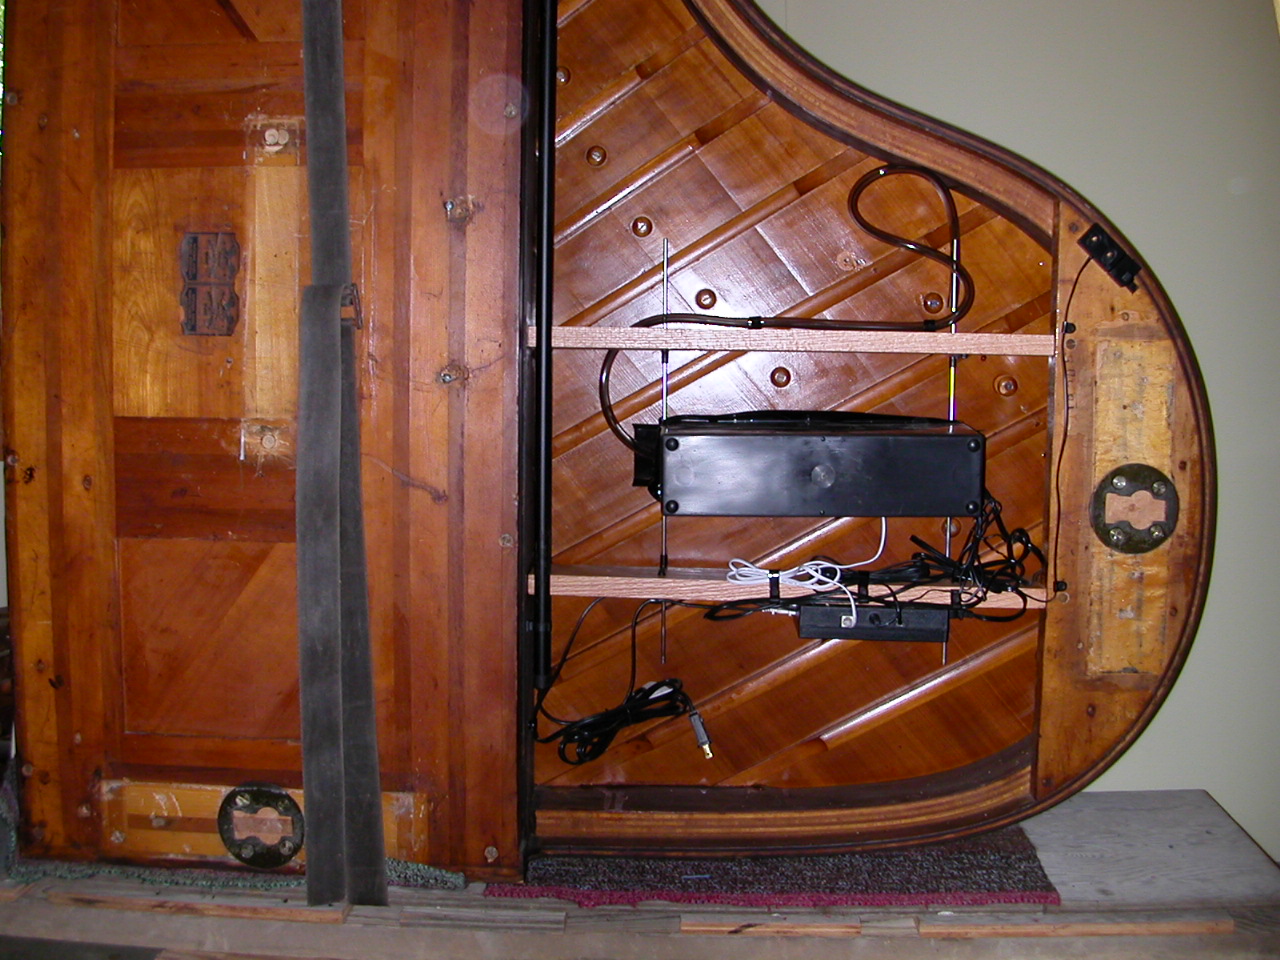
On its side, looking at the “DampChaser Climate Control System” installed below the soundboard

The owners moved to Calgary during the time the piano was being rebuilt and it soon followed in a specially-built crate.
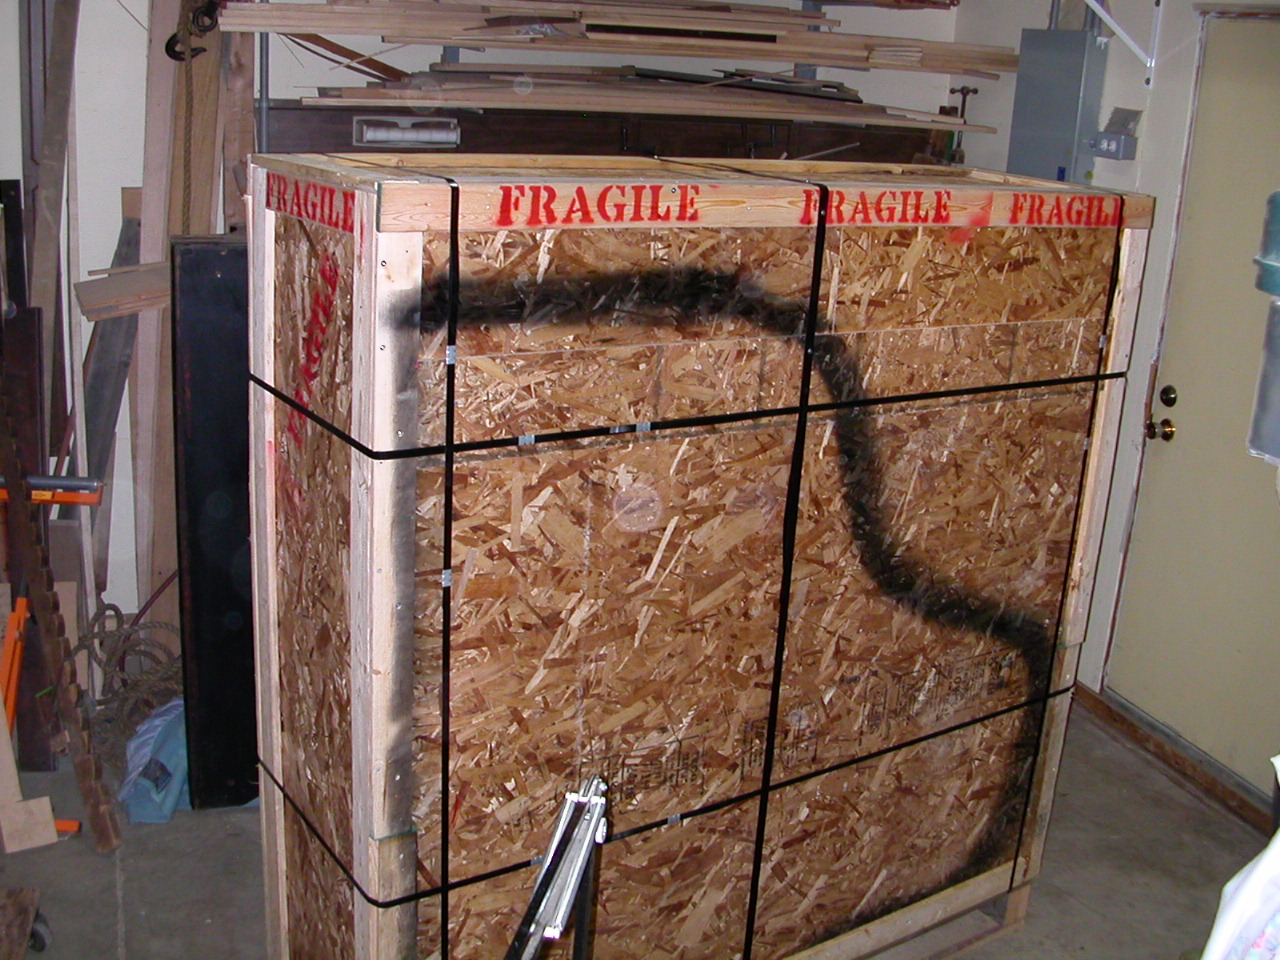
The crated piano ready for shipping
Other Miscellaneous Projects
Ralph Thorn Pianos is also experienced with repairing reed organs and melodions.
Bellows for Karn Reed Organ receiving new bellows cloth
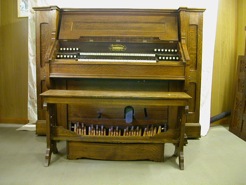 Dominion two manual and pedal reed organ ca. 1905, fully restored
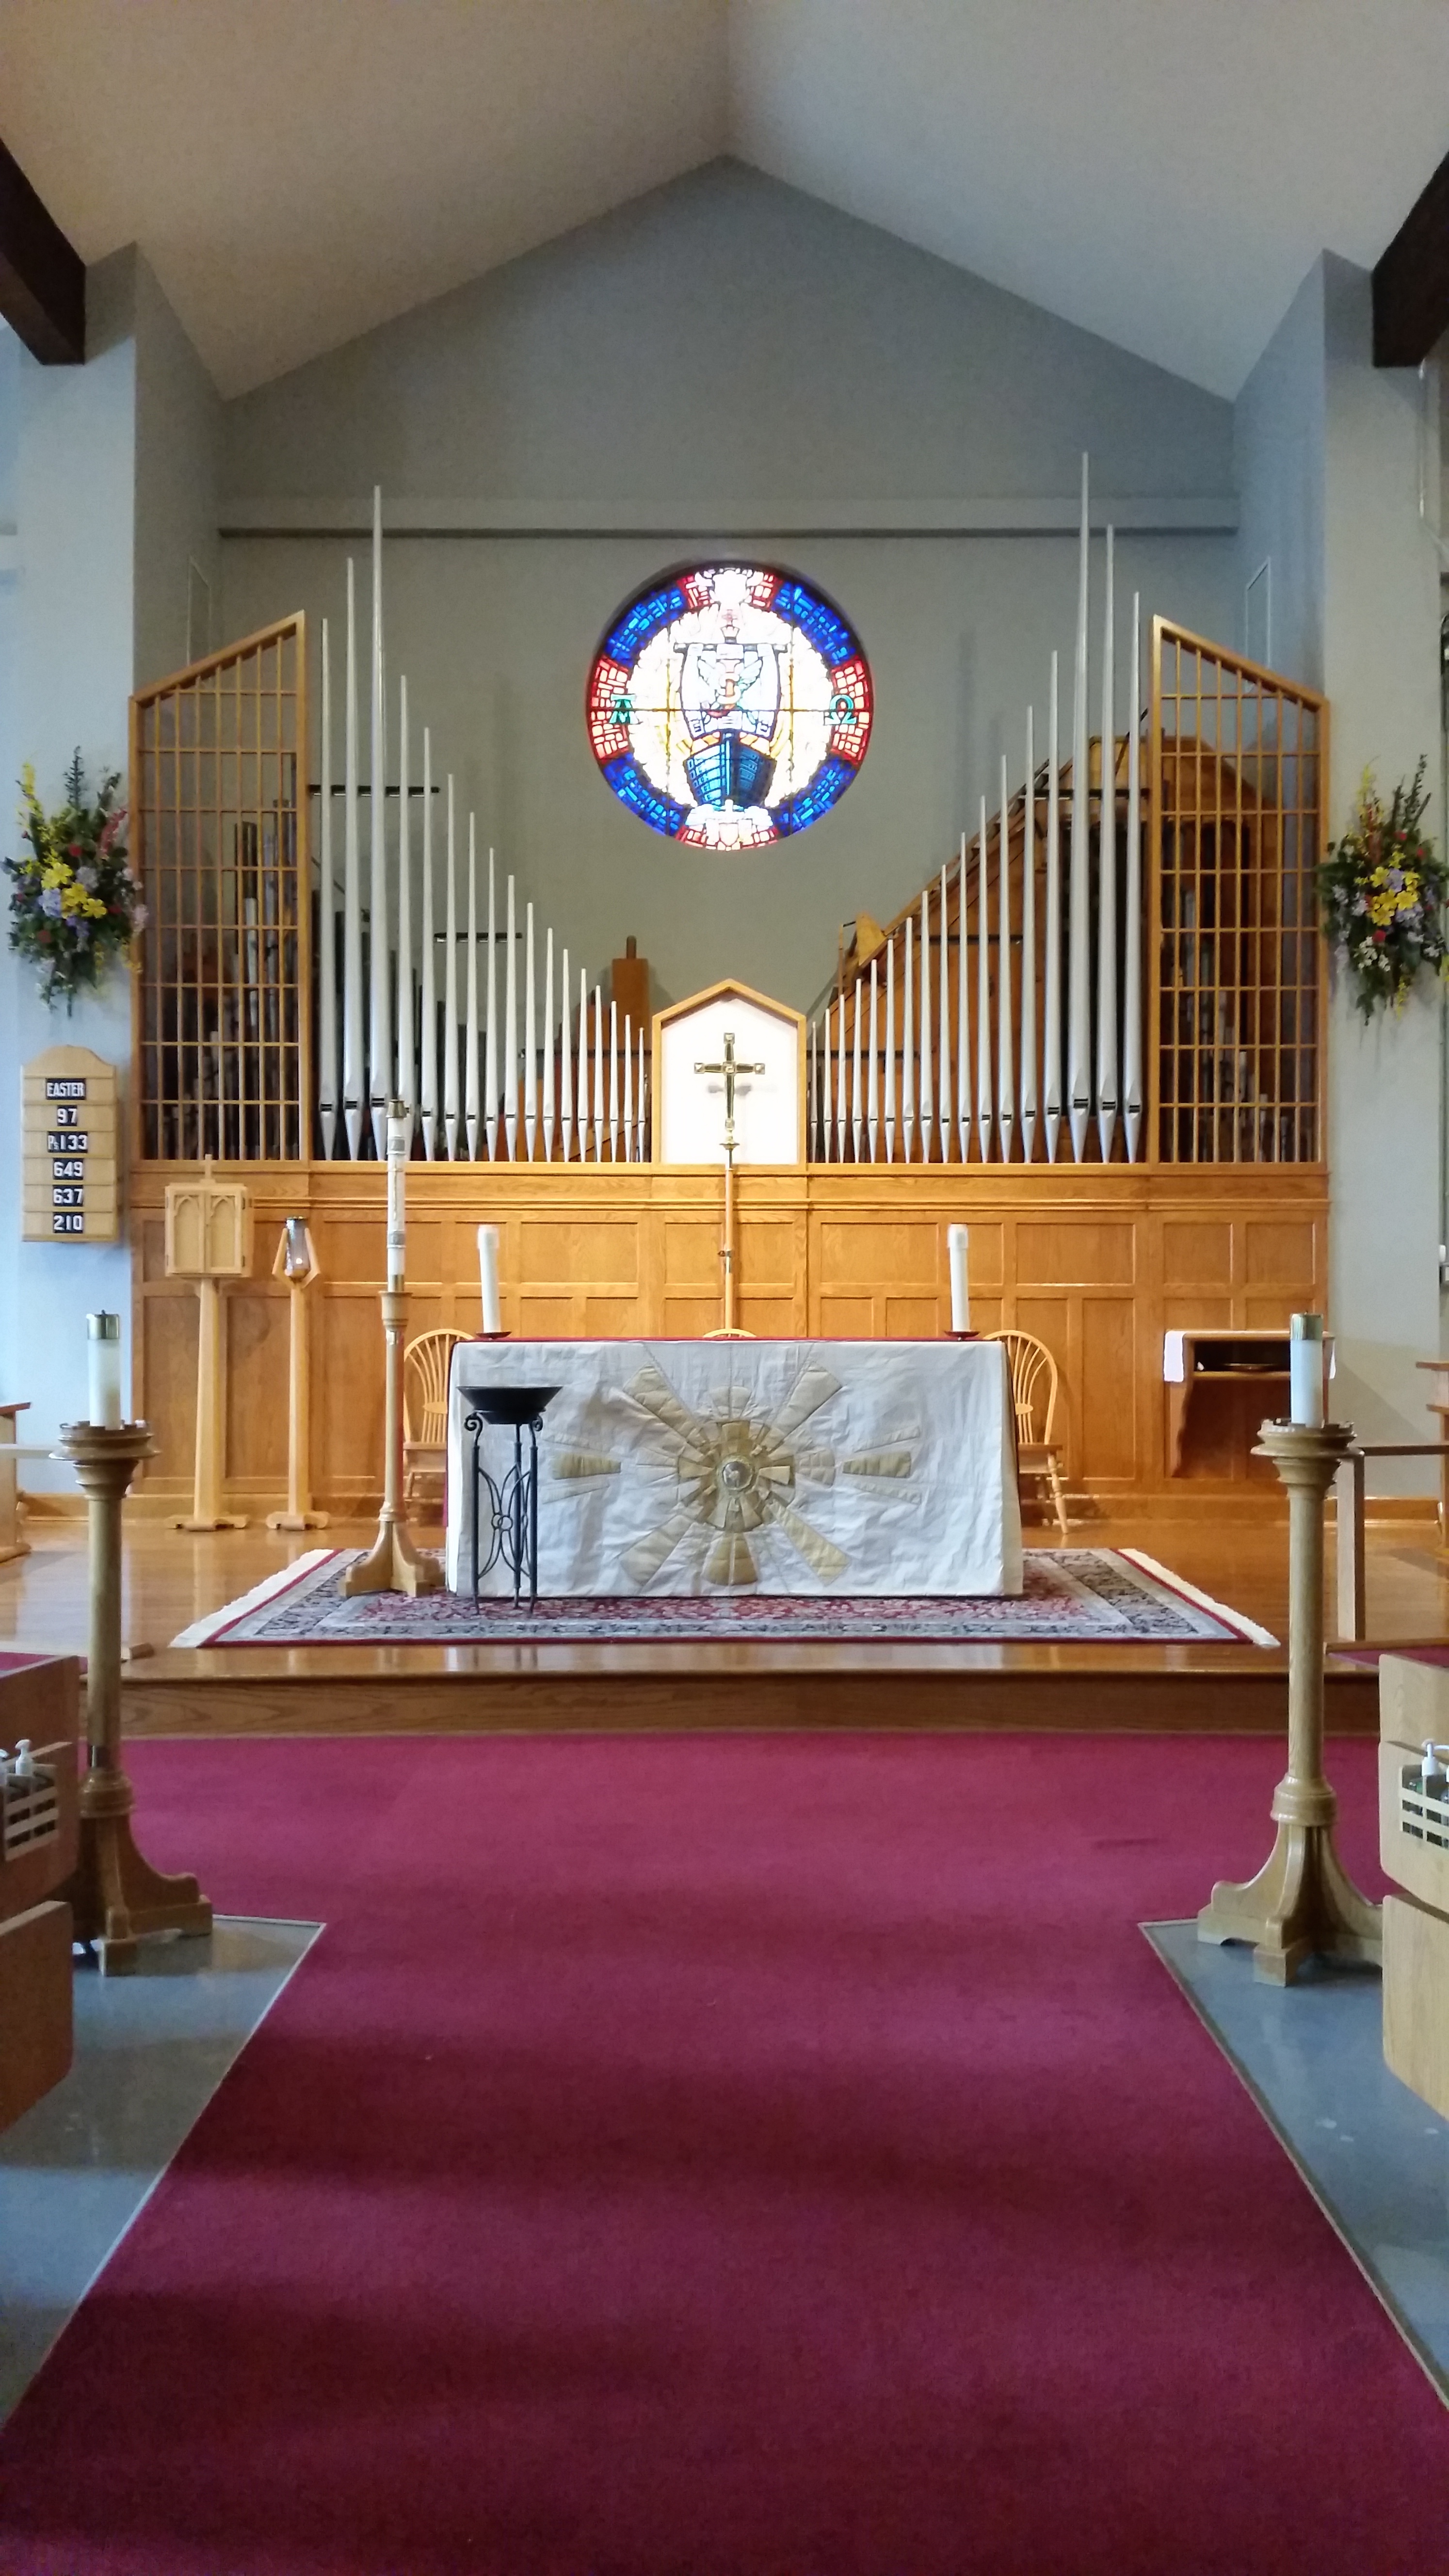
Pipe Organ Facade design and installation done by Ralph Thorn Pianos at St. Jude’s Anglican Church, London ON, 1995
Marantz Pianocorder is used for “Playing in” every piano rebuilding project
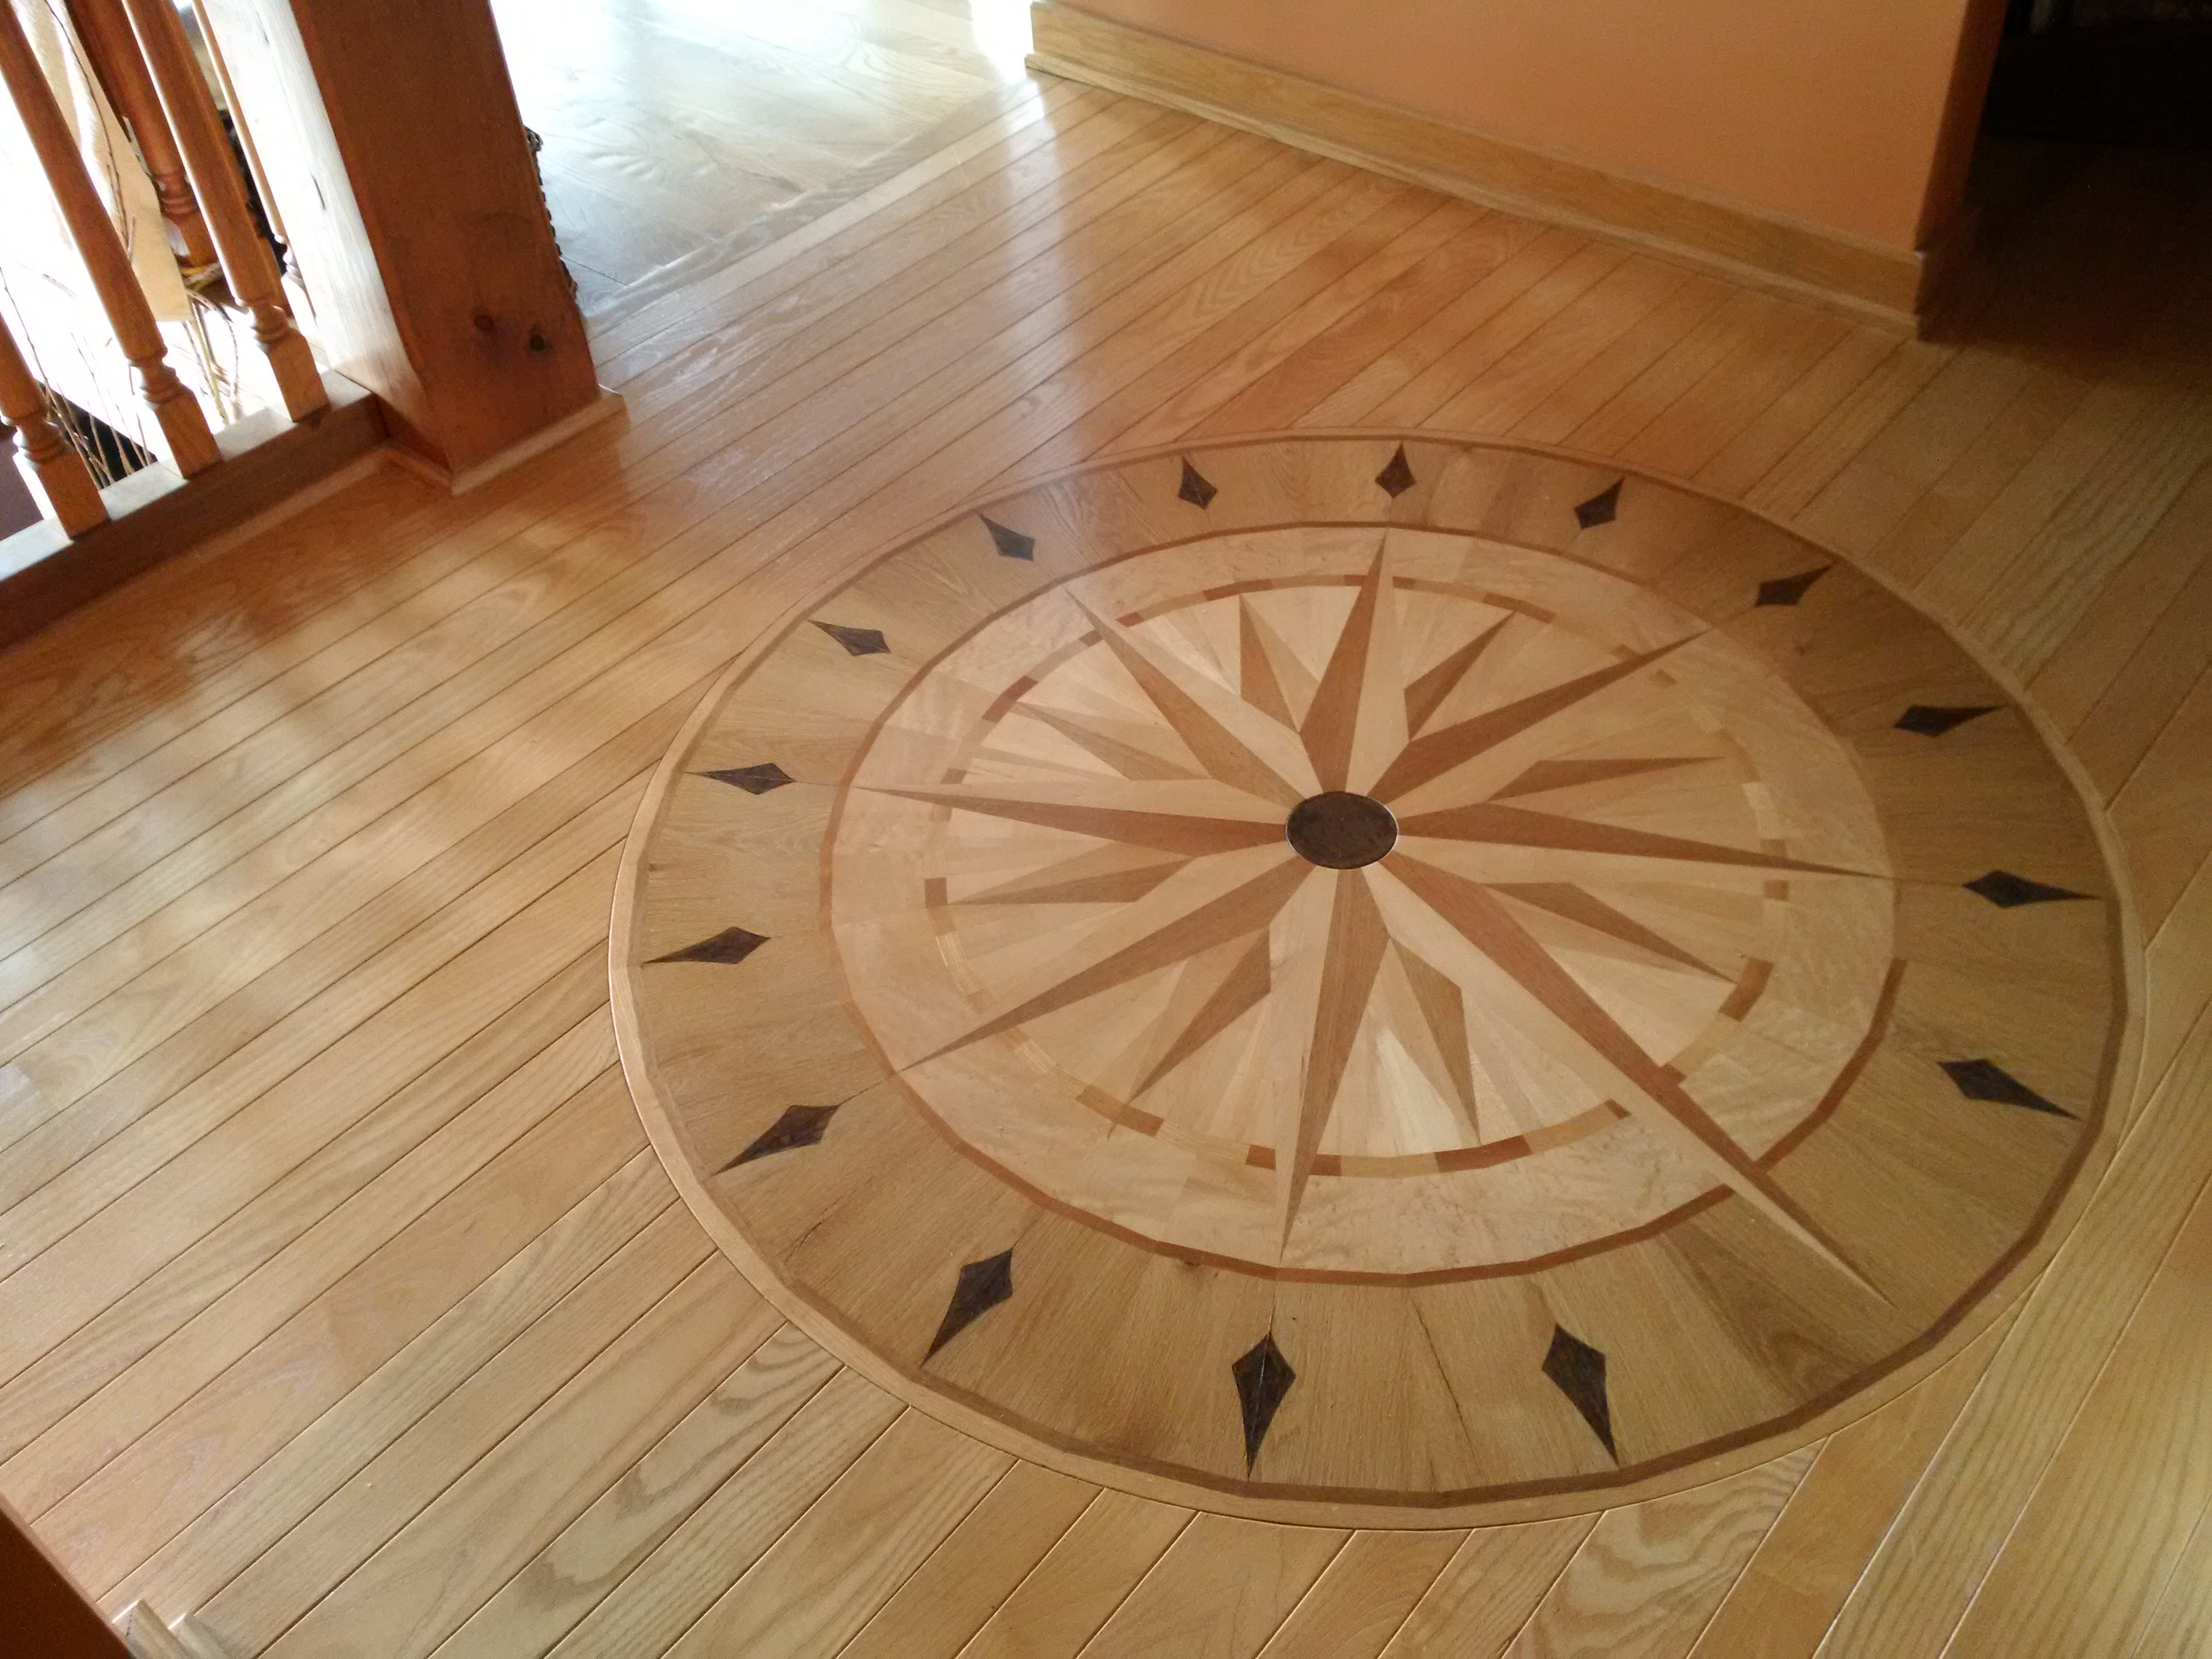
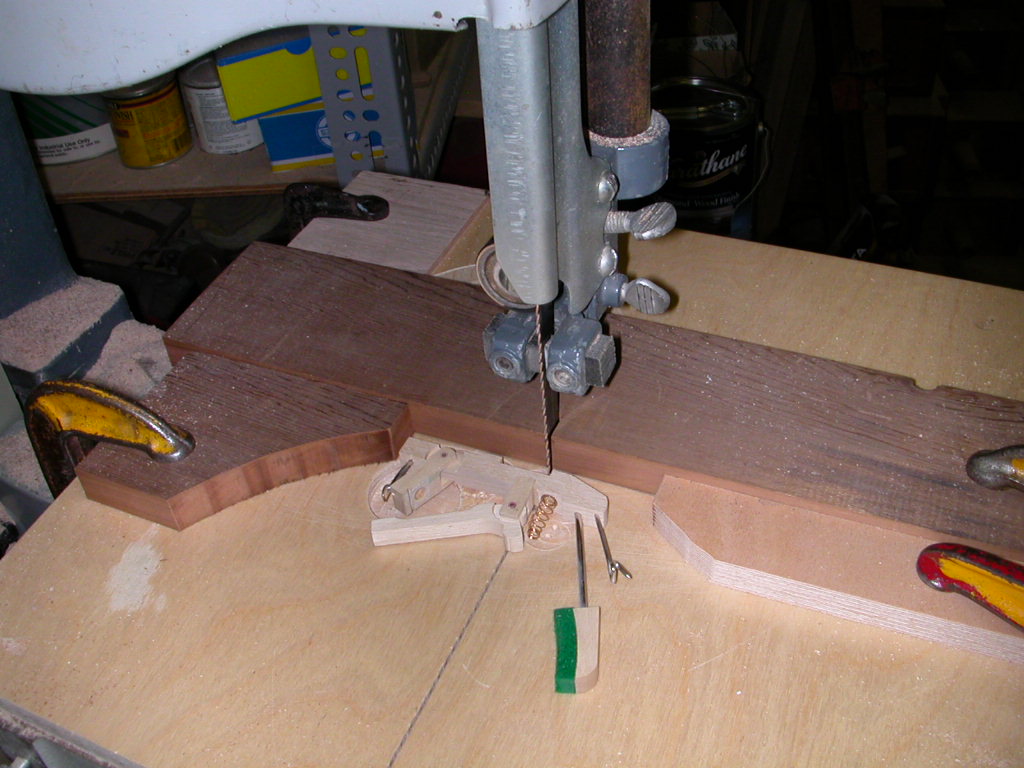
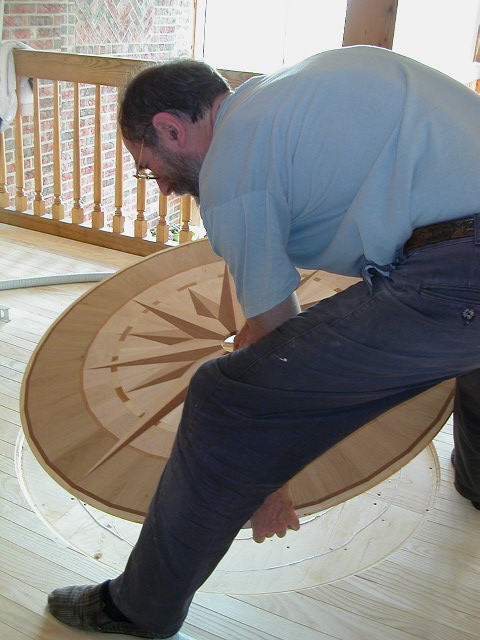
Woodworking skills required for piano rebuilding are evident in this 4′ floor medallion
Many elaborate jigs were required to make the compass rose medallion
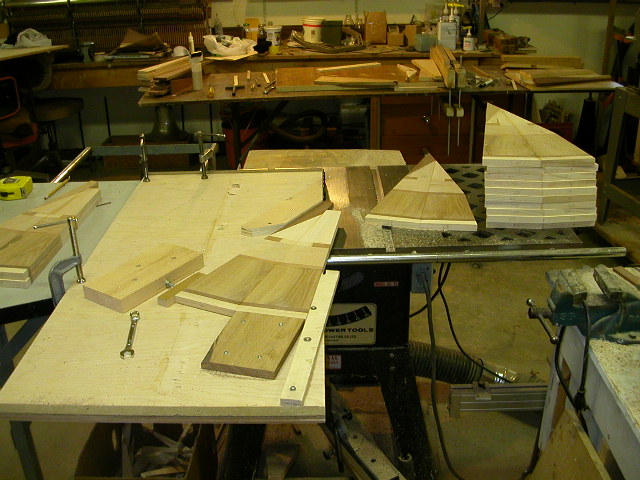
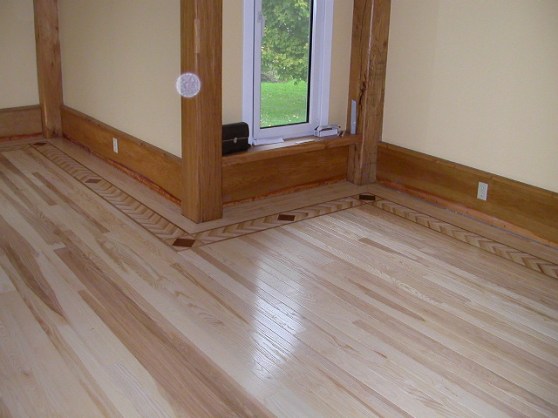
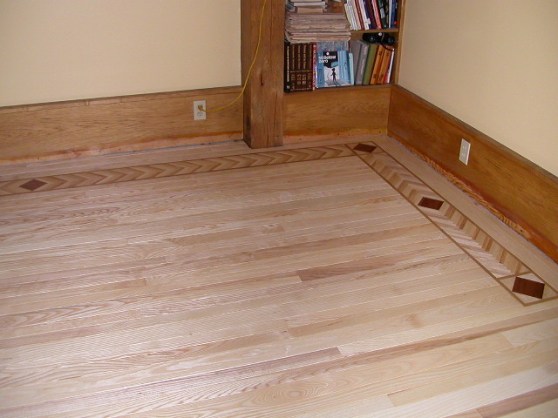
Below more woodworking projects:
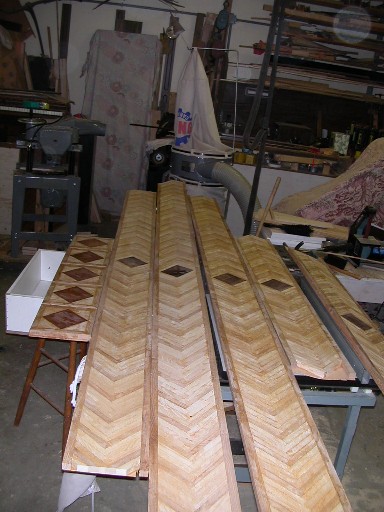
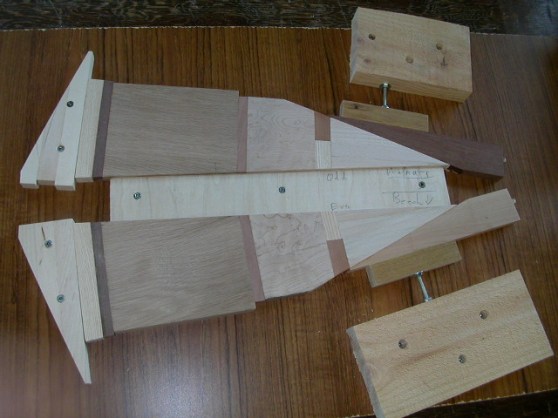
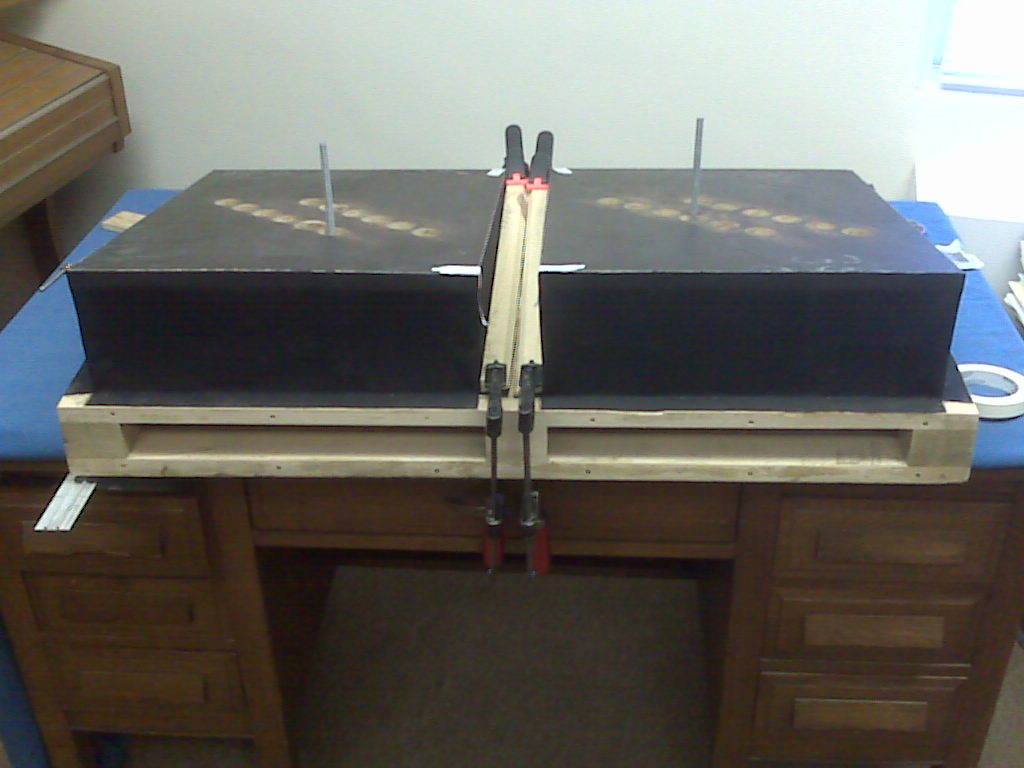
Above: gluing jig for assembling the “pie sections” of the compass rose medallion

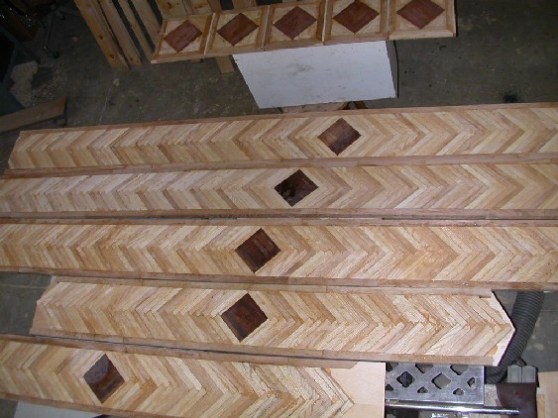
Above: 12′ long form used to assemble the herringbone-pattern floor borders
1990 – My largest ever project – from the dream, through concept, design, construct 1/12 scale detailed model to the completed timber-framed house:


We were awarded “Honourable Mention” in a Harrowsmith Magazine home design and build competition.
